Crochet Amigurumi Patterns: Easy Guide for Beginners
Discover easy crochet amigurumi patterns for beginners. Essential tips for magic rings, sizing, hook tension, and scaling plushies without holes.
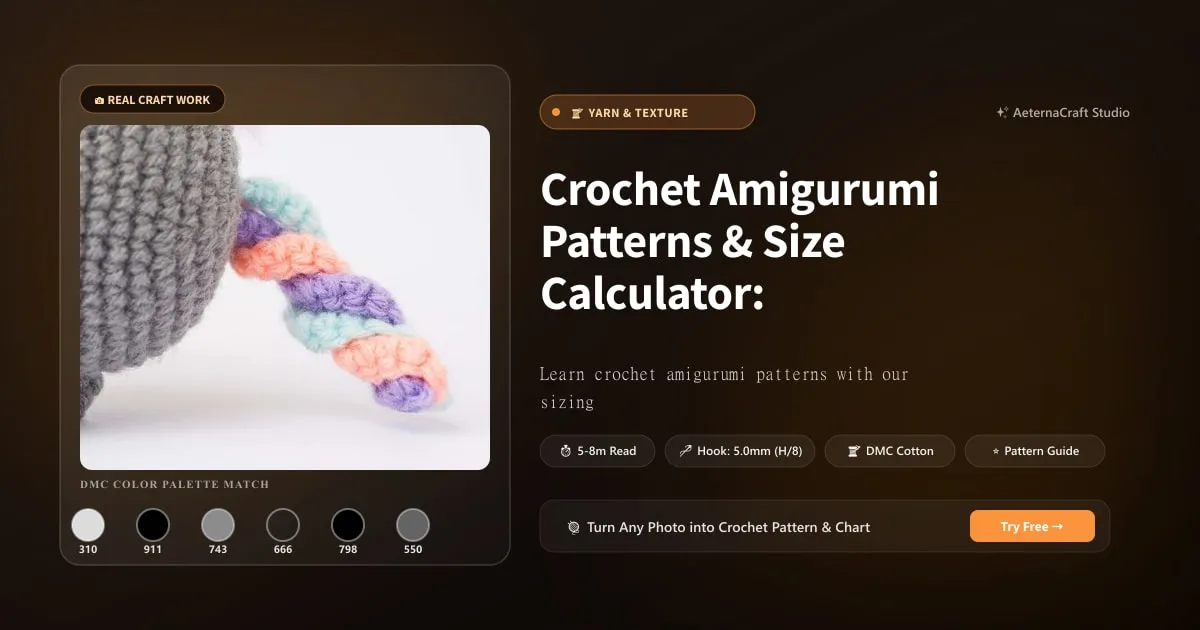
Why Crochet Amigurumi Patterns Are Perfect for Beginners
Let’s be honest for a second. When I first picked up a crochet hook about twenty years ago, I was intimidated by the idea of “garments.” Sweaters require exact body measurements, complex shaping, and if you mess up a single row near the end? You have to frog it all back. It’s expensive in terms of both yarn and patience. Then I discovered amigurumi. My, how things have changed!
I remember making my very first crocheted bear — a lumpy, slightly asymmetrical mess with one eye higher than the other — but it was mine, and I was proud as punch. That’s the magic of this craft. Unlike wearable items, amigurumi doesn’t care if your tension varies slightly between rows. In fact, tight tension is actually your friend here, not your enemy.
So, what exactly makes amigurumi different from those scarves and shawls we all start with? The primary difference lies in the construction. Most traditional crochet starts with chains and works in rows back and forth. Amigurumi, however, is almost always worked in continuous rounds. You are building a tube or a sphere, spiraling upward without joining each round with a slip stitch. This creates a seamless fabric that is perfect for stuffing. If you were to join each round with a slip stitch, you’d get a visible seam running down the side of your little bunny’s head, and while some people like that look, it’s generally considered a “mistake” by purists.
The key characteristic here is tight tension. Because you are stuffing these figures, if your stitches are too loose, the white polyester filling will peek through the gaps like a bad dental job. We want dense, sturdy fabric.
Starting with simple amigurumi patterns offers benefits that go far beyond just cutting the yarn. First, they are incredibly portable. You can work on a tiny mouse while sitting on a bus, reading a movie, or waiting for your coffee to brew. Second, they are economical. A full-sized blanket might cost you forty dollars in yarn; a small amigurumi frog costs five dollars. If you make a mistake? It’s a minor setback. I once spent three hours on a complex elephant only to realize I had the trunk attached to the forehead instead of the snout. Frustrating? Yes. Devastating? No. I just stuffed it up, drew eyes on the forehead, and called it “Steve,” who now lives on my bookshelf and makes me laugh every day.
For beginners, I strongly suggest starting with geometric shapes before diving into character designs. A simple sphere or a cube is forgiving. It teaches you the fundamentals of increasing and decreasing — the bread and butter of amigurumi — without worrying about attaching legs or ears yet. Once you understand how a circle grows into a ball, the rest of the craft begins to click. It’s like learning to walk before you run, except in this case, running involves making a cute little dragon.
Essential Tools and Yarn for Crochet Amigurumi Patterns
You don’t need an expensive studio to start, but you do need the right gear. Let’s talk yarn. Not all yarns are created equal when it comes to squishy friends. For amigurumi, weight is crucial. I recommend sticking to Worsted Weight (Category 4) or DK (Category 3) yarns. These weights provide enough bulk to see your stitches clearly but aren’t so heavy that your tiny parts sag under their own weight. Fingering weight can be used for delicate birds or fairy wings, but it requires a much finer hook and more time, which might discourage a new crafter. Bulky yarn is generally too thick for small details unless you’re making a giant comfort bear.
The fiber content changes the game significantly. Cotton, particularly mercerized cotton, is my absolute favorite for amigurumi. It has little to no stretch, which means your shapes stay defined and spherical. Acrylic is soft and affordable, great for baby toys, but it can be squishy and lose its shape over time if overstuffed. Wool has some natural elasticity, which can be tricky if you want rigid structures, but it felts nicely if you wash it in hot water later. Alpaca is beautiful but slippery and drappy, making it less ideal for keeping structure. Silk blends add a lovely sheen for special occasion dolls, but they are pricey.
| Yarn Type | Fiber Content | Best For… | Pros | Cons |
|---|---|---|---|---|
| Worsted Weight | 100% Cotton | Structured animals, durable toys | Stiff, great stitch definition, easy to see stitches | Can be stiff initially, less squishy feel |
| DK Weight | 100% Acrylic | Soft babies’ toys, plushies | Very soft, affordable, wide color range | Loses shape over time, can pill |
| Worsted Weight | Wool Blend | Winter-themed figures | Warm, holds stuffing well | Can felt/shrink if washed improperly |
| Fingering | Cotton/Silk | Delicate fairies, insects | Lightweight, detailed | Very time-consuming, hard to see stitches |
Now, let’s talk hooks. The golden rule of amigurumi is: use a hook size smaller than what the yarn label recommends. If the yarn says use a 5.0mm (H/8) hook, try a 3.5mm or 4.0mm hook. This tighter tension ensures there are no holes for your stuffing to escape through. I often carry a few different sizes: a 2.75mm (C/2) for fine details, a 3.00mm (E/4) for DK cotton, and a 3.50mm (E/5) or 4.00mm (G/6) for worsted weight acrylic. You’ll know you have the right size when you can barely fit your hook into the next stitch. It should feel snug.
Don’t forget your accessories! Stitch markers are non-negotiable. You will lose count of where a round begins. I use contrasting plastic ring markers or even simple safety pins for larger projects. A tapestry needle is essential for sewing parts together and weaving in ends. And please, consider safety eyes or embroidered faces. Buttons are dangerous for young children (choking hazard), so unless you’re making a doll for yourself or an older child, stick to satin stitch embroidery for eyes and mouths. It’s safer and often cuter.
Step-by-Step: Reading a Crochet Amigurumi Pattern
Reading an amigurumi pattern can feel like deciphering ancient runes if you aren’t familiar with the shorthand. But don’t worry, it’s easier than it looks. Patterns usually follow a standard abbreviation system. Here is a quick reference for the ones you’ll see most often:
- sc: Single Crochet. The foundational stitch. Insert hook, pull up loop, yarn over, pull through two loops on hook.
- inc or (2 sc in same st): Increase. Two single crochets in the same stitch. This expands your circumference.
- dec or sc2tog: Decrease. Single Crochet Two Together. Insert hook into next stitch, pull up loop, insert hook into following stitch, pull up loop, yarn over, pull through all three loops. This shrinks your circumference.
- MR or Magic Ring: An adjustable loop at the start of a round, used to close the center hole tightly.
- rnd(s): Round(s).
- st(s): Stitch(es).
A typical instruction might look like this: Rnd 1: Ch 1, MR, 6 sc into MR. (6 sts). This tells you to start with a magic ring and make six single crochets inside it. The number in parentheses at the end is your total stitch count for that round. It’s vital to check this number! If you think you have 6 stitches but you actually have 7, your piece will start to curl or ripple.
How to Follow Rounds and Keep Count
One of the biggest pain points for beginners is losing track of rounds. Amigurumi is worked in a spiral, meaning there is no official “join” at the end of a round like there is in flat crochet. To keep your place, place a stitch marker in the first stitch of each new round. Move the marker up after you complete the last stitch of that round. It sounds simple, but it prevents the dreaded “wait, did I do 8 rounds or 9?” panic.
Another tip: use a row counter app or a manual clicker. I keep a small mechanical clicker on my keychain. Every time I finish a round, I click it. It’s satisfying, and it eliminates guesswork. If a pattern has intricate shaping, such as decreasing for an armhole, break the instructions down. Instead of reading “Rnds 10-15: Dec 1 at beginning of each round,” write it out or highlight specific sections.
Have you ever felt overwhelmed by a pattern that seems to jump around? It’s normal. Take a deep breath. Look for the “shape” indicators. Does the stitch count increase? You’re growing a sphere. Does it decrease? You’re closing it up or tapering an arm. Understanding the geometry helps you anticipate where the pattern is going, even if the instructions are slightly confusing.
Mastering Key Techniques for Crochet Amigurumi Patterns
The foundation of every good amigurumi figure is the Magic Ring (also known as the Adjustable Loop). Many beginners start with chaining two and working into the second chain from the hook. The problem? You get a hole in the center that is hard to close, especially when you start stuffing your creation later. I’ve seen stuffed animals with gaping heads because the creator couldn’t close that initial hole tight enough. The Magic Ring solves this.
To create a Magic Ring: Wrap the yarn tail around your fingers to form a loop. Insert your hook into the loop, grab the working yarn, and pull up a loop (you now have two loops on your hook). Chain one to secure. Now, work your required number of single crochets into the center of the ring. When you are done, simply pull the tail end of the yarn. The loop collapses, closing the hole completely. It’s like magic, but with more yarn.
Increasing and Decreasing Evenly
Once you have your starting point, you need to grow your shape. This is done through increases. The standard increase is working two single crochets into the same stitch. To keep your circle flat and round, you must space these increases evenly. For example, in Round 2, you might work 1 sc in the first stitch, then 2 sc in the next, repeating this sequence. In Round 3, you’d do 1 sc, 1 sc, 2 sc, etc. This gradual expansion prevents the edges from ruffling.
Decreasing is how you taper your shape, creating cones, limbs, or heads. The most common decrease is sc2tog (single crochet two together). However, standard decreases can leave a visible diagonal hole, especially if your tension is loose. Years ago, I made a frog that looked like it had a zipper running down its leg because I wasn’t paying attention to my decreases. The fix is the “Invisible Decrease.” Instead of inserting your hook into the top loops of both stitches, you insert it into the front loop of the first stitch and the back loop of the second stitch. It locks the stitches together tightly, hiding the gap. It takes a moment to get used to, but it makes a massive difference in the professional look of your toy.
Changing Color Seamlessly
Color changes can look messy if you just cut the yarn and tie a knot. For a cleaner look, use the invisible color change method. Complete the last step of your final single crochet with the new color instead of the old one. Yarn over with the new color and pull through both loops. This hides the transition inside the stitch. If you are carrying yarn (keeping the unused color trailing behind), make sure it’s not too tight, or your fabric will pucker. For beginners, cutting the yarn and weaving in ends with a tapestry needle is often easier to manage than juggling two colors, especially if you aren’t using large blocks of color.
Troubleshooting Common Issues in Crochet Amigurumi Patterns
Even with the best intentions, things go wrong. Here is how to fix the most common nightmares.
Fixing Lumpy or Uneven Shapes: If your sphere looks more like a potato, the issue is likely inconsistent tension or miscounts. Did you accidentally add or skip a stitch somewhere? Check your stitch counts at the end of every round. (If you are adapting an amigurumi pattern to add or remove stitches around a row, use our Even Increase & Decrease Calculator to space your increases perfectly symmetrically without bunching). If the tension is uneven, try blocking your piece. Lightly steam or wet the amigurumi and shape it back to a sphere while it dries. For stuffing issues, ensure you are distributing the filling evenly. Don’t just pack the bottom; fill from the inside out.
Dealing with Gaps at Color Changes or Decreases: Gaps usually happen because your stitches are too loose. If you see holes where you decreased, switch to the invisible decrease technique mentioned earlier. Also, ensure you are using a hook size appropriate for your yarn. If you’re using bulky yarn with a large hook, you’ll get holes. If the gap is at a color change, check if you tied off too loosely. Weave those ends in tightly with your tapestry needle.
When Your Amigurumi Parts Don’t Fit Together: This is the despair of many crafters. You’ve made two arms, but one is longer than the other. First, check your gauge. Are you using the exact same yarn and hook for every part? Even switching from one ball of yarn to another in a different dye lot can cause slight variations in thickness. Sewing parts together can hide minor discrepancies. Use a mattress stitch for joining limbs to bodies; it creates a nearly invisible seam. Pin the parts in place with straight pins before sewing to ensure symmetry. Measure them with a ruler if necessary. It feels fussy, but precision pays off.
5 Free Crochet Amigurumi Patterns to Get You Started
Ready to test your skills? Here are five beginner-friendly projects that teach the basics without overwhelming you.
- Simple Sphere (Yarn Ball): Perfect for learning increases and decreases. Use red worsted weight cotton with a 3.5mm hook. Start with a 6-sc magic ring, add 6 stitches per round until you reach 30 around (round 5), work 5 plain rounds, then decrease by 6 per round back to 6 and close. The finished ball is 3 inches tall and uses about 25 grams of cotton—roughly 55 yards. Finish it with a small bow.
- Stuffed Cube: Teaches you to work in straight lines rather than spirals. Great for practicing consistent tension. Use beige acrylic for a “cheese” block effect.
- Basic Bird: Uses simple shaping for a head and body. Focuses on attaching small wings and beak. Use bright yellow DK cotton.
- Mini Bear: Introduces separate parts (ears, arms, legs) and sewing them together. A rite of passage for any amigurumi maker. Use brown wool blend for warmth.
- Spiky Cactus: A fun twist that uses puff stitches or textured stitches. Great for adding color and personality without complex anatomy. Use green acrylic with pink flowers.
Tips for Customizing Your First Amigurumi
Once you’ve mastered the basics, don’t be afraid to tweak the patterns. Change the color of the bird’s beak from orange to pink. Add a tiny hat to the bear using scrap yarn. Customization is where the joy happens. It helps you understand the structure better because you have to think about how a change affects the balance. Start small. Add a ribbon. Embroider a smile instead of using safety eyes. These small changes make your creation unique and build your confidence for more complex designs. When you do resize, remember the math: bumping your hook one size (say 3.0mm to 3.5mm) raises the finished height by roughly 15%, but yarn usage grows with the square of the scale—a 3-inch ball scaled to 4.5 inches needs more than double the yardage, about 60 grams. Run your gauge and target size through the amigurumi calculator and it will give you exact stitch counts and yardage for every round before you start.
Thinking about turning your hobby into extra income or selling your amigurumi plushies at local craft fairs? Price your work fairly for materials and your actual labor hours using our free Amigurumi Pricing Calculator. Happy crocheting!
Frequently Asked Questions
If a plush is made with 2.5mm hook and is 9.5cm tall, how tall would it be with a 5.5mm hook?
Scaling up from a 2.5mm hook to a 5.5mm hook (with proportionally thicker yarn) increases dimensions by roughly 2.2x. A 9.5cm plushie will finish at approximately 20.5cm to 21cm tall. Remember that yarn volume scales cubically, so you will need approximately 4 to 5 times more yarn by weight.
How much more yarn do I need if I double the size of my crochet plushie?
You need roughly 4 times more yarn if you double the size. Amigurumi is 3D, so scaling up by 2 in each dimension multiplies volume by 8, but yarn usage scales closer to surface area, which quadruples. For a 10cm bear using 50g of DK cotton, a 20cm version needs about 200g.
Why does my amigurumi have holes between stitches?
Holes mean your tension is too loose or your hook is too large for the yarn. Switch to a hook 0.5mm to 1.0mm smaller than the yarn label recommends. For worsted weight yarn, try a 3.5mm or 4.0mm hook instead of 5.0mm. Also check you aren't accidentally skipping stitches.
Can I use acrylic yarn instead of cotton for amigurumi?
Yes, you can use acrylic yarn for amigurumi, but expect different results. Acrylic is softer and cheaper, making it great for baby toys and plushies. However, it stretches more than cotton, so your shapes may lose definition over time. Cotton holds stiff shapes better for structured animals.
Related Posts
Botanical Monstera Mini Tapestry Free Pattern
Crochet your own botanical monstera mini tapestry wall hanging with this free beginner-friendly pattern, row-by-row color chart, and step-by-step tips.
Beginner15 Crochet Shawl Patterns for Every Skill Level
Discover 15 stunning crochet shawl patterns for beginners to experts. Find free and paid designs, plus tips for choosing yarn and adjusting sizes.
Try Our Free Crochet Tools
Turn Your Photo Into a Crochet Pattern
Upload any photo and our AI generates a pixel-perfect crochet pattern with real yarn color matching in seconds.
Try AeternaCraft Studio Free →Calculate Yarn for Any Resize
Free amigurumi yarn & resizing calculator. Change hook, switch yarn, or scale a whole pattern — instant results with PDF export.
Open the Calculator →