Botanical Monstera Mini Tapestry Free Pattern
Crochet your own botanical monstera mini tapestry wall hanging with this free beginner-friendly pattern, row-by-row color chart, and step-by-step tips.
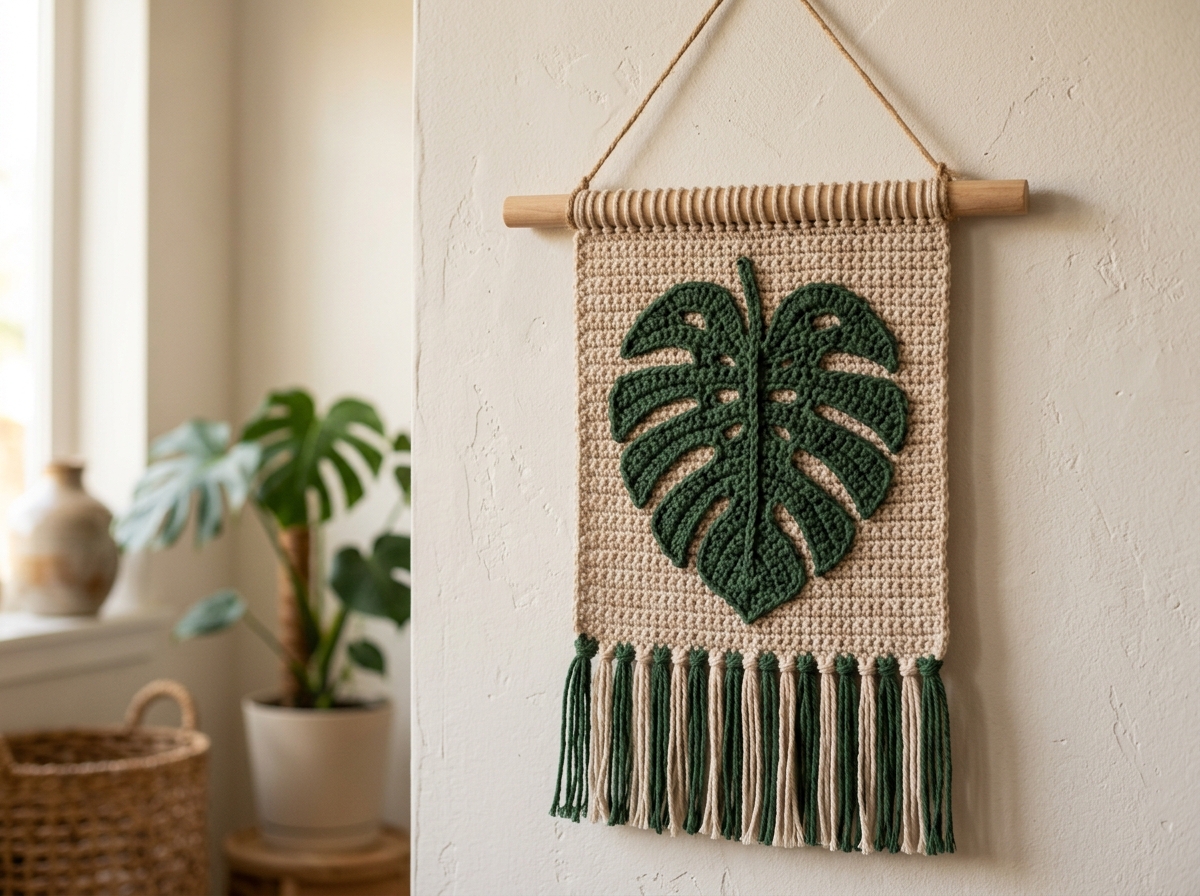
Bring a lush, modern touch of nature indoors with the Botanical Monstera Mini Tapestry. This compact wall hanging features the iconic silhouette of a Monstera deliciosa leaf, rendered with clean colorwork that looks stunning in any cozy living space, studio, or plant nook.
Whether you are new to colorwork or an experienced crocheter looking for a satisfying weekend project, this pattern works up quickly with minimal yarn requirements.
Pattern Details & Specifications
- Craft: Crochet
- Skill Level: Advanced Beginner
- Technique: Tapestry Crochet / Flat Single Crochet Colorwork
- Finished Dimensions: Approximately 5.5 inches (14 cm) wide by 7.5 inches (19 cm) tall (excluding fringe and hanging string).
- Gauge: 20 stitches × 22 rows = 4 inches (10 cm) in single crochet worked flat. Gauge is not critical, but consistent tension ensures a flat, neat fabric.
Materials Needed
- Yarn: DK or Light Worsted Weight Cotton Yarn (e.g., Rico Creative Ricorumi, Paintbox Cotton DK, or Lily Sugar’n Cream):
- Color A (Background): Natural Oatmeal / Cream – approx. 50 yards (45 m)
- Color B (Leaf): Forest Green – approx. 35 yards (32 m)
- Crochet Hook: 3.5 mm (US E/4) or size needed to obtain gauge
- Wooden Dowel: 7 to 8 inches (18–20 cm) long, approx. 8mm to 10mm diameter
- Notions: Tapestry needle for weaving in ends, sharp craft scissors, measuring tape, rustic twine or cotton cord for hanging.
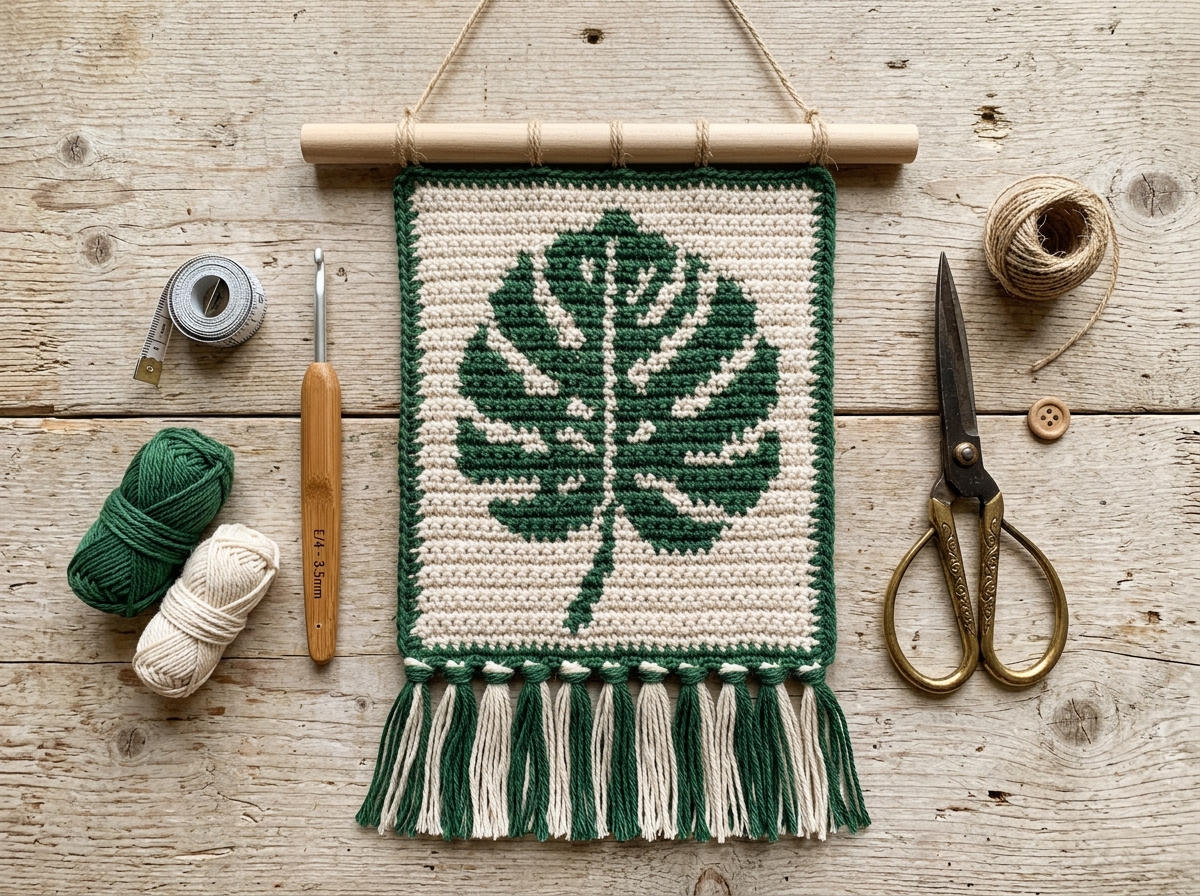
Tapestry Crochet Tips for Clean Color Changes
- Changing Colors: Always execute the final yarn-over of the previous stitch with the new color:
- Insert hook into the stitch, yarn over with the current color, and pull up a loop (2 loops on hook).
- Drop the current color, yarn over with the new color, and pull through both loops to complete the stitch.
- Carrying Yarn: Lay the inactive strand along the tops of the stitches of the previous row and crochet over it with the working color. Keep a gentle tension so the carried strand remains invisible without bunching the fabric.
- Turning Chains: Chain 1 at the beginning of each row does not count as a stitch. Turn your work clockwise after each row to avoid tangling your two yarn bobbins.
Step-by-Step Instructions
Base & Foundation
Using Color A (Cream), chain 29.
- Row 1 (RS): Starting in the 2nd chain from the hook, work 1 sc in each chain across. Turn. (28 sts)
- Rows 2–4: Ch 1, 1 sc in each stitch across with Color A. (28 sts)
Introduce Color B (Forest Green) at the end of Row 4 during the final yarn-over.
Charted Leaf Section (Rows 5–34)
Work in back-and-forth single crochet across 28 stitches for 30 rows, changing colors according to the Monstera leaf design:
- Rows 5–8 (Stem Base): Color A 13 sc, Color B 2 sc, Color A 13 sc.
- Rows 9–16 (Lower Leaf & Feneastrations): Follow leaf expansion by working green stitches into symmetrical lobes, maintaining negative space cutouts with Color A.
- Rows 17–28 (Central Fenestrations & Main Leaf Body): Create the signature monstera cutouts by alternating Color A and Color B across the central vein.
- Rows 29–34 (Leaf Tip Taper): Gradually taper Color B inward until the tip reaches a single central stitch, surrounded by Color A.
Top Border
- Rows 35–37: Work 1 sc in each stitch across in Color A only. Fasten off Color B. (28 sts)
- Row 38 (Dowel Attachment): Hold your wooden dowel across the top edge. Insert your hook through the stitch and under the dowel, yarn over above the dowel, pull up a loop, and finish a single crochet to secure the fabric directly to the wood. Fasten off and weave in all remaining ends.
Adding the Bottom Fringe
- Cut 30 to 36 strands of yarn (alternating Color A and Color B) measuring roughly 8 inches (20 cm) in length.
- Group 3 to 4 strands together, fold in half to form a loop.
- Insert your crochet hook from the wrong side through the bottom edge of the tapestry, catch the loop, and pull partially through.
- Thread the loose ends through the loop and pull snugly to form a clean lark’s head knot.
- Repeat across the bottom edge and trim evenly with sharp fabric scissors.
Customizing Your Own Wall Hangings
Want to design your own custom botanical tapestry, pet portrait, or geometric wall decor?
Use our free AeternaCraft Photo to Crochet Pattern Converter to turn any photo or illustration into an instant row-by-row tapestry grid! You can also check your yarn requirements with our Crochet Yarn Calculator and test your tension swatch using the Gauge Swatch Calculator.
Frequently Asked Questions
What stitches are used in this monstera tapestry?
This pattern is worked entirely in regular single crochet (sc) in back-and-forth rows using the tapestry crochet technique to carry your non-working yarn.
How do I hang the finished mini tapestry?
Fold the top border over a 7-inch to 8-inch smooth wooden dowel (approx. 1/4 to 3/8 inch diameter) and whip-stitch closed, or single crochet directly onto the dowel on your final row.
Can I use acrylic yarn instead of cotton?
Yes, DK or worsted weight acrylic works well, but 100% mercerized or craft cotton provides crisp stitch definition and blocks flatter against your wall.
Related Posts
How to Crochet a Babybel Cheese Cover: Free Pattern & Tips
Learn to crochet a realistic Babybel cheese cover with my free pattern. Includes sizing tips, yarn choices, and customization ideas for gifts.
ToolsCrochet Car Cup Holder Extender: Free Pattern & Tips
Learn to crochet a custom water bottle pouch for your car's cup holder. Free pattern, yarn tips, and customization ideas included.
Try Our Free Crochet Tools
Turn Your Photo Into a Crochet Pattern
Upload any photo and our AI generates a pixel-perfect crochet pattern with real yarn color matching in seconds.
Try AeternaCraft Studio Free →Calculate Yarn for Any Resize
Free amigurumi yarn & resizing calculator. Change hook, switch yarn, or scale a whole pattern — instant results with PDF export.
Open the Calculator →