Finish Large Crochet Projects Without Burning Out
Learn strategies for managing oversized crochet projects, including planning, time management, and motivation tips to avoid project fatigue.
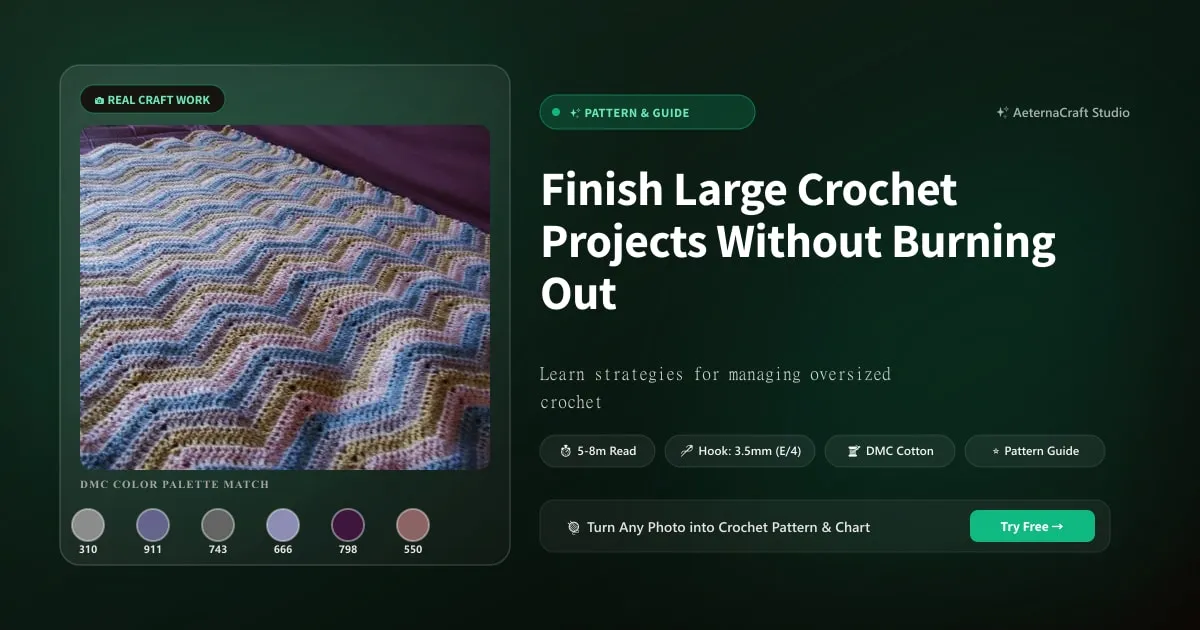
Let’s be honest for a second. There’s nothing quite like the initial rush of starting a massive blanket or a complex shawl. You buy the yarn, you cast on, and you feel like a creative powerhouse. But then, three months later, you’re staring at a growing pile of green, and that creative powerhouse feels more like a weary mule pulling a cart up a hill. This isn’t just you being lazy; it’s psychology, my friend.
Why Large Crochet Projects Are So Challenging
The Psychology of Project Fatigue
When I first tackled my first queen-sized afghan, I didn’t realize I was signing up for a marathon, not a sprint. The problem with large projects is the delayed gratification. In a small project like a pair of socks or a dishcloth, you see the finish line after a weekend. In a large piece, the finish line is a distant horizon that keeps moving further away as you add more rows. This triggers what psychologists call “goal gradient hypothesis”—we lose motivation as the reward feels too far out of reach. Without novelty, the brain gets bored. The repetitive motion that once soothed you starts to feel monotonous.
To combat this, you have to hack your own brain. Instead of thinking about the whole blanket, think about the next hundred stitches. Break it down. When I started working on a massive baby quilt, I stopped looking at the entire grid and focused only on finishing one single square before I allowed myself to check my phone or take a break. It sounds small, but those micro-milestones keep the dopamine flowing. Ask yourself: Is my current pattern keeping me engaged? If the answer is no, maybe it’s time to swap to a different texture or stitch pattern temporarily to keep things fresh.
Physical Toll: Hand and Body Strain
Here is the hard truth: crochet is hard on the body. I’ve been doing this for twenty years, and I still wake up some mornings with fingers that feel like rubber bands. Repetitive strain injury (RSI) is not a joke; it’s a career-ender if you ignore it. Wrist pain, thumb fatigue, and lower back agony from hunching over that giant pile of work are real threats.
Years ago, I made the mistake of trying to crochet for six hours straight while sitting on a stiff dining chair. By hour two, my right wrist was screaming. I thought I was invincible because I had done this for a decade. I was wrong. That day taught me that listening to your body is just as important as knowing your stitches.
You need to invest in ergonomics. Use ergonomic hooks—look for ones with thicker handles or soft grips that reduce pressure on your palm. Try the “pencil grip” versus the “knife grip” to see which relieves tension in your forearm. And please, stand up every thirty minutes. Stretch your wrists, shake out your fingers, and roll your shoulders. If your hands start to tingle or throb, stop. Immediately. There is no shame in putting the hook down. In fact, it’s smart craftswoman behavior. Remember, can I finish this row without compromising my health? If the answer is tricky, take a break. Your future self will thank you when you’re still able to crochet at eighty, rather than dealing with chronic pain at forty.
Planning Your Large Project for Success
So, you’ve decided to tackle the beast. Good for you! But before you buy that skein of luxury merino wool, we need to talk strategy. Planning isn’t about killing creativity; it’s about ensuring you don’t run out of yarn mid-project or waste weeks on a pattern that doesn’t fit your schedule.
Choosing the Right Pattern and Yarn
The biggest mistake new crocheters make is choosing a pattern that is too intricate for a large-scale item. You don’t want to memorize a complex chart for 500 rows. Look for patterns with repetitive stitch sequences. For example, a simple shell stitch using half double crochet (hdc) or double crochet (dc) allows you to enter a “flow state” where you can let your mind wander while your hands work automatically.
When it comes to yarn, fiber choice matters immensely for comfort and care. If you’re making a baby blanket, cotton or acrylic is practical and washable. If it’s a cozy throw, alpaca or wool offers warmth but requires gentler care. Always calculate your yardage meticulously. Don’t just guess. If your gauge is 16 stitches to 4 inches using a 4.0mm hook, measure your swatch, then multiply by the total inches required. And here is a pro-tip: buy extra. Always buy at least one extra skein of your main color, and keep it unopened until you finish, just in case you need to match a dye lot later. Washing your yarn before you start can also help prevent shrinkage surprises. Ask yourself: Is this yarn texture pleasant against the skin for hours of wear? If it’s scratchy or heavy, reconsider.
Creating a Realistic Timeline
How long will it take? This is the question that haunts us all. To answer it, you need to know your speed. Time yourself. Grab your stopwatch and crochet for twenty minutes. Count your stitches. Let’s say you do 40 stitches in 20 minutes. That’s 2 stitches per minute. If your blanket requires 4,000 stitches per row and you plan to do one row a day, do the math. It will take 33 days for just one row, assuming you stick to the plan.
This is where optimism bias kicks in. We think we’ll crochet every day. Life happens. Kids get sick, work runs late, we get tired. Create a buffer. If your calculation says 3 months, aim for 4 months. Set weekly goals. Maybe your goal is “two rows on Tuesdays and Fridays.” Use a habit tracker. Seeing those checked-off days gives you a sense of accomplishment. Don’t set yourself up for failure by aiming for perfection. A consistent, slow pace beats a burst of energy followed by three weeks of silence.
Staying Motivated Throughout the Process
Motivation is fickle. It comes and goes like the weather. The key isn’t to force yourself to be motivated; it’s to build systems that carry you through the low spots.
Breaking the Project into Manageable Chunks
I have a theory: large projects become manageable when they look small. If you’re working on a huge granny square afghan, treat each square as its own mini-project. Finish one, bind off, and feel that surge of pride. Then start another. This technique, often called “modular crocheting,” allows you to complete individual units without feeling overwhelmed by the scale of the final assembly.
Another trick is alternating projects. If you hit a plateau with your large blanket, pick up a small amigurumi or a quick pair of socks. Switching to a different stitch type—like moving from bulky dc work to delicate single crochet (sc) details—gives your brain a reset. Reward yourself, too. I used to tell myself, “If I finish this skein, I can go get that expensive coffee.” Small treats keep the engine running. Ask yourself: What small victory can I celebrate today? Even finishing a single row can be a win if you acknowledge it.
Tracking Progress Visually
We live in a visual world, and your brain responds to images. Keep a photo diary. Take a picture of your work every time you sit down. At first, it seems insignificant. But look back after a month, and you’ll see the dramatic growth. Those photos are proof that you are making progress, even when it doesn’t feel like it.
Use row counters. I love my little mechanical clickers, but apps work too. Some people pin a ribbon to their project every 50 rows. These visual markers act as milestones. They break the endless sea of stitches into digestible chunks. When you see that ribbon, you know you’ve crossed a threshold. It’s a psychological anchor. Also, consider joining online communities where you share your progress. Knowing others are watching—or supporting—can provide that external push when internal drive fades.
Techniques to Speed Up and Reduce Errors
Efficiency in crochet isn’t about rushing; it’s about working smarter. When you’re doing hundreds of rows, small inefficiencies add up to hours lost.
Efficient Stitch Methods and Tools
One of my favorite time-savers is mastering the continuous round technique for circles or joining loops seamlessly. This eliminates the messy join and reduces the time spent cutting and weaving. For flat projects, consider using a larger hook than recommended for your yarn weight, provided your gauge remains acceptable. A 4.5mm hook instead of a 4.0mm can significantly increase your stitch count per row, speeding up the process.
Tools matter. Invest in good stitch markers. I use locking markers for specific pattern repeats and split-ring markers for general counting. They save you from having to recount rows constantly. Also, try maintaining consistent tension. Uneven tension leads to lumpy fabric that requires more fixing later. Practice relaxing your grip. A tight hand slows you down and causes pain. Let the hook glide. If you find yourself fighting the yarn, take a breath and loosen up.
Common Mistakes and How to Avoid Them
The most common error in large projects is losing your place. It happens. You’re watching TV, chatting with a friend, and suddenly you’re in row 45 instead of row 40. Prevention is key. Use a row counter app on your phone, but keep it simple. Another tip: check your work periodically. Every ten rows, glance back. Does the fabric look even? Are the stitches aligned? Catching a mistake early means unraveling fewer rows.
If you do make a mistake, don’t panic. Learn to fix it without frogging everything. Sometimes, a stray loose stitch can be tucked away with a tapestry needle. Other times, you might need to rip back a few rows. Be gentle with your yarn during repairs. And remember, is this mistake visible in the finished object? If it’s on the inside or covered by seaming, it might be okay to leave it. Perfectionism is the enemy of completion. Focus on the overall integrity of the piece, not microscopic flaws that no one else will see.
Finishing Strong: Blocking, Weaving Ends, and Care
You did it. The last stitch is in. The urge to throw it in the laundry is strong, but wait! The finish is where the magic happens.
Blocking Large Items
Blocking transforms your crochet. It evens out stitches, opens up lace patterns, and sets the shape. For large items like blankets, blocking can be daunting. Don’t try to block it on your living room rug. Use a dedicated blocking surface, like interlocking foam mats. For wet blocking, soak the item in cool water with a mild detergent, then roll it in a towel to remove excess moisture. Pin it out. Use rust-proof pins or blocking wires for straight edges.
For wool or alpaca, steam blocking can be effective, but be careful not to touch the iron directly to the fibers, as it can scorch them. Test on a swatch first. Cotton and acrylic generally require wet blocking. When pinning, follow the grain of your pattern. If it’s a square, ensure the corners are at 90 degrees. Let it dry completely before removing pins. This step takes patience, but the result is professional-looking edges that make your hard work shine.
Efficient Weaving and Seaming
Now, the dreaded weave-in-ends. I hate it, but I’ve learned to love it because I do it as I go. Never leave ends for last. Trim them to about 6 inches and weave them in immediately. Use a darning needle with a large eye. Go under multiple stitches in the opposite direction of the tail to hide it securely. This prevents the end from coming loose later.
If you’re assembling squares, the mattress stitch is your best friend. It creates an invisible join that lays flat. Take the time to do this neatly. A sloppy seam will ruin the look of a large blanket. Thread your yarn onto a needle, leaving a long tail. Insert the needle through the back loop of both squares, parallel to the edge. Pull gently until the gap closes. Check your work frequently to ensure the seam lies flat.
Finally, care instructions. Write them down and attach a label. Is it hand wash only? Lay flat to dry? This ensures the project lasts for generations. You’ve put hundreds of hours into this. Treat the finishing with the same respect you gave the stitching. Your future self, wrapped in that warm, perfect blanket, will be proud.
Frequently Asked Questions
How do I stay motivated on a large crochet project?
Break the project into smaller chunks, like individual squares or 100-stitch sections. Use a photo diary to track progress visually, and reward yourself with small treats after completing each milestone. Alternating with a small project like amigurumi also helps reset your brain.
What's the best way to avoid hand pain when crocheting a blanket?
Use ergonomic hooks with thicker handles, try different grips (pencil vs. knife), and stand up every 30 minutes to stretch your wrists and shoulders. Stop immediately if you feel tingling or throbbing. I learned this the hard way after a six-hour session left my wrist screaming.
How do I calculate yardage for a large crochet project?
Make a gauge swatch first—measure how many stitches per 4 inches with your chosen hook (e.g., 16 stitches with a 4.0mm hook). Multiply by the total inches needed, then add at least one extra skein for safety. Always buy from the same dye lot if possible.
Related Posts
Mosaic Crochet Tarot Blanket: Tips & Pattern Guide
Learn from a Reddit user's experience with the Crocheter Tarot mosaic blanket. Get tips on written vs chart patterns, yarn choices, and time management.
AdvancedGrand Lace Tablecloth: 10-Month Project Survival Tips
Avoid false starts and finish a stunning lace tablecloth. Get real advice on hook size, yarn choice, and staying motivated through a 10-month crochet journey.
Try Our Free Crochet Tools
Turn Your Photo Into a Crochet Pattern
Upload any photo and our AI generates a pixel-perfect crochet pattern with real yarn color matching in seconds.
Try AeternaCraft Studio Free →Calculate Yarn for Any Resize
Free amigurumi yarn & resizing calculator. Change hook, switch yarn, or scale a whole pattern — instant results with PDF export.
Open the Calculator →