Grand Lace Tablecloth: 10-Month Project Survival Tips
Avoid false starts and finish a stunning lace tablecloth. Get real advice on hook size, yarn choice, and staying motivated through a 10-month crochet journey.
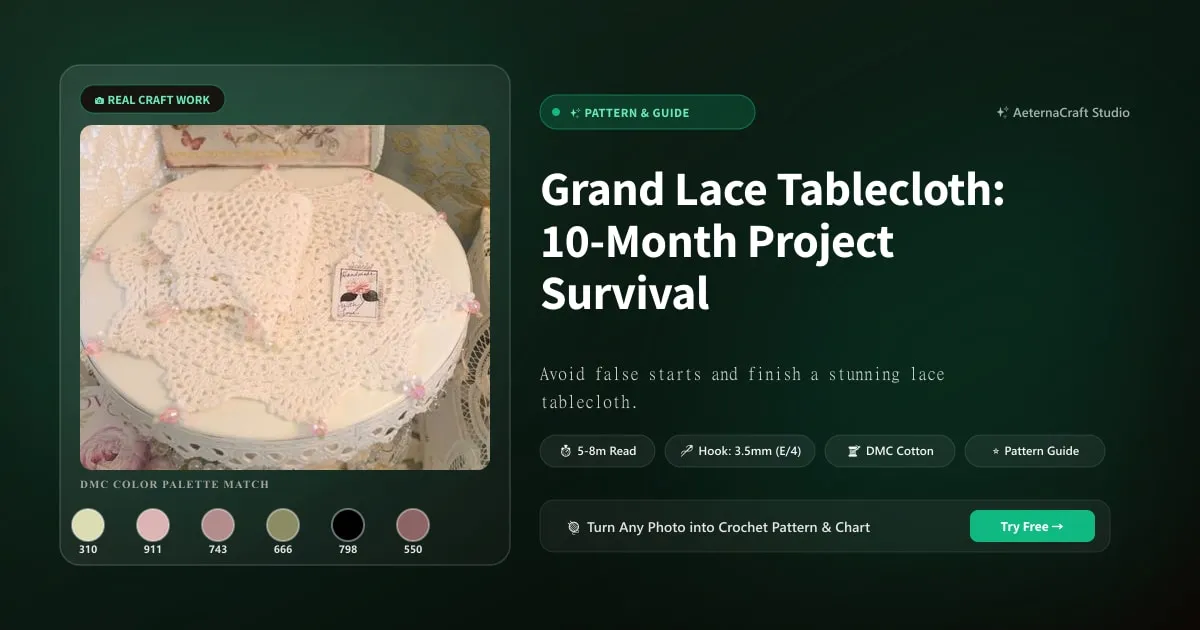
Grand Lace Tablecloth: 10-Month Project Survival Tips
When I sat down to plan my grand lace tablecloth, I thought I knew what I was doing. Twenty years of crochet under my belt, after all. But attempting a massive lace project without a solid game plan? That’s like trying to navigate a labyrinth blindfolded—you bump into walls, get frustrated, and probably end up crying over a tangle of thread. My biggest pain point was the sheer scale. This wasn’t a coaster or a quick scarf. This was a tablecloth meant to drape over a seven-foot dining table. If I got the gauge wrong by even a fraction, the thing would either be the size of a napkin or large enough to cover my whole house. Honestly, that thought terrified me.
Planning Your Grand Lace Tablecloth Project
Choosing the Right Yarn and Hook
The foundation of any good lace project is your materials. For a true heirloom-quality tablecloth, I swear by fine cotton yarn. Specifically, look for #10 crochet cotton. It’s that thin, almost translucent thread that looks delicate but has incredible strength. You’ll often see brands like Madeira or Gütermann mentioned; I’ve used both, and while the price tags might make you wince, the consistency is worth every penny. Acrylic? Save it for the throw pillows. Acrylic lacks the crisp definition and beautiful drape that cotton offers when you’re working intricate patterns.
And your hook? You need a tiny one. I’m talking 1.75mm to 2.0mm. When I started, I grabbed my trusty 4.0mm (G/6) because it felt familiar. Big mistake. The stitches were loose, the fabric sagged, and the lace motifs looked bloated and unrefined. A 1.75mm hook keeps those loops tight and defined. If you have small hands or find fine hooks painful, don’t fight it—invest in ergonomic handles. There’s nothing worse than finishing a row only to realize your pinky finger is screaming in protest. I switched to wooden hooks with rubber grips, and it saved my hands during those long winter nights.
Selecting a Pattern and Estimating Yardage
Before you buy a single strand of yarn, you need a map. Literally. Find a pattern that includes a grid or detailed written instructions for the repeat. If you can’t visualize the repeat, you won’t survive ten months. Once you have the pattern, calculate yardage. This is where many crafters fall short. Don’t just guess. Look up the yardage per motif in the pattern instructions. Then, measure your table. Say your table is 70 inches wide and you want a 10-inch drop on each side. That means your cloth needs to be 90 inches wide.
If one motif is 4 inches wide, you need roughly 22.5 motifs across. Multiply that by the number of rows, then multiply by the yardage per motif. Add a 15% buffer for mistakes and weaving in ends. Years ago, I miscalculated this badly. I bought exactly what the pattern suggested and ran out three rows before the edge. I had to order more yarn, but the dye lot was slightly different. The result? A subtle color shift that drove me crazy for months. Never skip the math.
Avoiding False Starts: Gauge Swatching and Planning
Here’s a question you’re probably asking yourself: “Do I really need to swatch for something this big?” Yes. Absolutely, yes. A false start on a lace project is devastating because ripping out lace is like pulling teeth. It takes forever, and you risk distorting the holes in the fabric.
Create a gauge swatch that matches the complexity of your main motif. Crochet it, then wash it. Why wash it? Because cotton relaxes after its first bath. If you measure it dry, your final piece will shrink significantly. After washing and blocking your swatch, count your stitches and rows. If your gauge is off, change your hook size. Going from a 1.75mm to a 1.65mm (even smaller!) can tighten things up nicely. Take notes on everything: hook size, tension, and fiber. These notes become your bible for the next nine months.
Executing the Long-Term Crochet Project
Now comes the marathon part. Ten months is a long time to work on one piece. Motivation wanes. Life happens. Babies get sick, holidays arrive, and suddenly you realize you’ve been staring at the same half-finished shell stitch for three weeks. Keeping your spirits high—and your sanity intact—is half the battle.
Staying Motivated Over Months
The psychological weight of a large project is real. To combat this, break the project into micro-milestones. Don’t think about “finishing the tablecloth.” Think about “finishing the border of section four.” Celebrate those small wins. I found that joining online crochet-alongs (CALs) helped immensely. Even if the official CAL had ended, I’d follow along with other crocheters’ progress posts. Seeing others struggle with the same tricky cluster stitches made me feel less alone.
Another trick? Rotate your projects. If you’re burned out on lace, pick up a quick amigurumi or a dishcloth for a week. It gives your brain a break from the meticulous counting required for lace, and you still get the dopamine hit of finishing something. Just remember to mark your place with a stitch marker so you don’t lose your spot when you return.
Managing Yarn and Tools
Organizing your workspace is crucial. With fine cotton, a single snag can unravel hours of work. Keep your yarn in a bag or a box, never just tossed loosely in a basket where it can get tangled with other fibers. I use a yarn bowl to keep the thread flowing smoothly without tangles. Also, invest in good lighting. Eye strain is a silent killer of productivity. I bought an LED ring light with adjustable brightness, and it made a huge difference in seeing those tiny holes clearly.
Ergonomics matter more here than ever. Since you’re using a 1.75mm hook, you’re gripping tightly. Every thirty minutes, shake out your hands. Stretch your wrists. I learned this the hard way when I developed mild tendonitis in my thumb. Now, I set a timer. When it goes off, I put the hook down, no matter where I am in the row.
Tracking Progress and Troubleshooting
How do you know you’re actually making progress? Track it. I used a simple spreadsheet to log how many motifs I completed each day. Seeing the number go up, even by one, was incredibly satisfying. Take photos of your work weekly. When you feel stuck, looking back at last month’s photo reminds you how far you’ve come.
Mistakes will happen. Maybe you missed a chain space or worked a double crochet (dc) where a half double crochet (hdc) was called for. In lace, fixing these errors is easier than you think. If you catch it quickly, you can often just pull the loop through to undo the last few stitches. If you’ve gone further, use a crochet hook to gently pull the yarn backward through the stitches above the error, effectively “un-crocheting” back to the mistake. It’s faster than frogging the whole row.
Finishing and Blocking Your Lace Tablecloth
You did it. The last stitch is in. You feel a mix of exhaustion and pride. But wait—the project isn’t finished until you block it. Blocking is the magic step that transforms a lumpy, uneven piece of yarn into a gorgeous, professional-looking heirloom.
Weaving in Ends Securely
With fine cotton lace, woven-in ends must be invisible. If you tie a knot, it will create a bump that shows through to the right side. Instead, weave your tail back and forth through the stitches of the same color, following the path of the yarn for about two inches. Trim close, but not too close. For extra security, I sometimes dab a tiny amount of clear fabric glue on the ends inside the weave, though most people manage fine without it. The key is to follow the natural direction of the stitch so the end blends seamlessly.
Blocking for Perfect Shape and Size
This is where the rubber meets the road—or rather, where the tablecloth meets the table. You need to wet block your entire piece. Fill your bathtub with lukewarm water and a bit of gentle wool wash (yes, even for cotton, it helps relax the fibers). Submerge the tablecloth and let it soak for an hour. Do not wring it out! Wringing distorts the lace holes. Instead, lift it gently, roll it in a dry towel, and press to remove excess water.
Once damp, lay it out on your blocking boards or carpet. Here’s a pro tip: use blocking wires. These are metal rods that slide into the edges of your lace motifs, giving you a crisp, straight line that pins alone can’t achieve. Pin your corners to ensure they are square. Measure diagonals; if they are equal, your corners are 90 degrees. Let it air dry completely. This process takes about 24 to 48 hours. Patience pays off here. The blocked piece will open up, revealing the true beauty of the lace pattern.
Caring for and Displaying Your Heirloom
Your tablecloth is now a masterpiece. It’s time to share it with the world—but also to protect it for generations to come.
Washing and Storage Tips
Hand wash only. Machine washing, even on delicate, can catch the fine threads on zippers or other clothing items. Use cold water and a mild detergent. Lay it flat to dry, reshaping it as needed. For storage, never hang a wet lace tablecloth; the weight of the water will stretch it out of shape. Store it in a breathable cotton bag or wrap it in acid-free tissue paper. Avoid plastic bags, as they trap moisture and can lead to mildew. Label the bag with the date and materials used—it helps future caretakers know how to handle it.
Displaying on a Large Table
When you finally lay it out, use a table pad underneath if your table has a rough surface. This protects the delicate cotton from abrasion. Center it perfectly—measure from the edge of the table to the drop on all sides to ensure symmetry. If you’re using it for special occasions, consider having a dedicated “tablecloth night” where you take photos and enjoy the fruit of your labor. It’s a reminder that every hour spent on that 1.75mm hook was worth it. So, are you ready to start your own grand project? I hope these tips help you avoid the pitfalls I fell into. Happy crocheting!
Frequently Asked Questions
What size hook do I need for a lace tablecloth?
For a true heirloom lace tablecloth, use a 1.75mm to 2.0mm hook. A 4.0mm hook will make loose, saggy stitches that ruin the lace definition. I learned this the hard way on my first attempt.
How do I calculate yardage for a large lace project?
Measure your table width plus desired drop on each side. Divide by the motif width to get the number of motifs across. Multiply by the number of rows, then by yardage per motif. Add a 15% buffer for mistakes. I once skipped this math and ended up with a dye lot mismatch that haunted me.
How do I fix a mistake in a lace pattern without frogging everything?
If you catch it quickly, pull the loop through to undo the last few stitches. For deeper errors, use a crochet hook to gently pull the yarn backward through stitches above the mistake—this 'un-crochets' back to the error faster than frogging the whole row.
Related Posts
Finish Large Crochet Projects Without Burning Out
Learn strategies for managing oversized crochet projects, including planning, time management, and motivation tips to avoid project fatigue.
BeginnerDoily Crochet: From Beginner to Pro in 10 Doilies
Learn how to progress from your first doily to an advanced masterpiece with tips on thread, tension, blocking, and pattern reading.
Try Our Free Crochet Tools
Turn Your Photo Into a Crochet Pattern
Upload any photo and our AI generates a pixel-perfect crochet pattern with real yarn color matching in seconds.
Try AeternaCraft Studio Free →Calculate Yarn for Any Resize
Free amigurumi yarn & resizing calculator. Change hook, switch yarn, or scale a whole pattern — instant results with PDF export.
Open the Calculator →