20 Free Crochet Sweater Patterns for Beginners
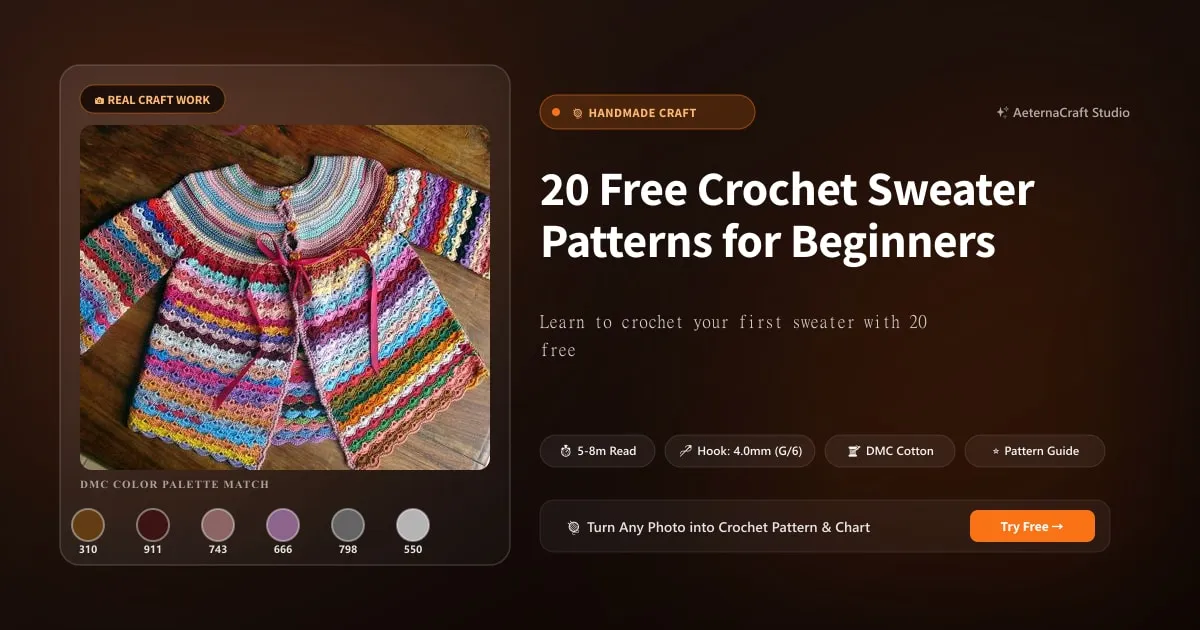
Learn to crochet your first sweater with 20 free patterns, step-by-step tutorials, and pro tips on yarn, hooks, and fit adjustments.
Why Crochet Sweater Patterns Are Perfect for Beginners
When I first picked up a hook back in the late nineties, I absolutely dreaded the word “garment.” I imagined steep learning curves, mathematical nightmares, and garments that would look like misshapen sacks once washed. Oh, how wrong I was. Crochet sweaters are actually some of the most forgiving projects a beginner can tackle. Unlike woven fabrics that demand precise tailoring, crochet has built-in stretch and give. If you accidentally pull a few rows too long or the hips run slightly wide, it just becomes part of your garment’s relaxed silhouette. Honestly, it’s incredibly liberating. Most modern sweater patterns are designed to be knit in seamless top-down raglans or worked in simple back-and-front rectangles. You’ll spend your time mastering foundational stitches like single crochet (sc), half double crochet (hdc), and double crochet (dc) while watching something wearable take shape. There is nothing quite like the pride of slipping your arms into a sweater you made from scratch. It anchors you in the craft.
Let’s talk construction, because that’s where beginners usually panic. Many free patterns now use a top-down approach. You start with a neckband, work in continuous rounds, and place stitch markers to separate sleeves from the body. As you grow outward, you simply split your stitches and work the torso and sleeves independently. No complicated shaping charts. No guesswork. Alternatively, rectangle sweaters are wonderfully straightforward. You crochet four identical panels measuring roughly 20 inches by 24 inches each, then sew the shoulders and sides together using a mattress stitch or slip stitch (sl st). The seams hide beautifully inside the garment, and you can easily try it on over your head to check length before committing to the final assembly.
So, what do you actually need before you start? Let’s keep it practical. You won’t need an entire craft store inventory. A solid ball of worsted weight yarn in a light, solid color is my absolute top recommendation. Trust me, trying to see stitch definition in dark navy or charcoal with a thin hook is a frustrating exercise. Lighter shades let you spot mistakes early. Grab a 4.0mm or H/8 crochet hook to start with—these sizes work beautifully with standard worsted or DK yarn. Keep a set of plastic stitch markers within arm’s reach; they are lifesavers for marking round beginnings or raglan increases. A metal tape measure is non-negotiable for tracking your gauge and body measurements (convert your swatch measurements into exact stitch counts using our free Crochet Gauge Swatch Calculator). Finally, sharp embroidery scissors for clean yarn cuts, a large-eye yarn needle for weaving in ends, and our free Crochet Row Counter to keep your row and repeat counts on track hands-free.
Why do I swear by lightweight solids? Years ago, I bought the exact same sweater pattern twice because I lost track of where I was in the round. The second time, I used a bright pink acrylic yarn and marked my beginning stitch with a contrasting safety pin. Problem solved. Starting simple builds confidence. You’ll learn how tension affects fabric density, how to finish seams neatly, and how to read a schematic without throwing your hook across the room. Before you know it, you’ll be ready to dive into more structured designs. What if your local yarn shop only stocks bulky yarn? No worries—I’ll show you exactly how to swap it out later. For now, keep your tools close, your tea hot, and your stitches even. You’ve got this.
Before you cast on, use this quick decision flowchart to match your current skill level with pattern difficulty:
- Have you finished at least 3 small projects? → Move to the Simple Top-Down Raglan.
- Prefer working back-and-forth on a flat surface? → Start with the Rectangle Cardigan.
- Want low-stress color play and modular building? → Choose the Classic Granny Square.
- Crave instant results and don’t mind heavy arms? → Pick the Cozy Chunky design.
This simple path prevents overwhelm and keeps momentum high. Measure your favorite well-fitting sweater laid flat. Note the bust circumference, body length, and sleeve span. Compare those numbers to the pattern’s finished measurements. Leave at least 2 to 4 inches of positive ease so the garment breathes. Remember, cotton has almost no stretch, whereas wool or alpaca will hug your curves nicely. I love how a simple hdc stitch repeats can create a gorgeous waffle texture that hides minor tension inconsistencies. Start small. Build steady habits. The rest will follow.
Top 10 Free Crochet Sweater Patterns for Beginners
When I started hunting for reliable free patterns online, I quickly realized that not every designer accounts for novice hands. Some tutorials jump straight into complex cable crosses or mysterious decrease formulas that leave you squinting at the page. I’ve curated three foundational styles that appear in countless free libraries. They are repeatable, adaptable, and genuinely beginner-friendly. Pick one that matches your comfort level and commit to finishing it. A completed project teaches you more than ten abandoned starts ever could.
Pattern 1: The Classic Granny Square Sweater
This design breaks the intimidation factor completely. Instead of fighting a massive tube of fabric, you create individual squares measuring 5 inches by 5 inches. Each square uses alternating rounds of double crochet (dc) clusters and chain spaces, usually worked in a 3-dc shell over a corner chain-2 space. You’ll typically need around 30 to 40 squares for an adult medium, depending on your gauge. Join them using a contrasting color and single crochet (sc) slip stitches along the edges. I remember spending an entire rainy weekend chaining off dozens of moss-green squares when I was twenty-two. My kitchen table looked like a craft explosion, but sewing them together into a poncho-style cardigan taught me invaluable seam-picking skills. Because the construction is modular, you can experiment with color gradients or switch between cotton and acrylic midway through without breaking stride. The open stitchwork also drapes softly, making it ideal for spring layers. Look for a free pattern that includes step-by-step photos for joining techniques; it saves so much trial and error.
Pattern 2: Simple Top-Down Raglan Sweater
If you prefer working in continuous rounds, the raglan sweater is your best friend. You begin with a measured neck circumference—usually 18 to 20 inches for a women’s medium—and work upward from the collar down. The magic happens at four diagonal lines where you place increases. Every other round, you add two stitches at each marker line. This expands the yoke evenly until it reaches your underarms, typically around 8 to 10 inches deep. Once the yoke measures correctly, you divide the work: place your sleeve stitches on holders or scrap yarn, and join your body stitches to continue working in the round. No seaming required. I swear by this method because you can literally try it on as you progress. When I first made a raglan in soft alpaca blend, I kept slipping it over my shoulders after row twelve to check the shoulder slope. It’s practically impossible to mess up the fit this way. Use a 4.0mm hook with worsted weight yarn, and stick to a basic dc or hdc stitch pattern for the torso. The sleeve stitches will drop off naturally, and you can switch to shorter lengths or a circular hook to finish them seamlessly.
Pattern 3: Cozy Chunky Cardigan
Sometimes you just want a quick win. The chunky cardigan leans heavily on super bulky yarn and oversized hooks—think 6.5mm or 9mm for rapid coverage. You’ll work two identical rectangles for the front and back, plus two long strips for the sleeves. Each panel might require only 40 to 50 rows of simple sc or hdc worked back and forth. The construction is purely mechanical: seam the shoulders, attach sleeves into the armholes, and pick up stitches along the front opening to knit a border. Leaving it open creates a relaxed duster, while adding vintage wooden buttons transforms it into a structured jacket. I used to rush through these when I needed a gift in under a week. The heavy acrylic or merino wool blends trap air beautifully, resulting in incredible warmth with minimal effort. Just remember that bulky yarn eats needles fast, so buy extra balls. A single sweater often demands six to eight skeins depending on your desired length. If you want visual interest, alternate two strands of fingering weight held together, but I’ve learned that sticking to one thick plied strand gives cleaner edges and fewer tangles. Which style speaks to your current mood? Start there. Master the rhythm. The rest will unfold.
How to Choose the Right Yarn and Hook for Your Crochet Sweater
Picking yarn feels like walking into a candy store, doesn’t it? You grab the prettiest color, assume it will behave, and then wonder why your shoulders ache from dragging a tangled mess across the floor. After two decades of sorting through stash, let me spare you the heartache. Yarn weight and fiber composition dictate everything about your final garment. Worsted weight (Category 4) is the sweet spot for beginners. It balances speed, stitch definition, and availability. If you crave faster progress, move up to bulky weight, but beware that thick yarns can distort pattern stitches and make seaming feel like wrestling a sleeping bear. Fingering weight is beautiful for delicate shawls, but for a full sweater, it will keep you busy for months unless you switch to a massive aluminum hook.
Fiber choice matters just as much as thickness. Acrylic is budget-friendly, machine-washable, and holds dye brilliantly. It’s perfect for practice garments or kids’ wear that needs frequent laundering. Wool offers natural elasticity and temperature regulation, though it requires gentle hand washing and careful blocking. Cotton has zero stretch, which means your sweater will hang stiffly unless you modify your technique. Mercerized cotton adds a subtle sheen and smoothness, making it lovely for summer tops, but it can strain your fingers during long sessions. Alpaca drapes like a dream but lacks memory, so stitches may sag over time. Silk blends introduce luxury and luster, but they’re slippery and expensive. I personally love mixing a soft wool-acrylic blend for my everyday cardigans—it washes easily and keeps its shape year after year.
Matching Hook Size to Yarn
The label on your yarn ball suggests a hook size, but don’t treat it as gospel. Your personal tension varies wildly from mine. If you crochet tightly, a 4.0mm hook will yield a dense, stiff fabric. Switching to an H/8 (5.0mm) immediately softens the drape. Conversely, loose crocheters might need a 3.5mm hook to prevent gaps between stitches. Always prioritize gauge over the recommended size. A loose gauge means using more yarn and creating a floppy garment. A tight gauge makes fabric rigid and exhausting to work.
Here is a quick yarn substitution chart I keep taped above my sewing station:
| Original Weight | Swap To | Hook Adjustment | Best For |
|---|---|---|---|
| Worsted (Category 4) | DK (Category 3) | Down 0.5mm | Lighter layers, faster drape |
| DK (Category 3) | Worsted (Category 4) | Up 0.5mm to 1.0mm | Warmer weather, less yarn usage |
| Bulky (Category 5) | Super Bulky (Category 6) | Up 1.5mm to 2.0mm | Instant gratification winter jackets |
| Cotton | Acrylic Blend | Same or +0.5mm | Stretch compensation, softer hand |
Before you cast on, always test a gauge swatch. I cannot stress this enough. Crochet a square measuring at least 6 inches by 6 inches using your intended stitch pattern. Lay it flat without stretching. Count your stitches horizontally and vertically. If the pattern calls for 14 sc and 18 rows equaling 4 inches, and you only get 12 stitches, change your hook size and try again. I once wasted three skeins of expensive alpaca because I refused to swatch properly. The finished vest resembled a child’s dress. Swatching takes forty minutes now, but it saves days of frogging later. Do you find yourself consistently getting fewer stitches than the pattern states? Your tension is likely too loose. Adjust accordingly. Trust the process.
Step-by-Step Guide to Reading Crochet Sweater Patterns
Staring at a dense block of text can feel like deciphering ancient hieroglyphics. I’ve been there, squinting at my screen while muttering about missing increases. Let’s demystify the language. Professional patterns follow strict formatting conventions, but they still pack a lot of technical shorthand into compact paragraphs. Once you internalize the structure, you’ll navigate them effortlessly.
Understanding Sizing and Schematics
Every quality pattern begins with a finished measurements chart. Look for bust, body length, and sleeve span. These are measured flat, so multiply by two to get the full circumference. Most designers build in positive ease—meaning your actual chest measurement plus 2 to 4 inches for comfortable movement. If you want a fitted silhouette, choose negative ease, but be aware that cotton sweaters will feel restrictive without stretch fibers. The schematic diagram is your roadmap. It shows side views and front views with dotted lines indicating seam allowances and increase zones. Learn to translate these lines into stitch counts. For example, a yoke chart might say “increase 2 sts at each marker line every other round until yoke measures 9 inches.” That’s just math disguised as instructions.
Abbreviations are the next hurdle. Familiarize yourself with the standard lexicon: ch (chain), sl st (slip stitch), sc (single crochet), hdc (half double crochet), dc (double crochet), tr (treble crochet), inc (increase), dec (decrease), rep (repeat), jo (join). Always check the designer’s abbreviation list at the top. Some use “mc” for main color and “cc” for contrast color. Others spell out “work in rnds” instead of “rnd.” Take notes in the margins. I use a mechanical pencil to cross off completed rows so my eyes don’t lose their place. If you are tracking a complicated lace panel, mark it with a sticky tab. Organization prevents panic.
Following Written Instructions vs Charts
Some people prefer paragraph formats because they tell a narrative story. I like that. It feels like a friend guiding your hands. Others swear by symbol charts. Charts map every stitch into a grid. Horizontal lines represent rows, vertical columns represent stitches. A small square means single crochet, a cross means double crochet, and a triangle means treble. You read from bottom to top, right to left in English patterns. Charts are incredibly useful for repeating motifs like cables or lace grids. They remove the mental load of counting chains and skips.
Here is a tiny snippet of how a dc cluster chart looks when translated: [Row 4: ch 3, dc in next st, ch 1, skip 1, tr in next st, ch 2, tr in next st, ch 1, skip 1, dc in next 3 sts] When I first switched from written instructions to charts, I found myself getting lost in the maze. Then I realized I just needed to slow down. Use a ruler or a highlighter to trace the active row. Place a fresh stitch marker at the beginning of each new line. If a chart seems confusing, print it out and annotate it with your own notes. Does your brain prefer visual grids or step-by-step prose? There is no wrong answer. Find the format that reduces your cognitive load. Practice with a simple hdc ribbing pattern first. Build your pattern literacy gradually. Once the symbols click, you’ll unlock hundreds of complex designs previously out of reach.
Customizing Your Crochet Sweater for a Perfect Fit
The beauty of handmade garments lies in one thing: control. Commercial clothing forces you into standardized boxes, but crochet lets you sculpt fabric to your exact proportions. I’ve altered dozens of finished sweaters mid-project because my arm span differed from the designer’s model. Learning to tweak measurements without breaking the stitch rhythm is a superpower. It turns a good pattern into a perfect one.
Adjusting Length and Sleeve Width
Changing length is surprisingly straightforward. If you want a cropped hem, simply stop your body rounds earlier. Measure from your underarm down to your desired waistline, usually 14 to 16 inches for a standard cut. To extend it, just add multiples of your stitch height. For sweaters worked in hdc or dc, each row adds roughly 0.25 inches. Add four rows, and you gain an inch. Sleeves require a bit more patience. If your upper arms feel too tight, work your initial sleeve rounds in a looser stitch like dc or tr. To widen the forearm, place increases at the underarm seam lines every 6 to 8 rows. I always check the bicep circumference against my favorite store-bought sweater. If it measures 20 inches flat, match that number plus 2 inches for ease. You can remove width by working decreases instead, but be cautious: sudden tapering creates unsightly V-shaped holes. Gradual shaping preserves the garment’s structural integrity.
Adding Personal Touches: Collars, Cuffs, and Embellishments
Basic stitch patterns can feel flat without contrast. I love adding ribbed cuffs and hems to anchor the silhouette. Crocheting a ribbed edge is easier than it sounds. Work in the back loop only (blo) to create ridges. Here is a quick sequence I rely on: ch 50, sc in 2nd ch from hook and across, ch 1, turn, sc blo in each sc across. Repeat until the cuff matches your wrist circumference plus 1 inch for stretch. Fasten off and sew into the sleeve opening with a yarn needle. I usually pick a contrasting color for this step. A mustard yellow cuff on a slate gray sweater instantly elevates the design. For collars, pick up stitches evenly along the neckline using a crochet hook. Work continuous rounds of sc or hdc, decreasing slightly at the back neck to prevent flaring. Fold the collar inward once for a classic lapel effect. Decorative buttons are the cherry on top. Space them 3 inches apart, reinforce each placement with a dab of textile glue behind the fabric, and buttonhole by chaining 3 and skipping 3 stitches when you reach the button position. Do you want your sweater to feel cozy and slouchy, or crisp and tailored? Adjust your tension and finishing techniques accordingly. Handcrafted details prove that patience pays off beautifully.
Troubleshooting Common Crochet Sweater Problems
Even seasoned makers hit snags. Fabric twists, stitches vanish, or the finished piece hangs wrong. Panic rarely fixes anything, but a systematic approach does. I’ve spilled more tears over dropped stitches than I’m willing to admit, but experience taught me that every mistake contains a lesson. Let’s walk through the most frequent headaches and how to resolve them calmly.
Fixing Gauge Issues
Gauge problems usually surface after you’ve already crocheted half the body. You measure the chest, realize it’s two inches too narrow, and face the dread of starting over. The fix is almost always hook size adjustment. If your swatch shows too many stitches per inch, switch to a larger hook. One millimeter up is usually enough to loosen tension without changing the fabric weight drastically. If you have too few stitches, downsize by 0.5mm. Always re-swatch after changing hooks. I once wasted a whole afternoon fighting a stubborn row count before realizing my left hand was dragging the yarn too tightly. Loosening my grip and switching to a smooth wooden 4.0mm hook instantly corrected the issue. Calculate your match by dividing the pattern’s required stitches by your swatch stitches, then multiply the ratio across your entire garment dimensions. This quick math tells you exactly how much to add or subtract without guessing.
Dealing with Uneven Edges or Stitches
Ragged armholes and wavy hems almost always stem from inconsistent tension or missed increases. Place a stitch marker in the first stitch of every row. When you return to the beginning of the round, check that marker. If it’s buried or skipped, you’ve likely lost your place. Maintain consistent hand pressure. Imagine holding a live bird—firm enough to keep it secure, gentle enough not to crush it. When picking up stitches along a curved edge, distribute your increases evenly. If the edge curls inward, you’re probably too tight; if it flares outward, you’re too loose. Practice your foundation chain until it lays flat without twisting. I spent years fighting crooked borders until I switched from the traditional chain method to a magic ring or a flexible foundation chain. It instantly stabilized my project starts.
Sometimes, despite your best efforts, a section just refuses to cooperate. That’s when you face the dreaded frog. Yes, ripping out work hurts. I’ve done it more times than I care to count, especially when I noticed a stray loose stitch ruining a dc panel. Frogging is not failure; it’s revision. Insert your hook into the correct row, gently pull the working yarn, and watch the loops unravel cleanly. Keep the live stitches on a spare needle or scrap yarn until you are ready to resume. If you rip out too far, use a darning needle to weave the yarn tail back through the adjacent column of stitches, securing them temporarily. Take a deep breath. Realign your markers. Begin again. Mistakes are just data points guiding your next row. You are building muscle memory, one corrected stitch at a time. Which frustration have you faced most often? Acknowledge it, adjust your technique, and keep hooking. The finished piece will thank you.
Frequently Asked Questions
How do I calculate stitches to adjust a sweater pattern for my size?
Measure your bust circumference, add 2–4 inches for positive ease, and multiply by your gauge swatch (stitches per inch). Use our free Crochet Gauge Calculator to calculate exact panel stitches, and the Even Increase/Decrease Calculator for sleeve and neckline shaping.
What is the easiest crochet sweater pattern for a complete beginner?
The easiest crochet sweater pattern for a complete beginner is the rectangle cardigan. You crochet four simple rectangles—two for the front and two for the back—using single crochet or half double crochet, then seam them together. No shaping, no increases, just straight rows.
What yarn fiber is best for a beginner's first crochet sweater?
A worsted weight (#4) acrylic or acrylic-wool blend (such as Lion Brand Wool-Ease) provides the perfect combination of elasticity, durability, and stitch definition without heavy sagging.
Related Posts
How to Change Colors in Crochet: 3 Seamless Techniques
Master seamless color changes in crochet with 3 easy techniques. Avoid gaps, tangles, and tension issues for perfect stripes every time.
Beginner7 Easy Crochet Stitches for Beginners: Step-by-Step Guide
Master 7 easy crochet stitches for beginners with step-by-step tutorials. Chain, single, half double, and double crochet with personal tips from a maker.
Try Our Free Crochet Tools
Turn Your Photo Into a Crochet Pattern
Upload any photo and our AI generates a pixel-perfect crochet pattern with real yarn color matching in seconds.
Try AeternaCraft Studio Free →Calculate Yarn for Any Resize
Free amigurumi yarn & resizing calculator. Change hook, switch yarn, or scale a whole pattern — instant results with PDF export.
Open the Calculator →