7 Easy Crochet Stitches for Beginners: Step-by-Step Guide
Master 7 easy crochet stitches for beginners with step-by-step tutorials. Chain, single, half double, and double crochet with personal tips from a maker.
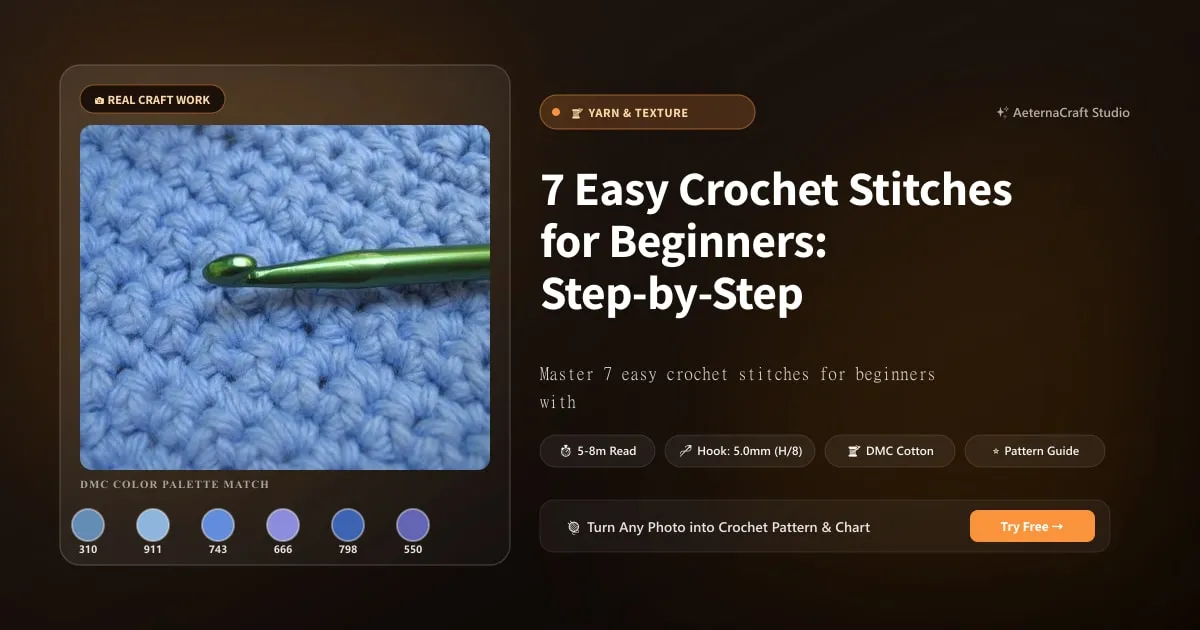
If you have ever watched someone work a hook through yarn and somehow conjure a blanket out of thin air, I completely understand why you were mesmerized. Honestly, the first time I saw my grandmother finish a basket weave dishcloth in under an hour, I thought she had hired invisible assistants. She hadn’t. She just knew her loops.
Crochet stitches are exactly what they sound like: loops pulled through loops using a hooked tool. Unlike knitting, where your stitches live on two needles and threaten to cascade onto the floor if you sneeze, crochet locks each loop down immediately. That security is comforting, especially when you are learning.
The four fundamental stitches you will build everything else on are the chain stitch (ch), single crochet (sc), half double crochet (hdc), and double crochet (dc). They look simple when someone else does them, but I promise you, once your fingers memorize the rhythm, they become surprisingly graceful. The chain is your starting line. Everything else stacks onto it. The single crochet gives you dense, sturdy fabric. The half double crochet sits right in the middle, offering a nice balance of drape and structure. The double crochet builds height quickly and works up larger items without exhausting your wrists.
Why do I insist you start with these four instead of jumping straight to lace or cable textures? Because they show up in roughly ninety percent of published patterns. When you learn to read and execute them confidently, you stop feeling lost. You begin to recognize architecture in patterns rather than alphabet soup. More importantly, your hands develop muscle memory. Your brain stops translating every instruction into a puzzle and starts trusting the process.
I still remember the day I attempted a complicated Tunisian stitch without mastering the basics first. My fabric twisted, my rows wobbled, and I ended up with something that looked less like a coaster and more like a startled sea creature. I spent two nights frogging out that disaster. Afterward, I went back to plain single crochet rows for a week. Just me, worsted weight acrylic, and a size H/8 (5mm) hook. Every subsequent project I tackled felt easier because my foundation was solid.
You might wonder whether I actually needed those extra weeks of boring repetition. Absolutely not. But I am glad I did it anyway.
When you practice the four fundamentals, you also learn how yarn behaves. A slick cotton strand slides differently than fuzzy alpaca, and a tightly plied merino wool bounces back in ways that slippery mercerized thread never will. Your tension changes depending on fiber, weight, and hook material. Learning to watch that interaction early saves you from pulling your hair out later.
The truth is, beginners often rush past the basics because they want a finished object yesterday. I get it. But rushing is what makes people quit. Slowing down long enough to feel each loop form, each yarn over catch, and each pull-through settle is where the real learning happens. Once those four stitches click, the entire craft opens up. Complex textures, colorwork, amigurumi, garments—all of it grows out of the same root system.
So if you are sitting there wondering whether you are doing it wrong, let me reassure you: getting comfortable with the basics is not a detour. It is the road itself.
Why Start with These Stitches?
These four stitches are versatile, repeatable, and honest. They do not require fancy tools or advanced geometry. They reward patience. They also build the counting skills and edge awareness that protect you from the most frustrating beginner pitfalls. Once you can work a clean row of single crochet and a steady row of double crochet, you will notice that almost every free pattern online is just these stitches rearranged with slightly different intentions.
Essential Tools and Materials for Learning Crochet Stitches
Before I let you touch a single stitch, we need to talk about your workspace. I know, I know—you just want to jump in and see what happens. But picking the right hook and yarn combo at the start is like choosing the right shoes for a hike. Wrong footwear, blisters and regret. Right footwear, miles of happy wandering.
For your very first project, I recommend worsted weight yarn paired with a size H/8 (5mm) hook. That combination is remarkably forgiving. The yarn is thick enough that you can clearly see each stitch hole, which helps when you are trying to figure out where your hook needs to go. The hook is large enough that you are not fighting microscopic loops, but not so huge that your fabric looks sloppy. It is the sweet spot.
If you prefer natural fibers, go with a smooth acrylic or a soft cotton blend. Acrylic is inexpensive, machine-washable, and has just enough grip for beginners. Cotton is stable and does not stretch, which keeps rows tidy. I will admit, I used to dismiss acrylic because I thought it was “lesser,” but years ago I made the mistake of buying an expensive merino skein for my first blanket project. It split constantly, slipped through my fingers, and I cried over dropped stitches twice. Stick to something that behaves until your hands are ready for high-maintenance fibers.
When you eventually move on, you will likely graduate to smaller hooks. A 4.0mm hook pairs beautifully with DK yarn for lightweight scarves and garments. A 3.5mm hook works wonderfully with fingering weight for delicate shawls or lace accessories. Later still, a bulky yarn with a 6.5mm or 8mm hook will let you finish a cozy throw in an afternoon. But start simple.
Ergonomic hooks are absolutely worth considering. If your hands cramp after twenty minutes, you will not keep practicing. Aluminum hooks glide fast but can hurt your palm. Wooden hooks have warmth and grip. Plastic ergonomic hooks, like the ones with cushioned grips, reduce strain significantly. I switched to an ergonomic aluminum hook around year three, and my carpal tunnel symptoms disappeared overnight. Your future wrists will thank you. If you are shopping for your first set or want an ergonomic handle that eliminates hand cramps, check out our in-depth tested 5 Best Crochet Hooks for Beginners: Top Picks & Buying Guide.
Beyond the hook and yarn, gather a few supporting supplies. Stainless steel stitch markers are non-negotiable. I use them to mark the beginning of a row, highlight a stitch increase, or flag the center of a round. Without markers, I have lost count more times than I care to admit. A tapestry needle with a large eye helps you weave in ends neatly, and small sharp scissors save your yarn from accidental snags. A flexible ruler or measuring tape lets you check dimensions as you go.
A common question I hear from newcomers is whether they need a special hook grip or tension ring. I say try without first. Most beginners improve simply by slowing down and using a consistent wrap. If you find your index finger tensing up constantly, a silicone tension ring can help guide the yarn, but it is not essential.
Keep your supplies in one accessible spot. When I teach friends, I always hand them a single medium-weight ball, one hook, two markers, and a pair of scissors. Nothing else. Too many choices paralyze new crafters. Once they finish their first swatch, I introduce the rest.
Other Helpful Supplies
Your station does not need to be elaborate. A small crochet basket, a notebook for tallying rows, and good lighting matter far more than decorative containers. I store my markers in a magnetized lid, which keeps them from rolling across the kitchen counter and into places only vacuum cleaners can reach.
Step-by-Step Guide to Basic Crochet Stitches for Beginners
Alright, let us finally get our hands dirty. Before anything else, you need a slip knot and a foundation chain. Think of the slip knot as the gatekeeper. If it is too tight, nothing else will flow smoothly. If it is loose, your chain will unravel during row two. Aim for snug but movable.
To make a slip knot, hold the yarn tail in your left hand and wrap the working yarn clockwise around your fingers to form an X. Insert the hook through the loop, grab the working yarn, and pull it through. Tighten gently by holding both the tail and the working end. Slide the knot onto your hook. Done.
Now chain it out. Wrap the yarn over the hook from back to front, grab the yarn through the loop on the hook, and pull. That is one chain. Repeat until you have twelve to fifteen chains for practice. Keep the loops relaxed. If your chain feels stiff, swap to a hook one size larger temporarily. If it sags, tighten your yarn wrap slightly and practice breathing instead of gripping.
The single crochet stitch is your first real fabric builder. Insert your hook into the second chain from the hook. Yarn over, pull up a loop. You now have two loops on the hook. Yarn over again, pull through both loops. That completes one sc. Work across the chain in the same manner. Your first row will probably look lumpy. Good. So did mine.
The half double crochet follows a similar path but uses one extra yarn over before you insert the hook. Yarn over, insert into stitch, yarn over, pull up a loop. Three loops sit on the hook now. Yarn over, pull through all three. This stitch is taller than single crochet, shorter than double, and it drapes nicely. It is perfect for scarves, simple blankets, and anything where you want warmth without heaviness.
The double crochet builds height even faster. Yarn over, insert hook, yarn over, pull up a loop. Three loops on the hook. Yarn over, pull through two loops. Two loops remain. Yarn over, pull through the final two. Notice how each double crochet row eats up space quickly? That is why I love them for quick dishcloths and summer tops.
You might ask, “Which stitch should I use when I feel overwhelmed by all the steps?” The answer is the one your hands already know better. Repeat it. Then learn the next one. Muscle memory does not care about perfection on day one. It cares about repetition.
How to Make a Slip Knot and Chain Stitch
Hold the tail, create the loop, slide it on, tighten comfortably. Chain twelve to fifteen. Feel the rhythm. Do not fight the yarn. Let the hook lead and your fingers follow.
Single Crochet Stitch Tutorial
Insert hook into second chain from hook. Yarn over, pull up a loop. Yarn over, pull through two loops. Continue across. Keep the tension even. If you pull too tight, the next stitch becomes a wrestling match.
Half Double Crochet and Double Crochet
Hdc adds one extra yarn over before insertion and pulls through all three loops at the end. Dc adds one yarn over before insertion, then works two partial draws before the final pull-through. Both are taller than sc. Both teach you to manage loop count carefully.
Common Mistakes When Learning Crochet Stitches (and How to Fix Them)
Tension issues are the number one reason beginners quit. I cannot stress this enough. When your stitches alternate between too tight and too loose, your fabric ripples, your counts drift, and your confidence takes a hit. The usual suspects are gripping the hook like it owes you money and wrapping the yarn inconsistently. Sometimes your dominant hand moves faster than your brain can coordinate it.
Start by checking your posture. Sit upright, relax your shoulders, and let your arms rest on a table or pillow. Take a slow breath before each row. Seriously. It sounds silly, but tension lives in the jaw, the shoulders, and the fingertips. When you exhale and soften your grip, your stitches soften too.
If you find yourself wrestling the yarn, try a tension regulator ring on your index or middle finger. It guides the strand steadily and reduces constant rewrapping. Do not rely on it forever, though. You want your hands to learn natural control eventually.
Another frequent headache is accidentally adding or dropping stitches. You finish a row, count your work, and suddenly you have three extra loops or two fewer than expected. The fix is simple: count at the end of every row. I use stitch markers every ten stitches to break the row into manageable chunks. If you lose count in the middle, undo back to the marker rather than guessing where the error occurred.
Missing stitches usually happen because the hook skips the back loop entirely or because the chain twist flips the foundation. Always check that your foundation chain lies flat before you work into it. If it curls like a ribbon, twist it open before inserting your hook.
The chain-1 turn method keeps edges straight. Instead of chaining two or three to reach the height of your previous stitch, chain one and flip your work. It works beautifully for single crochet and half double crochet rows. Your fabric will look cleaner, and you will stop losing two stitches at the beginning or end of each row.
You may wonder whether it matters if I count by looking at the top bumps or the sides. It absolutely matters. Top bumps are visible for single and half double crochet. Double crochet rows are better counted along the side posts. Know your stitch anatomy.
When I spot a dropped stitch, I do not panic. I stop, locate the last correct row, and use a crochet hook or needle to pick up the runaway loop carefully. Pull it through the neighboring stitch, secure it, and continue. Most mistakes are reversible if you catch them early.
Uneven Tension Solutions
Switch to a slightly larger hook temporarily. Practice slow rows. Breathe. Relax your grip. Use a tension ring if needed. Track your progress in a notebook.
Accidentally Adding or Dropping Stitches
Count every row. Mark every ten stitches. Twist-check your foundation chain. Use chain-1 turns for sc and hdc. Pick up dropped loops promptly.
Practice Pattern: Combine Your New Crochet Stitches
Let us put everything together in one tidy practice piece. I call this the Four-Stitch Swatch, and it doubles as a simple dishcloth once you finish the set. Grab your worsted yarn and H/8 hook. You will work back and forth in rows.
Chain 21. Row 1: skip the first chain from the hook, work one single crochet in each remaining chain across. You should end with 20 sc. Ch 1, turn. Row 2: hdc in each stitch across. You should still have 20 stitches. Ch 1, turn. Row 3: dc in each stitch across. You should still have 20 stitches. Ch 2, turn. Row 4: hdc in each stitch across. Ch 1, turn. Row 5: dc in each stitch across. Ch 2, turn. Continue alternating rows 4 and 5 until the piece measures approximately seven inches from the starting chain. Fasten off, leaving a six-inch tail. Weave in ends with a tapestry needle.
This pattern teaches you to transition between stitch heights without losing your count. The alternating hdc and dc rows keep the fabric balanced. If you find the edge curling, add a border of ten rounds of single crochet around the perimeter. Suddenly you have a functional dishcloth.
Now, how does this relate to the seven easy patterns mentioned in the introduction? Same four foundational stitches, different arrangements. Swap worsted for DK and a 4.0mm hook to make a lightweight washcloth. Use bulky yarn and a 6.5mm hook for a fast blanket swatch. Try mercerized cotton for a decorative pot holder. Work the hdc rows in silk blend for a summer scarf. Switch to alpaca for a cozy cowl. Use 3.5mm with fingering weight for a delicate coaster set. And keep the original H/8 worsted version for a sturdy kitchen cloth. Seven projects, identical stitch vocabulary.
Learning to read patterns is the next hurdle. Abbreviations trip everyone up initially. ch means chain, sc means single crochet, hdc means half double crochet, dc means double crochet, tr means treble crochet, sl st means slip stitch, st means stitch, and sk means skip. When you see an asterisk, like sc in next stitch, ch 1, sk next st, repeat everything between the asterisks until told otherwise. Round brackets usually indicate multiple stitches worked into the same space.
Highlight the instructions before you start. Write the row count beside each row. Keep a pen nearby to cross off completed lines. If a pattern says “work even,” it means no increases or decreases—just keep repeating the established row.
Simple Dishcloth Pattern Using Basic Stitches
Chain 21, row 1: sc in 2nd ch from hook, sc across (20 sc). Row 2: ch 1, turn, hdc across. Row 3: ch 1, turn, dc across. Repeat rows 2 and 3 for 15 rows. Finish with a single crochet border if desired.
Tips for Reading Patterns and Abbreviations
Memorize the core symbols. Practice the repeat symbol. Track your row number aloud. Write notes in the margin. Trust the count, not your guess. Also remember that British and Australian patterns use UK terms (where a UK double crochet is a US single crochet) — avoid costly stitch mix-ups by using our free US to UK Crochet Terms Converter or read your instructions with our Crochet Pattern Reader & Cleaner.
Next Steps After Mastering Beginner Crochet Stitches
Congratulations. You have formed loops, counted rows, corrected mistakes, and built actual fabric. Now is the moment where many crafters either leap forward or hesitate. Do not hesitate. Move into intermediate territory at your own pace.
The treble crochet is your next height upgrade. It works exactly like double crochet, except you yarn over twice before inserting the hook. One treble equals two double crochets in height. It creates airy, drapey fabric ideal for shawls and lightweight wraps. Once you are comfortable with trebles, try the slip stitch. It looks intimidating because the name does not match its usefulness, but sl st simply joins stitches or moves your hook across the work invisibly. I use slip stitches constantly to seam amigurumi pieces and connect color blocks.
Shell stitches build directly on double crochet clusters. You work five or seven dc into the same stitch, then skip the next few stitches and anchor with a single crochet. The result is a wavy, fan-shaped texture that looks professional but requires zero advanced math. Granny squares are just shells arranged in rounds. Once you master one granny square, you can make coasters, blankets, bags, and even clothing.
Community makes this entire journey significantly warmer. I joined Ravelry early in my second year, and it changed everything. You can search patterns by stitch type, yarn weight, hook size, and difficulty. The forums are full of patient people who answer the same questions you will ask. Reddit’s crochet communities function similarly, and both host monthly challenges that keep motivation high. Local yarn shops often host free crochet nights, which are wonderful for troubleshooting in real time. There is something deeply encouraging about watching someone older than me gently adjust your hook angle and whisper, “Yes, exactly like that.”
Share your progress online with #crochetforbeginners if you feel comfortable. People love seeing imperfect first swatches because they remember being there. You will get compliments, tips, and occasionally unsolicited opinions. Filter what serves you and ignore the rest.
Keep a project journal. Note which hook and yarn combo produced the cleanest fabric. Record tension adjustments. Jot down stitch counts when a pattern surprises you. Those notes become your personal reference library.
Finally, remember that perfection is not the goal. Even professional crocheters drop stitches, miscount rows, and frog out beautiful-looking pieces because of one stubborn error. The difference is that they keep going. You will too.
Exploring Intermediate Stitches
Try treble crochet for drape, slip stitch for seaming, and shell stitch for texture. Granny squares and simple ribbed cuffs are excellent next projects.
Joining the Crochet Community
Ravelry, Reddit, local yarn shops, and social hashtags provide support, inspiration, and accountability. Share your work, ask questions, celebrate small wins.
Frequently Asked Questions
How much more yarn do I need if I double the size of my crochet plushie?
You need roughly four times the original yarn amount if you double the dimensions of a crochet plushie. That's because scaling up length, width, and height multiplies volume. For example, a 6-inch plushie using 100 yards of worsted weight yarn would need about 400 yards for a 12-inch version. Always buy an extra skein to be safe.
What is the easiest crochet stitch for a complete beginner to learn first?
The chain stitch is the easiest crochet stitch for a complete beginner to learn first. It's the foundation for everything else. You simply yarn over and pull through a loop on the hook. Practice making chains until they feel smooth and even — aim for 15 to 20 chains in a row without stopping.
Can I use acrylic yarn instead of cotton for amigurumi?
Yes, you can use acrylic yarn instead of cotton for amigurumi, but cotton holds its shape better for toys. Acrylic is softer and cheaper, which makes it great for practice. However, cotton's lack of stretch keeps stitches tight and prevents stuffing from poking through. I prefer mercerized cotton for amigurumi that need crisp details.
Related Posts
Crochet for Beginners: Your 7-Step Start Guide
Learn crochet for beginners with essential tools, basic stitches, and easy patterns. Start your first project today with expert tips.
BeginnerHow to Change Colors in Crochet: 3 Seamless Techniques
Master seamless color changes in crochet with 3 easy techniques. Avoid gaps, tangles, and tension issues for perfect stripes every time.
Try Our Free Crochet Tools
Turn Your Photo Into a Crochet Pattern
Upload any photo and our AI generates a pixel-perfect crochet pattern with real yarn color matching in seconds.
Try AeternaCraft Studio Free →Calculate Yarn for Any Resize
Free amigurumi yarn & resizing calculator. Change hook, switch yarn, or scale a whole pattern — instant results with PDF export.
Open the Calculator →