What Does C2C Mean in Crochet? Beginner Guide & Chart
What does C2C mean in crochet? Learn corner-to-corner basics with our complete beginner guide, diagonal increase/decrease steps, and free graph charts.
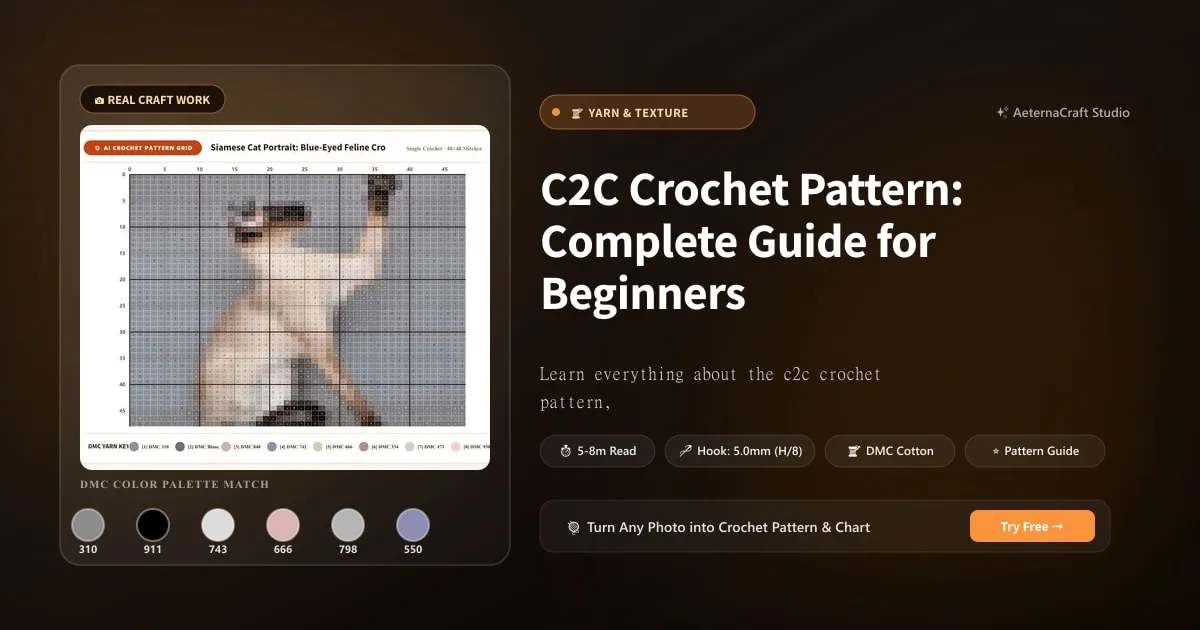
[!TIP] Planning yarn colors or graphing a photo for your C2C blanket? Use our free C2C & Tapestry Yarn Yardage Calculator to calculate exact balls per color shade, or upload any photo to AeternaCraft Studio to auto-generate a pixel-perfect C2C graphgan chart with stitch counts.
C2C Basics: What Does C2C Mean in Crochet?
C2C stands for Corner-to-Corner crochet. Instead of working back and forth in horizontal rows, you build the fabric diagonally one square “tile” (or block) at a time, starting at the bottom corner and expanding outward to the opposite corner:
- Basic Block Unit: 1 standard C2C block =
[ch 3 + 3 dc]worked into a chain-3 turning loop. - Pixel Graph Matching: Each block corresponds to exactly 1 square on a pixel grid or graphgan chart.
- Yarn Planning: Because each block uses approximately 23.5 inches of worsted yarn, use the C2C & Tapestry Yarn Yardage Calculator to calculate exact balls to buy per color shade.
The C2C Crochet Technique Explained
If you have ever stared at a finished crochet blanket and wondered how someone made those perfectly stacked little squares march up the diagonal, you are looking at corner-to-corner crochet, or c2c for short. I have been pulling yarn through loops for over twenty years, and honestly, c2c was the first time I truly felt like I was building with pixels instead of just stitches. The magic happens because you work the fabric diagonally, starting at one corner and growing outward. Each unit you create is called a block, and a standard block is built from a cluster of three double crochets (dc) sandwiched between chains. You will often see it written as chaining three, then working three dc in the same space, joining with a slip stitch (sl st) or chain to continue. When you stack these blocks row after row, they lock together into that unmistakable brick-like texture that looks surprisingly structured but stays wonderfully soft.
When I first tried c2c back in 2008, I chained too tightly and ended up with a triangle that looked less like a cozy throw and more like a twisted paper fan. Thankfully, I slowed down, switched from a tiny 3.5mm hook to a beefier H/8 (5.0mm), and suddenly my blocks sat flush against each other like they were meant to be there. That single change taught me more about tension than any pattern note ever could.
C2C vs. Traditional Graphgans
You might be wondering how this differs from a traditional graphgan. A classic graphgan is worked flat in rows, usually with single crochet (sc) or half double crochet (hdc), where every square on your chart maps directly to one stitch. You turn your work at the end of every row, which means you spend a lot of time counting turns and managing color jumps across the back. C2C skips all that turning nonsense. Instead of working back and forth, you grow the piece diagonally, and your color changes happen right at the edge of the row. That makes it incredibly forgiving when you are switching hues. Pixel art, geometric motifs, and even simple checkerboard layouts look fantastic because the diagonal grain naturally highlights the shape without requiring you to carry yarn invisibly across huge empty spaces.
Some crafters prefer the smooth, flat surface of traditional graphgans, and I completely understand that preference. But if you want something faster, more flexible, and much better suited for beginners who get anxious about turning their work every single row, c2c is your friend. It is also ideal if you want to add a treble (tr) crochet variation for taller, lusher blocks, though the standard dc cluster remains the workhorse of the technique.
Essential Supplies for Your First C2C Crochet Pattern
Before you cast on, let us talk supplies. You do not need a fancy kit. Grab worsted weight yarn for your first project—it has that perfect balance of visibility and speed. I always tell new crocheters to start with a soft acrylic or a cotton-acrylic blend because the fiber is easy on the hands and shows stitch definition clearly. For a c2c blanket, a skein of DK weight yarn works beautifully if you prefer something lighter, while bulky yarn will give you instant gratification on a quick pillow cover. Fingering weight is absolutely possible, but it will take forever and demand a smaller hook like a 3.5mm or 4.0mm, so I would save that for later.
Your hook size matters more than you think. Most yarn labels suggest 5.0mm to 5.5mm, but for c2c, I usually recommend going one size up. A 4.0mm hook paired with DK yarn gives crisp blocks, whereas a 5.5mm hook with worsted weight keeps the fabric drapey and relaxed. Stitch markers help you track your working edge, and a pair of blunt-tipped tapestry needles will save you from yanking your yarn tails through ten different blocks later. Always make a small swatch measuring roughly 4 inches by 4 inches before committing to a larger project. Gauge changes everything, and knowing your block count per inch will prevent that heartbreaking moment when your baby blanket finishes at nap-size instead of crib-size.
Here’s what gauge means in real numbers: worsted weight at 5.0mm gives about 2.4 blocks per inch, so a 40-block-wide baby blanket works up to roughly 17 inches across and eats 700 grams (about 1,470 yards). The same 40-block chart in DK at 3.5mm runs 3.1 blocks per inch—a 13-inch square lapghan using only 400 grams. If you swap yarn weights mid-project or are scaling a pattern written for another brand, plug the gauge of both yarns into the yarn substitution calculator to convert hook size and total yardage before you chain that first row.
How to Read a C2C Crochet Pattern Graph
Understanding the Grid: Rows and Blocks
Reading a c2c graph feels like learning a new alphabet at first, but once it clicks, you will never want to go back. Every colored square on the chart represents exactly one c2c block. The grid does not read left to right like a book; instead, you start at the bottom right corner and move diagonally upward toward the top left. If you are a left-handed crocheter, you will likely follow the reverse path, building from the bottom left toward the top right. Either way, the math stays the same: row one has one block, row two has two blocks, row three has three blocks, and so on until you reach your widest point. After that, the decrease rows mirror the same diagonal climb in reverse.
Imagine a simple 7x7 graph for a scarf. The bottom row contains one white square. The next row has one white square and one blue square. Row three has two white, then one blue. As you work, you are literally following the chart diagonally, adding a new block at the beginning of each row during the increase phase. I keep a printed copy of every graph under a glass jar of buttons so I can pin progress marks directly onto the paper. There is something deeply satisfying about watching a flat grid transform into a tangible fabric under your fingertips.
One question I hear constantly is whether the graph direction matches the row numbers. The answer is yes, but pay close attention to your pattern’s key. Some designers print row one at the bottom, while others print it at the top. Always check the written instructions alongside the chart before you make your first chain.
Color Changes in C2C: Carrying Yarn vs. Bobbins
Color management is where c2c truly shines. Because you only work one color per row, you never have to hunt for loose strands across the back of the fabric. For small color blocks, you can simply carry the unused yarn along the top edge of your previous row. Just lay the new color alongside the old one, crocheting over both tails for the first three stitches of the new row, then continue with the new yarn alone. The carried strand stays nearly invisible and keeps your work lightweight.
However, if a color only appears in a tiny island in the middle of a large solid area, carrying it across five or six inches of fabric creates bulk and might distort your edges. In those cases, I swear by yarn bobbins. Wind a small amount of each needed color onto a bobbin, tape it to your working project, and pick it up only when the graph demands it. Years ago, I attempted a c2c pillow cover using eight colors and carried every single strand across the back. The resulting piece weighed as much as a small dog and refused to lie flat no matter how hard I blocked it. Switching to bobbins fixed everything instantly.
Another reader question I love tackling here: do I need special tools for bobbins? Not really. Small plastic spools, wooden thread winders, or even folded pieces of cardstock work perfectly fine. Just make sure your bobbins spin freely so the yarn feeds smoothly without snagging.
Common Mistakes When Reading C2C Patterns
The most frequent mistake I see beginners make is misreading the diagonal direction. They start at the bottom left when the chart says bottom right, and suddenly their image is facing the wrong way. Another common slip-up is missing the increase row entirely, which collapses the fabric into a straight edge instead of a triangle. Count the blocks on each row before you begin crocheting. If row four should contain four blocks and you count three, stop and recheck your graph.
Losing track of color changes is equally frustrating. Highlighters come to the rescue. Mark the row you are currently working on, or use a sticky tab to track your place. Some designers number the blocks in each row, which takes the guesswork out of counting. Keep your graph accessible, your eyes rested, and your patience steady. C2C charts reward careful reading, and once you internalize the diagonal rhythm, you will be designing your own pixel masterpieces in no time.
Step-by-Step: How to Crochet a C2C Pattern
Starting Your C2C Project: The First Block and Increase
Let us get our hands dirty. To begin your very first c2c project, chain six. Skip the first two chains from the hook and work three double crochets (dc) into the third chain from the hook, the fourth chain, and the fifth chain. Finish with one final dc in the sixth chain, giving you three complete stitches in three separate chains. Now chain three to create your turning chain, and work a slip stitch (sl st) into the top of the three-dc cluster. This completes your very first block.
Row two requires an increase. Chain six again, which forms the chain-three base plus a brand-new block foundation. Work three dc across those new chains just like before, then slip stitch into the top of your existing row-one block. At this point, you should have two blocks connected diagonally. Row three follows the exact same logic: chain six, work three dc, then join to the top of the second block in the previous row. Notice the pattern? Each new row adds exactly one block at the beginning, pushing the fabric outward along the diagonal. By the time you finish row five, you will have five blocks stacked side by side along that rising edge.
I remember making my first c2c square and accidentally slip-stitching into the chain-3 space instead of the top of the cluster. The result looked like a tiny ladder leaning against a wall. Do not panic if your joins feel fiddly at first. The key is consistency. Insert your hook firmly into the center peak of the cluster below, pull the yarn through both legs, and let the slip stitch hold the shape.
Working the Middle Section: Consistent Increases
Once you pass the halfway point of your design, the increase phase continues until you reach the widest section of your project. For a square, that midpoint occurs when your block count equals the desired width. If you are working a 40-block-wide blanket, you will increase steadily until row forty, then flip the formula. During this middle stretch, every row still begins with a chain-six, three-dc cluster, followed by a slip stitch into the top of the last block from the row below. The rhythm becomes almost meditative: chain six, work three dc, join to the previous block, turn, repeat.
Stitch counts can feel tricky because c2c does not use traditional row counts. Instead of counting vertical lines, you count blocks along the diagonal edge. Row one holds one block. Row two holds two. Row ten holds ten. When you reach your target width, the graph switches to decreases. Track your progress with a row counter clipped to your yarn, or mark each completed row on your chart. Missing a single increase throws off the entire symmetry, so slow down when the pattern calls for it.
A practical tip: if you notice your blocks getting shorter or wider, check your hook size immediately. A 4.0mm hook with DK yarn produces compact, neat blocks, while the same yarn on an H/8 hook yields softer, more open squares. Both are correct as long as you stay consistent within one project.
Decreasing: Shaping the Opposite Corner
The decrease row is where many crocheters get nervous, but it is actually simpler than it looks. Instead of adding a brand-new block at the start of the row, you join directly to the first block of the previous row and work one fewer block. Here is the exact method: chain three, then work two single crochets (sc) into the top of that first block, effectively closing it. Chain three, slip stitch into the top of the second block from the row below, chain three, and work your next three-dc cluster. Continue this pattern until only one block remains in the row. Each subsequent row drops one block, shaping the opposite corner neatly.
Some designers prefer to slip stitch across the first block rather than closing it with single crochet. Both methods work, but I find that chaining three and working two sc into the block peak gives a cleaner, tighter join that resists gaping. Maintain even tension as you decrease. Pulling too hard on the chain-3 spaces will bunch the edge, while working too loosely creates a wavy border that refuses to lie flat.
When I first decreased on a c2c throw, I rushed the final three rows and ended up with a jagged edge that looked like a mountain range. I frogged the last section, counted each stitch aloud, and suddenly the corner came out perfectly squared. Patience pays off here. Trust the process, watch your block count drop by one each row, and enjoy watching your diagonal canvas shrink gracefully back into the shape you planned.
Tips for Perfecting Your C2C Crochet Pattern
Achieving Straight Edges: Preventing Curling
Nothing ruins a c2c project faster than edges that curl like potato chips. I have seen it happen to beautiful alpaca blankets and sturdy cotton dishcloths alike. The culprit is usually a combination of tight tension, an undersized hook, or working the chain-3 spaces too tightly. Because c2c builds fabric diagonally rather than vertically, the natural grain pulls inward unless you give it room to breathe.
My first fix is almost always the hook size. If the yarn label recommends a 4.0mm hook, try a 4.5mm or 5.0mm instead. Larger hooks loosen the stitch structure and let the blocks settle into a flat plane. Blocking is another lifesaver. Soak your finished piece in lukewarm water for twenty minutes, gently squeeze out excess moisture, lay it flat on a towel, and pin the edges with rust-proof tacking pins. Allow it to dry completely before removing the pins. The difference is remarkable.
If curling persists, add a simple border. A round of single crochet (sc) worked evenly around the perimeter stabilizes the edges, while a row of half double crochet (hdc) adds a subtle raised frame that hides minor unevenness. I often use mercerized cotton for dishcloths and border them with a contrasting color to make the finished edge pop.
Managing Yarn Tension for Even Blocks
Consistent tension is the biggest challenge of even blocks, and it takes practice to master. Keep your yarn bowl or yarn feeder relaxed on your lap, and let the thread flow without dragging. Avoid anchoring the working strand too tightly around your fingers. Many beginners pull hard on the chain-3 spaces because they fear the blocks will gap apart, but that exact habit creates a rigid, stiff fabric.
Practice the same hand motion repeatedly. I like to whisper a little rhythm while I crochet: chain-six, three-dc, slip-stitch, turn. The rhythm keeps my hands synchronized and prevents accidental tightening. If you notice your blocks shrinking as you work, stop and rewrite your swatch. Swatching saves time, money, and sanity. A 4-inch by 4-inch test square should measure approximately sixteen blocks by sixteen rows when worked on a 4.0mm hook with worsted weight acrylic. Adjust your hook up or down by half a millimeter until the gauge matches your intended finished size.
Fiber choice also influences how your blocks behave. Wool and alpaca have natural elasticity, which helps blocks bounce back into shape. Silk blends glide smoothly through your fingers but can stretch under their own weight if the project is large. Acrylic holds its structure well and washes easily, making it ideal for home decor. Choose your fiber based on how the finished piece will live in your space.
Customizing C2C Patterns: Changing Colors and Size
Once you understand the increase-decrease rhythm, you can reshape almost any c2c graph. Want a longer scarf? Extend the middle section by adding repeat rows of the same color. Prefer a smaller blanket? Shrink the maximum block count and adjust your decrease sequence accordingly. Want to design your own pixel image? Graph paper works perfectly. Draw each square on 5x5 grid paper, assign a yarn color to each value, and convert the drawing into a stitch chart.
Software makes this even easier. Several free online graph generators let you upload a photo, adjust the resolution, and export a printable c2c chart. You can also turn any photo into a custom pixel grid in our Photo-to-Pattern Studio. Once you have your block counts per color, plug them directly into our free C2C & Tapestry Yarn Yardage Calculator to find out exactly how many skeins to purchase for every shade—including your tension adjustments and a 15% safety buffer for color-change tails.
Plan your size around your available yarn stash and your patience level. Intricate portraits need fifty blocks or more, while bold graphic designs shine at thirty to forty blocks wide.
5 Easy C2C Crochet Patterns for Beginners
I have compiled five beginner-friendly c2c designs to get you started, but today we are going to focus on three of the most popular: a striped baby blanket, a quick practice dishcloth, and a diagonal geometric scarf. Each project teaches a different skill, from basic color switching to full increase-decrease shaping. Grab your hook, settle into your favorite chair, and let us make something.
C2C Baby Blanket: Simple Stripes
This project is pure joy. I recommend worsted weight acrylic for the main blanket because it is machine washable, soft against newborn skin, and stitches up quickly on a 5.5mm hook. For a standard crib-sized blanket finishing around 30 inches by 30 inches, you will need approximately seven 100-gram skeins of your primary color and three skeins each of two contrasting shades. The graph begins with one block in row one, increases by one block each row until row thirty, then decreases by one block each row until you reach a single block again. That gives you a perfectly square diagonal layout without any complicated motifs.
The stripe sequence is intentionally simple: three rows of cream, three rows of soft blue, three rows of blush pink, then repeat. Because c2c only uses one color per row, switching hues is almost effortless. Cut the yarn, pull the tail through the last loop, attach the new color with a knot or weave it in later, and continue. The finished blanket measures roughly 30x30 inches after blocking, with a gentle drape that does not weigh down tiny wrists. If you prefer a warmer version, swap the acrylic for a merino wool blend. Wool crimps nicely and traps heat, making it ideal for winter nurseries.
C2C Dishcloth: Quick Practice Project
Dishcloths are the perfect training wheels for c2c. They finish fast, cost very little, and teach you how to manage multiple colors without the pressure of a giant blanket. I always reach for 100% cotton or mercerized cotton for dishcloths because the fiber absorbs water beautifully and stands up to repeated washing without pilling. Work the project on a 3.5mm hook to keep the stitches tight enough to scrub surfaces without snagging.
A simple heart motif graph fits comfortably on a 15-block-wide grid. The heart occupies roughly seven blocks across at its widest point, leaving a clean margin around the edges. You will start with one white block, increase steadily until row seven, then decrease back down to one white block. The red heart color begins at row five, spans three blocks, and disappears by row nine. Switching colors happens cleanly at the edge of each row, so there is no carrying yarn across the back to hide. Finished size measures about 8 inches square after washing. I keep a stack of these in my kitchen, and honestly, making them feels like playing with edible Legos.
C2C Scarf: Diagonal Design
A c2c scarf looks deceptively complex but follows the exact same diagonal rules as the blanket. I suggest using a DK weight wool-alpaca blend on a 4.0mm hook for a scarf that is warm without being heavy. The design features a chevron pattern that peaks in the center and slopes back down toward the ends. The finished length should measure approximately 60 inches, with a width of 8 inches at the widest point.
The pattern increases from one block to thirty-five blocks, then decreases back to one. Each color section represents a different row count, creating sharp diagonal lines across the face of the scarf. Because the fabric is worked in one continuous diagonal direction, the edges stay naturally straight without seaming. If you want extra warmth, switch to a bulky yarn and a 6.0mm hook, though you will lose some of the fine geometric definition. Fingering weight silk or bamboo yarn works beautifully for a lightweight summer scarf, but it requires patience. Start with worsted or DK, master the increase and decrease rhythm, and then experiment with whatever fiber calls to you.
Frequently Asked Questions
How to read C2C crochet patterns and graph paper?
To read a C2C pattern or graph paper, follow the chart diagonally starting at the bottom corner (Row 1 = 1 square). Odd rows are worked upward along the diagonal, and even rows are worked downward. Each square on graph paper represents exactly one C2C block ([ch 3 + 3 dc]). Crossing off each diagonal row with a highlighter ensures you never lose your place.
What is C2C paper and how is it used in design?
C2C paper is grid graph paper where each square corresponds to one C2C crochet tile. Designers draw pixel art onto the grid, counting tiles per color to calculate yarn yardage. You can design on graph paper or use our C2C Yarn Calculator to budget skeins for every color in your chart.
What does C2C mean in crochet and what is the basic stitch?
C2C stands for 'Corner to Corner' crochet. It is a technique where you build a textured grid diagonally from one corner to the opposite corner. Each standard C2C block (tile) consists of a chain-3 turning space and 3 double crochet (dc) stitches worked into the previous row's chain-3 loop.
Why is my c2c project curling?
Curling usually comes down to three things: tight chain-3 spaces, a hook that is too small for your yarn, or working the fabric with inconsistent tension. When you pull every chain too tightly, the diagonal grain contracts inward. Fix it by stepping up your hook size by 0.5mm to 1.0mm, relaxing your grip, and blocking the finished piece with rust-proof pins.
How do I count rows in c2c?
Count the blocks along the diagonal edge instead of vertical lines. Row one has one block, row two has two blocks, row ten has ten blocks. During decreases, the count drops by one each row. Clip a row counter to your working yarn or highlight completed rows on your chart to stay on track.
Can I use any yarn for c2c?
Yes, but results vary by weight and fiber. Worsted weight acrylic is the easiest starting point because it shows blocks clearly and is forgiving. DK weight wool gives a softer drape, while bulky yarn speeds up the process but makes blocks less precise. Start with worsted weight acrylic, then experiment with cotton, alpaca, or silk blends once you master the rhythm.
Related Posts
Botanical Monstera Mini Tapestry Free Pattern
Crochet your own botanical monstera mini tapestry wall hanging with this free beginner-friendly pattern, row-by-row color chart, and step-by-step tips.
Beginner15 Crochet Shawl Patterns for Every Skill Level
Discover 15 stunning crochet shawl patterns for beginners to experts. Find free and paid designs, plus tips for choosing yarn and adjusting sizes.
Try Our Free Crochet Tools
Turn Your Photo Into a Crochet Pattern
Upload any photo and our AI generates a pixel-perfect crochet pattern with real yarn color matching in seconds.
Try AeternaCraft Studio Free →Calculate Yarn for Any Resize
Free amigurumi yarn & resizing calculator. Change hook, switch yarn, or scale a whole pattern — instant results with PDF export.
Open the Calculator →