5 Best Crochet Hooks for Beginners: Top Picks & Buying Guide
Find the perfect beginner crochet hook. I compare ergonomic designs, materials, and sizes to help you start crocheting without hand pain.
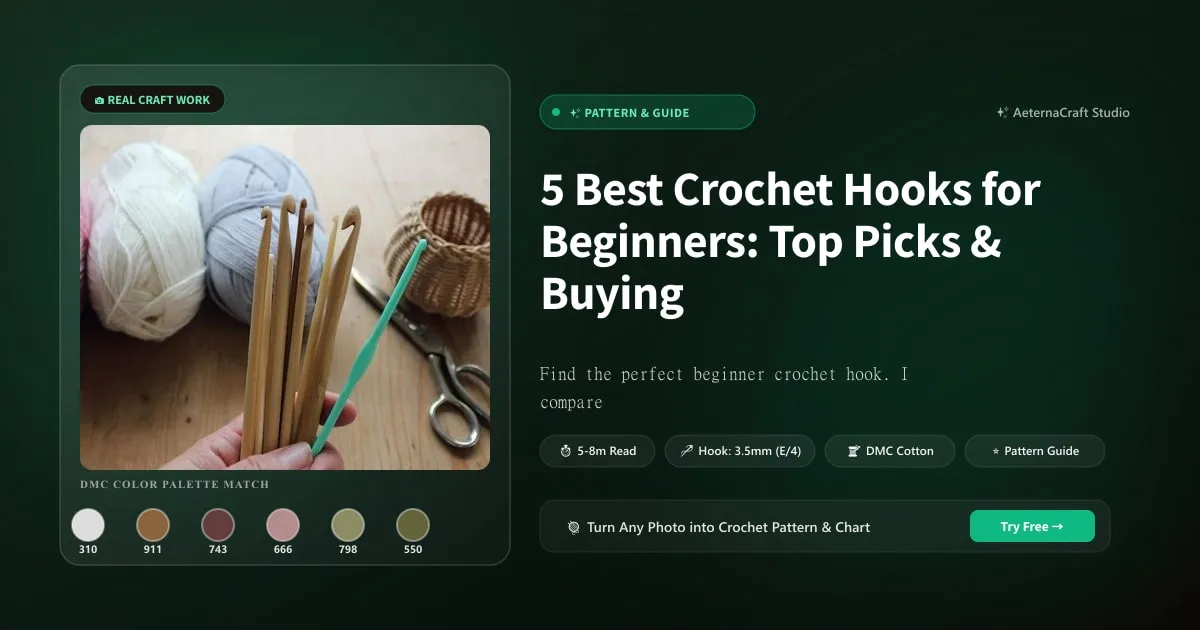
Why Choosing the Right Crochet Hook Matters for Beginners
Let’s be honest for a second. When I first picked up a hook, I grabbed whatever was lying on the counter—usually a stiff, cold piece of metal that felt like holding a chopstick. It wasn’t pretty. My tension was all over the map, and my thumb? Well, let’s just say my thumb developed a very strong opinion about what it thought about crocheting. You don’t want that experience. The right hook isn’t just a tool; it’s an extension of your hand. It changes how yarn flows, how tension holds, and whether you’ll finish your first project with a smile or a trip to the urgent care center for carpal tunnel (spoiler: we’re going for the smile).
How Hook Material Affects Your Stitches
The material you choose dictates the “feel” of your craft in three key areas: grip, weight, and temperature. Aluminum hooks, like the classic Susan Bates, are lightweight and smooth. They glide through stitches faster than anything else, which is great if you’re making granny squares for a blanket you’re desperately trying to finish before Christmas. However, that smoothness can be a double-edged sword. If your hands get sweaty—don’t worry, it happens to the best of us—your yarn might slip right out of the hook, leading to dropped stitches and a whole lot of frustration.
Then there’s bamboo. I love bamboo hooks. They have a natural warmth to them and, more importantly, friction. That tiny bit of resistance helps hold the yarn in place, making it easier to maintain consistent tension. If you’re working with slippery fibers like silk or mercerized cotton, bamboo is your best friend. But beware: bamboo can break if you press too hard or drop it on a tile floor. Years ago, I snapped a lovely 5mm bamboo hook because I was leaning on it while watching TV. Never again.
Plastic and ergonomic handles (like those silicone grips) offer a middle ground. They are warm to the touch and provide a cushioned surface that doesn’t dig into your palm during long sessions. Here is a quick comparison to help you visualize the differences:
| Material | Grip Factor | Weight | Best For |
|---|---|---|---|
| Aluminum | Slippery (Low) | Very Light | Fast work, tight gauges |
| Bamboo | Natural Friction (High) | Medium | Slippery yarns, warm feel |
| Plastic/Polymer | Moderate | Light | Budget sets, durability |
| Ergonomic Silicone | High Cushion | Heavier | Hand pain, long sessions |
The Importance of Hook Size and Yarn Weight
This is the question I get asked most often: “Which hook size should I start with?” If you buy a $30 set of tiny, delicate hooks designed for fingering weight lace yarn, you’re setting yourself up for failure. Not because you can’t do it, but because it’s hard on your eyes and your hands.
I always recommend starting with worsted weight yarn (often labeled as #4 on the skein) and a medium-sized hook. Specifically, look for a 5.0mm (H/8) or a 5.5mm (I-9). Why? Because worsted weight has enough body to show off your stitches clearly, so you can actually see what you’re doing. And a 5mm hook is substantial enough to handle without straining your fingers, but small enough to create a dense, sturdy fabric.
If you try to start with bulky yarn and a giant 15mm hook, your stitches will be loose and floppy, making it hard to learn proper tension. Conversely, starting with fingering weight and a 2.75mm hook means you’re counting stitches under a microscope. Start big, start easy.
Ergonomics: Preventing Hand Fatigue from Day One
“Why do my hands hurt when crocheting?” If you hear this, check two things: your posture and your hook. Most beginners cramp their hands because they are gripping the hook like they’re holding a hammer. We call this the “pencil grip” vs. the “knife grip.” Neither is wrong, but both require relaxation.
Ergonomic hooks are designed specifically to keep your wrist in a neutral position. Take the Clover Amour, for example. The handle is angled and cushioned, which reduces the twisting motion in your forearm. I remember a client coming to me years ago with severe wrist pain. She switched from a standard aluminum hook to an ergonomic one, and within two projects, her pain vanished. It’s not magic; it’s mechanics. By reducing the strain on your tendons, you can crochet for longer periods without taking breaks. If you plan on binge-crocheting a sweater, invest in comfort. If you’re just doing a quick scarf, a basic hook will do fine.
Top 5 Best Crochet Hooks for Beginners in 2024
After decades of testing hooks—from the cheap dime-store varieties to the handcrafted masterpieces—I’ve narrowed down the top five that actually make sense for someone just starting out. These aren’t just popular; they are reliable, accessible, and forgiving.
1. Clover Amour: The Gold Standard for Comfort
If I had to pick one hook to give to every new student I teach, it would be the Clover Amour. These hooks feature a soft, flexible silicone handle that contours to your hand. They come in full sets (sizes 2.5mm to 12mm), which is incredibly convenient. The hook itself is aluminum, so it glides smoothly, but the handle absorbs the pressure.
I’ve tested these against pricier options, and honestly, they punch way above their weight class. They cost around $15-$25 depending on the set. Are they perfect? The silicone can collect lint over time, so you might need to wipe them down occasionally, but that’s a minor trade-off for the comfort they provide. Beginners love them because they eliminate the “tight grip” anxiety. You can relax your hand, and the hook stays put.
2. Boye Ergonomic Crochet Hooks: Budget-Friendly Comfort
Not everyone wants to spend $20 on a single hook or even a set. The Boye Ergonomic line is fantastic for budget-conscious crafters. These hooks have a soft rubber insert inside a plastic shell. They are lightweight and affordable, usually coming in sets for under $10.
The downside? They aren’t quite as durable as the Clover Amour. The rubber can wear down or tear if you use metal stitch markers aggressively. But for learning the basics? They work beautifully. They provide enough cushion to prevent blisters and the plastic exterior makes them easy to clean. If you’re unsure if you’ll stick with crochet, this is the low-risk entry point.
3. Susan Bates Silvalume: Lightweight and Smooth
For those who prefer metal, the Susan Bates Silvalume is a legend. Unlike the shiny, polished aluminum hooks, these have a matte finish that provides just a bit of traction. The head is inline, meaning the shaft aligns directly with the handle, rather than being offset at an angle (like a Tunisian or tapered hook). This alignment allows for precise stitch formation.
However, there is a learning curve. Because they are so smooth and lightweight, some beginners find their hands move too fast, leading to uneven tension. I had a mentee once who said using these made her feel like she was “driving a sports car”—fast, but scary if you don’t know how to steer. Stick with these if you like metal and precision.
4. Addi Swing Crochet Hooks: Unique Design for Knitters
The Addi Swing has a bent handle that looks almost comical at first glance. But that bend is intentional. It keeps your wrist straight while you work, reducing the ulnar deviation (the bending of the wrist sideways) that causes pain. It’s particularly good if you hold the hook in the “knife grip” style.
Pros: Excellent for wrist health. Cons: They feel weird until you get used to them. Also, because the hook head is offset, it can be slightly harder to see exactly where you’re inserting the tip for complex stitches. I wouldn’t recommend this as your first hook, but it’s a great second purchase if you’re experiencing strain.
5. Furls Streamlines: Handcrafted Luxury
Okay, let’s talk about the elephant in the room: expensive hooks. Furls Streamlines are handmade resin hooks that weigh more than standard aluminum ones. The added weight is actually a feature—it uses gravity to pull the hook through the yarn, which can stabilize tension for some people. They look stunning and are incredibly durable.
But here’s the truth: Do you need to spend $30+ on a single hook when you’re learning? Probably not. These are investments. I love them, and I’m proud to own them, but for a beginner, the price-to-performance ratio isn’t as high as the Clover Amour. Buy these if you have disposable income and want a heirloom-quality tool that feels luxurious in your hand.
How to Choose the Best Crochet Hook for Your Needs
So, you’ve looked at the options. Now what? Choosing the right hook comes down to understanding anatomy, budget, and where you shop.
Hook Anatomy: Throat, Head, and Handle Explained
You might not think about it, but the shape of the hook tip matters. There are generally two types: Tapered and Inline.
A tapered hook (like most Boye or Clover Amour hooks) has a rounded throat that gradually narrows into the tip. This design is gentler on the yarn loops, making it easier to insert the hook and pull up a loop without snagging. It’s forgiving and great for loose work.
An inline hook (like Susan Bates or certain Furls models) has a sharper, more defined throat. The tip points directly forward. This offers more precision, which is helpful if you’re working with intricate lace patterns or tight stitches. However, it can snag yarn more easily, which might frustrate a beginner.
Ask yourself: Do I want ease and speed (tapered), or precision and control (inline)? For 90% of beginners, a tapered or slightly rounded head is much more forgiving as you learn to yarn over and pull through.
Budget vs. Premium: Is It Worth Spending More?
This is a common dilemma. You see a set of hooks for $5 and another for $50. What’s the difference? Durability and consistency. Cheap hooks often have inconsistent sizing—meaning a “5mm” hook from Brand A might actually measure 4.8mm, throwing off your gauge. Premium brands like Clover, Addi, and Furls measure precisely.
That said, you don’t need to buy premium all at once. My advice? Spend $15–$20 on one high-quality ergonomic hook in your preferred size. Use it for practice. If you find yourself crocheting daily for six months and still enjoying it, then invest in a matching set or upgrade to luxury handles. Don’t buy a full set of expensive hooks before you know you’ll use them. Wasted money is worse than wasted yarn.
Where to Buy: Online vs. Local Craft Stores
Local yarn shops (LYS) are amazing for this. Yes, their prices might be slightly higher, but you can hold the hooks. Feel the weight. Try the grip. See if the silicone handle slips when your hand gets sweaty. If your local store carries Clover or Boye, go there first.
Online, Amazon and specialized craft sites offer the best selection and prices. If you buy online, check the reviews for mentions of “sharp tips” or “cracking handles.” Also, be wary of counterfeit hooks. If a set of Furls looks too good to be true ($10 for a set?), it probably is. Stick to reputable retailers for premium brands.
Common Mistakes Beginners Make When Buying Crochet Hooks
We’ve all made mistakes. I once bought a hook made of titanium because I thought “more metal = better.” It was heavy, cold, and made my hands ache. Let’s save you that trouble.
Choosing the Wrong Size for Your Yarn
This is the cardinal sin. You buy bulky yarn and a tiny 3.5mm hook. Your stitches are tight as a drum, and you’re pulling harder than you would on a yoga mat. Or you buy fingering weight yarn with a 10mm hook, and your fabric looks like a net.
Always check the yarn label. It will suggest a hook size. If it says 5mm-6mm, start with 5.5mm. Here is a quick reference chart for common beginner yarn weights:
- Fingering/Sock: 2.25mm - 3.5mm (J/5 - E/4) — Hard for beginners
- DK/Light Worsted: 3.75mm - 4.5mm (F/5 - G/6) — Doable, but smaller
- Worsted/Aran: 5.0mm - 5.5mm (H/8 - I/9) — Best for Beginners
- Bulky/Chunky: 6.5mm - 9.0mm (K/10 - N/15) — Fast, but tricky to grip
Ignoring Ergonomics and Causing Hand Pain
Don’t push through pain. If your thumb hurts, stop. Adjust your grip. Switch to a larger hook to loosen up. Invest in an ergonomic handle. Many beginners think pain is “part of the process.” It isn’t. It’s a signal that something is wrong. Listen to it.
Buying a Full Set Instead of Testing a Single Hook
I see this all the time. Someone buys a 30-hook set for $20. Three months later, they’ve used one hook twice and returned the rest. Sets are great if you know your sizes, but for a beginner, a single, high-quality hook in 5.5mm is infinitely more useful than a box of random sizes you won’t understand yet. Master the medium. Then expand.
Final Thoughts: Your Hook Is Your Handshake
Choosing your first crochet hook is like choosing your first pair of running shoes. Get it wrong, and you’ll hate the experience. Get it right, and you’ll wonder why you didn’t start sooner. I’ve been at this for over twenty years, and I still get a little thrill when I pick up a new hook. The way it feels, the way it clicks through the yarn—it’s personal.
My honest recommendation? Start with a Clover Amour in 5.5mm and a skein of worsted weight cotton or acrylic. Practice your single crochet and double crochet until they feel natural. Then, if you love it, branch out. Try bamboo for the warmth. Try inline for the precision. Try a Furls if you want to treat yourself. But don’t overthink it. The best hook is the one that makes you want to pick it up and make something. Now go make something.
Frequently Asked Questions
What is the best crochet hook size for a beginner?
Stick with 5.0mm (H/8) or 5.5mm (I/9). These sizes pair perfectly with worsted weight (#4) yarn. They are large enough to see your stitches clearly, which helps with error correction, but small enough to produce a fabric that isn't overly drapey or loose. Avoid sizes below 4.0mm until you're comfortable with basic stitches like single crochet (sc) and double crochet (dc).
Are ergonomic crochet hooks worth it for beginners?
Absolutely, especially if you plan on crocheting for more than 20 minutes at a time. If you have arthritis, tendonitis, or simply get cramps easily, an ergonomic hook like the Clover Amour or Furls Streamlines can change your life. They distribute pressure evenly across your palm rather than concentrating it on your thumb and index finger. Even if you don't have pain now, building good habits early prevents injury later.
What is the difference between inline and tapered crochet hooks?
Inline hooks (like Susan Bates) have a throat depth flush with the shaft, which grabs yarn cleanly and helps beginners maintain uniform loop sizes. Tapered hooks (like Clover Amour or Boye) have a rounded head and gentle throat slope, making it faster and smoother to glide into tight stitches without snagging.
Related Posts
Botanical Monstera Mini Tapestry Free Pattern
Crochet your own botanical monstera mini tapestry wall hanging with this free beginner-friendly pattern, row-by-row color chart, and step-by-step tips.
Beginner15 Crochet Shawl Patterns for Every Skill Level
Discover 15 stunning crochet shawl patterns for beginners to experts. Find free and paid designs, plus tips for choosing yarn and adjusting sizes.
Try Our Free Crochet Tools
Turn Your Photo Into a Crochet Pattern
Upload any photo and our AI generates a pixel-perfect crochet pattern with real yarn color matching in seconds.
Try AeternaCraft Studio Free →Calculate Yarn for Any Resize
Free amigurumi yarn & resizing calculator. Change hook, switch yarn, or scale a whole pattern — instant results with PDF export.
Open the Calculator →