Crochet Cat Tapestries: 7 Tips for Perfect Pet Portraits
Learn to crochet cat tapestries with custom colors, shapes, and finishing techniques. Get tips for Lady Bagel, Sir Cheddar, and your own feline.
Why Customizable Cat Tapestries Are a Hit
Let’s be honest: there’s nothing quite like the way our feline friends stare at us. It’s a look that says, “I tolerate your existence,” or sometimes, “Feed me now.” When we love our cats as much as I’ve loved my chaotic menagerie over the last twenty years, we want to capture that personality. We don’t just want a generic silhouette—we want Barnaby’s specific slouch, or Mittens’ distinctively crooked ear. That’s where customizable cat tapestries shine. They aren’t just decorations; they’re tiny, crocheted love letters to our furry bosses.
I remember years ago, I tried to crochet a portrait of my first cat, a ginger tabby named Marmalade. I used a standard free pattern online. The problem? The pattern was rigid. It assumed a perfect orange tabby with a white patch on the chest. Marmalade had no white patches, and his orange was more of a muddy apricot than bright citrus. I spent three nights ripping out rows, frustrated because I couldn’t make the yarn match the soul of the cat. That was the day I decided I needed better tools and more flexible designs.
That’s why I’m so passionate about patterns like the one by @teeththief_crochet. These designers understand what we need. They offer structures that allow for the specific quirks of “Lady Bagel” or “Sir Cheddar”—those internet-famous archetypes that represent distinct personalities rather than just species. The availability of expansions, like jester hats or wizard robes for your cat, adds a layer of humor and character that a plain square just can’t achieve. You’re not just making a cat; you’re making your cat, perhaps dressed up for a Halloween party that never happens.
Finding these patterns requires a bit of hunting. You won’t usually find them at the big-box craft store counter. Look on Ravelry, Etsy, or Instagram for designers who specialize in tapestry crochet. When you browse, check the comments. Real crafters leave feedback there. Ask yourself: Does this pattern explain how to change colors? Does it offer guidance on modifying stitch counts for wider or narrower faces? A good designer anticipates that your cat might be chubby or slender and gives you the flexibility to adjust. This isn’t just about buying a PDF; it’s about investing in a design philosophy that respects the individuality of your pet. If a pattern feels too restrictive, put it down. Your cat deserves a bespoke fit, even if it’s just in cotton and wool.
Customizing Your Cat Tapestry Pattern
Once you have your pattern, the fun really begins: translating your three-dimensional, purring companion into two-dimensional yarn art. The most challenging part? Colors. Cats are not walking rainbows; they’re subtle masters of shading and texture.
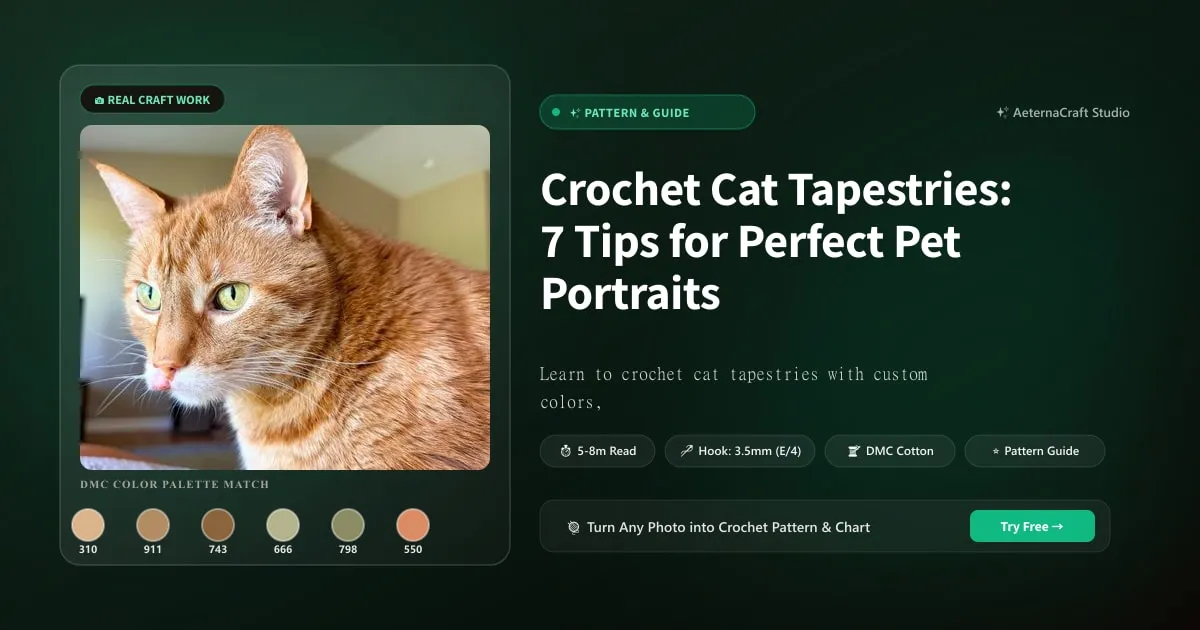
Start by gathering small scraps of yarn that match your cat’s coat. If you don’t have access to yarn samples, look up your cat’s photo on a neutral background. Pay attention to the transitions. A black-and-white tuxedo cat isn’t just black and white; there’s often a soft gray underbelly or a smudge of charcoal around the nose. I use a simple grid method for this. I print my cat’s photo, overlay a grid, and pick the dominant color for each square. Then, I look for a brand like Lion Brand or Scheepjes that has a shade close enough. Don’t stress about being perfect. If you’re aiming for a Siamese, you need those seal-point ears and tail, but also that creamy, warm body. A cool white will look dead against the dark points. Warm ivory or oatmeal usually works better for capturing the living warmth of a cat.
Beyond color, you need to adapt the physical shape of the tapestry. Most basic patterns are built on a rectangular grid, but cats are complex geometries. A Persian cat has a wide, squished face, while a Siamese has a wedge-shaped head. If you’re working with a pattern designed for a “standard” house cat, you’ll need to tweak the stitch counts. For a wider face, you might add 2 or 4 stitches evenly spaced across the row. For a narrower muzzle, you’ll decrease by 2 stitches every other row.
I once tried to crochet a Maine Coon, which has massive, tufted ears and a broad chest. The standard ear shaping in the pattern resulted in ears that looked like little triangles glued to the head. No good. I had to manually increase the height of the ear sections by adding 2 extra rows before decreasing back to the forehead width. I also added surface crochet details using a contrasting color to mimic the fur tufts. This is where the “tapestry” technique becomes your best friend. You aren’t limited to the base grid; you can float colors across the back to create highlights and shadows.
Another question I often hear from beginners is, “How do I handle the eyes?” Eyes are the window to the soul, and in crochet, they’re the window to the personality. A bored cat has heavy lids; an alert cat has round, wide eyes. Adjust the number of stitches in the eye area. For wide-eyed curiosity, use 3 rows of the eye color before switching back to the fur. For sleepy indifference, use 1 row. Don’t be afraid to break the grid slightly here. A little asymmetry makes the portrait feel alive, unlike a robotic doll stare.
Tapestry Crochet Techniques for Clean Results
Now, let’s talk mechanics. Tapestry crochet, also known as Intarsia (though technically different, many of us use the terms loosely until the experts correct us gently), involves carrying multiple colors through the work. The biggest pain point? Gaps. You know the kind. You change colors, pull tight, and suddenly there’s a tiny hole where the cat’s whisker should be. It’s frustrating, honestly. But with practice, you can eliminate them entirely.
The secret lies in how you handle the yarn tails. When you introduce a new color, do not just tie it off or leave a long tail to weave later—that creates bulk and potential holes. Instead, carry the unused color along the back of the work. Here is the golden rule: Twist the strands. Before you start crocheting with the new color, catch the old strand inside the loop of the new color. This twists them together, securing them and preventing gaps. I like to hold both strands between my fingers as I insert the hook. It takes muscle memory to get right, but it ensures a seamless transition.
Speaking of tension, this is where I made my earliest mistakes. Years ago, I tended to pull my tapestry work too tight, especially when changing colors. The result? The piece curled like a potato chip, and the stitches looked distorted. To avoid this, keep your tension relaxed but consistent. If your tapestry starts curling, check your hook size. You might be using a hook that is too small for the yarn weight, causing the fabric to contract.
Choosing the right materials is crucial for detailed work. I recommend worsted weight (Category 4) or DK weight (Category 3) yarns for cat tapestries. Bulky yarn might hide the detail you need for a tiny nose, and fingering weight can be overly fiddly for a large portrait. For fiber, cotton or a cotton-acrylic blend is my top choice. Why? Because cotton doesn’t stretch like wool does. Wool has elasticity, which means your tapestry can warp over time or while you’re working. Cotton holds its shape rigidly, which is perfect for the geometric precision of tapestry crochet. Brands like Lily Sugar’n Cream or Scheepjes Softglow are staples in my stash.
For hooks, stick to ergonomic handles if you’re doing large pieces. I usually use a 4.0mm (G/6) hook for worsted weight cotton. If your yarn label suggests a range, err on the smaller side for tapestry work. Tighter stitches mean less gap visibility. Always make a swatch. Not just a square of single crochet, but a swatch that mimics the color changes in your cat pattern. Measure it. If it’s too loose, go down a half millimeter to 3.5mm. If it’s too tight, go up to 4.5mm. This small investment of time saves hours of frustration later.
Finishing and Displaying Your Cat Tapestry
You’ve finished the last stitch. You cut the yarn, weave in the final tail, and stand back. It looks… flat. Too flat. Raw tapestry crochet often needs help to sit nicely in the world. This is where blocking comes in. Blocking is not just for lace shawls and wool sweaters. It is essential for giving your cat tapestry a polished, professional look.
I prefer wet blocking for cotton blends. Soak the finished piece in lukewarm water with a little bit of hair conditioner or specialized wool wash for about 15 minutes. This relaxes the fibers. Gently squeeze out the excess water—never wring it, or you’ll distort the shape. Lay it flat on a blocking mat or a clean towel. Use rust-proof pins to stretch the edges to your desired dimensions. If the tapestry is puffy or uneven, pin it into a perfect rectangle. Let it dry completely—usually 24 hours. Once dry, remove the pins. You’ll notice the stitches open up, becoming more uniform, and any minor tension inconsistencies smooth out.
Displaying your creation is the final celebration. You could frame it. A simple black or natural wood frame works well. However, tapestry crochet can look a bit stiff in a deep frame. An alternative is to turn it into a cushion. Sew the tapestry to the front of a pre-made pillow form, like a 12-inch by 12-inch square. This adds dimension and makes it usable. Or, attach it to a backing fabric—maybe a soft flannel or velvet—and hang it from a wooden dowel. This creates a rustic, gallery-wall vibe that feels cozy and inviting.
If you’re worried about the raw edges looking unfinished, consider adding a border. A simple single crochet border in a neutral color, like cream or gray, can frame the chaos of the multi-color work beautifully. Just remember, when adding a border, work evenly around the perimeter. Count your stitches. If you added extra stitches on one side, the piece will ruffle. If you missed some, it will pucker. Consistency is key. I once added a border to a large cat portrait and forgot to count the corners, resulting in a wavy edge that looked like a nervous smile. Lesson learned: always measure twice, crochet once.
Troubleshooting Common Issues
Even with the best techniques, things go wrong. Tension issues are the most common. If your tapestry looks like it’s breathing heavily—puffing up in spots—your tension is too loose. Tighten your grip slightly. If the edges are scalloping outward, you’re pulling too tight. Relax. Sometimes, changing your hook size helps. If you’re using a 4.0mm hook and the fabric is still too loose, try a 3.5mm. Small adjustments can make a huge difference.
Color mistakes happen. Maybe you picked up the wrong shade of blue for the eyes, or you dropped a stitch and lost the pattern alignment. Before you consider frogging the whole thing—which feels like losing a limb—try fixing it. Duplicate stitch is your savior here. Using a yarn needle and a strand of the correct color, you can mimic existing stitches over your mistake. It’s tedious, but it’s invisible to the naked eye once done correctly. For larger errors, surface crochet can cover bumps or misplaced colors by floating a thread over the back and anchoring it on the front. It’s not permanent, but it’s a great quick fix if you’re in a pinch.
Lastly, don’t be afraid to ask for help. Join online communities dedicated to tapestry crochet. Show your work-in-progress. Fellow crafters are usually generous with advice. After all, we’ve all been there, staring at a blob of yarn, wondering if it will ever look like a cat. Trust the process, keep your tea hot, and let your love for your pet guide your hook.
Frequently Asked Questions
How do I choose the right yarn colors for my cat's portrait?
Start by gathering small yarn scraps that match your cat's coat. Photograph your cat against a neutral background and pay attention to subtle transitions—a black-and-white tuxedo cat often has soft gray underbelly or charcoal smudges around the nose. Use a grid method: print the photo, overlay a grid, and pick the dominant color for each square. For Siamese cats, warm ivory or oatmeal works better than cool white to capture living warmth.
What hook size and yarn weight work best for tapestry crochet cat portraits?
I recommend worsted weight (Category 4) or DK weight (Category 3) yarns. Bulky yarn hides detail for tiny noses, and fingering weight is too fiddly for large portraits. For hooks, I use a 4.0mm (G/6) hook for worsted weight cotton. If your yarn label suggests a range, err on the smaller side for tighter stitches and less gap visibility. Always make a swatch that mimics your color changes before starting.
How do I fix color mistakes or tension issues in my cat tapestry?
For color mistakes, use duplicate stitch—mimic existing stitches over the error with a yarn needle and correct color. It's invisible once done. For larger errors, surface crochet can cover bumps by floating a thread over the back. If your tapestry curls like a potato chip, your tension is too tight—relax your grip or try a 3.5mm hook instead of 4.0mm. If edges scallop outward, you're pulling too loose.
Related Posts
How to Knit a Birthday Hoodie: 7 Custom Sweater Tips
Learn from a viral Reddit post on knitting a birthday hoodie. Get tips on pattern selection, sizing, yarn choices, and finishing techniques for a perfect fit.
AdvancedHow to Crochet Your Own Wedding Dress: Tips & Pattern Review
Learn from a real crafter's experience crocheting the Everlasting Wedding Dress. Get tips on yarn choice, time management, and overcoming common challenges.
Try Our Free Crochet Tools
Turn Your Photo Into a Crochet Pattern
Upload any photo and our AI generates a pixel-perfect crochet pattern with real yarn color matching in seconds.
Try AeternaCraft Studio Free →Calculate Yarn for Any Resize
Free amigurumi yarn & resizing calculator. Change hook, switch yarn, or scale a whole pattern — instant results with PDF export.
Open the Calculator →