How to Crochet Your Own Wedding Dress: Tips & Pattern Review
Learn from a real crafter's experience crocheting the Everlasting Wedding Dress. Get tips on yarn choice, time management, and overcoming common challenges.
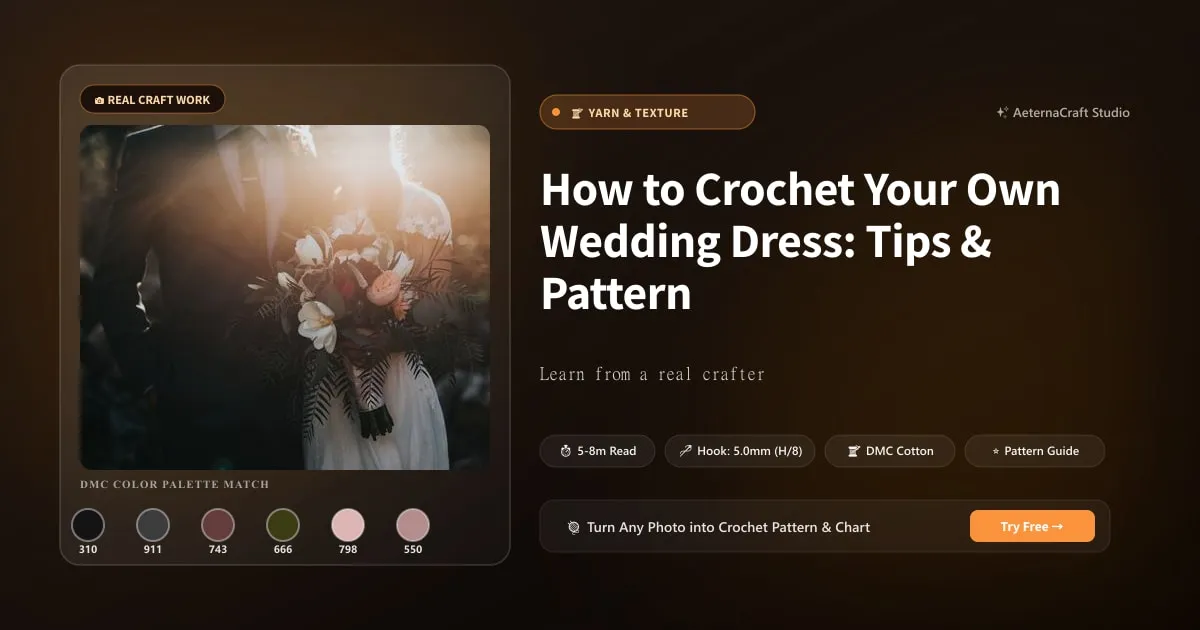
If you’re staring at a mountain of yarn and dreaming of walking down the aisle in something you stitched yourself, you’ve probably already stumbled upon The Everlasting Wedding Dress pattern by Jenny King. I remember when I first laid eyes on this design. It wasn’t just the beauty of it—though, honestly, looking at that cascade of delicate loops had me swooning—but the structure. It’s rated as intermediate to advanced, which sounds intimidating until you realize that “advanced” here mostly means “you need patience.” It doesn’t require you to be a master of complex colorwork or impossible geometric shaping; it requires consistency. And thank heavens, I have plenty of that.
What makes this pattern particularly suitable for a wedding dress isn’t just the aesthetic; it’s the way the stitches interact with light. The pattern relies heavily on openwork techniques, primarily using single crochet (sc), double crochet (dc), and chain spaces to create that ethereal, airy look. But the real secret weapon? The fiber choice. Jenny’s original recommendation leans heavily toward bamboo rayon, and after years of trial and error—some of them quite expensive—I can tell you why that matters so much.
Bamboo rayon is a dream for bridal wear. Why? Because of the drape. When you’re wearing a cotton wedding dress, it tends to hold its shape rigidly, almost like a stiff sheet. Silk blends offer luxury, yes, but they can be slippery and difficult to manage while you’re crocheting. Bamboo rayon, however, has this beautiful, fluid weight. It hangs off the body in a way that feels like liquid moonlight. It has a subtle sheen that catches the candlelight without looking flashy, and it’s incredibly soft against the skin. For a garment you’ll be wearing for twelve hours or more, comfort is non-negotiable.
I recall a project from back in the day where I tried to make a summer gown out of 100% cotton mercerized yarn. I was obsessed with the shine. But when I finished it, it felt like I was wearing a woven blanket. It didn’t move with me; it moved around me. With bamboo rayon, the fabric becomes part of your movement. That’s crucial for a bride who needs to dance, hug, and breathe.
That said, let’s talk about alternatives. Some of you might be asking, “Can I use acrylic?” Technically, yes. Acrylic is durable and easy to care for. But honestly, cheap acrylic looks… cheap under flash photography. It lacks that natural luster. If you’re on a budget, look for a high-quality acrylic blend with a rayon component, or perhaps a lightweight wool-silk blend if you’re having a winter wedding. But if you want that true bridal elegance, stick to bamboo, cotton-linen blends for a stiffer structure, or pure silk if you’re feeling brave and have deep pockets. Just know that silk can split and tangle easily if you aren’t careful with your tension.
Time Management and Realistic Scheduling
Okay, put down the tea. Let’s talk about the elephant in the room: Time. Or rather, the complete lack of it.
One of the most common pain points I see in forums is people underestimating how long it takes to crochet a full garment. When I started The Everlasting, I thought, “I’m a fast crocheter. I’ll whip this up in a weekend!” Spoiler alert: I did not whip it up in a weekend. I spent the first three months staring at my hoop, wondering where my life went. If you are planning to make your own dress, you need to treat this like a project with a hard deadline, not a hobby you pick up when you’re bored on Tuesday nights.
So, how long does it really take? Based on my experience and talking to other makers who tackled similar lace-style gowns, a realistic timeline for a beginner to intermediate crocheter is between three to six months of dedicated work. If you’re working a full-time job and only crocheting in the evenings and weekends, aim for six months. If you’re retired, a stay-at-home parent, or willing to sacrifice your social life for two intense months, you might pull it off in eight to ten weeks. But that is hardcore.
Here is a breakdown of a sample timeline I wish I had followed:
- Weeks 1-2: Gauge Swatching and Yarn Testing. Do not skip this. I wasted two weeks because my initial gauge was off. You need to make a large swatch—at least 6 inches by 6 inches—wash it, dry it, and measure it again. Yarn behaves differently after its first bath.
- Weeks 3-4: Bodice Construction. This is the hardest part structurally. You are fitting to your actual body. Allow extra time for adjustments here.
- Weeks 5-8: The Skirt. This is the volume phase. It’s repetitive, which is good for meditation but bad for monotony. Plan your entertainment!
- Weeks 9-10: Sleeves and Details. Whether you’re doing cap sleeves, long sleeves, or off-the-shoulder, this adds significant time.
- Weeks 11-12: Blocking and Assembly. This is where the magic happens. You will spend days pinning your pieces into shape.
And please, add a buffer. Life happens. Family emergencies, job stress, or just plain burnout. If your wedding is in June, start no later than December. I learned this the hard way when I realized I had three weeks left and my skirt was only half done. The panic induced more mistakes than anything else. I ended up using a smaller hook—a 3.5mm instead of the recommended 4.0mm—to tighten my stitches, which ruined the drape I’d worked so hard to achieve.
Does anyone else feel that anxiety creep in when the deadline approaches? Absolutely. But remember, slow is smooth, and smooth is fast. Rushing a lace pattern leads to dropped stitches, uneven tension, and a final product that doesn’t fit. Give yourself the gift of time.
Yarn Selection and Substitutions
Choosing your yarn is like choosing a partner—it defines the entire relationship. For a wedding dress, you need yarn that offers drape, strength, and a pleasant hand-feel. Let’s dig into the specifics, because “just buy white yarn” is terrible advice.
First, consider the weight. Most patterns for dresses like The Everlasting call for DK (Double Knitting) or light worsted weight yarn. Why? Because finer yarn allows for more intricate lace details. If you use bulky yarn, your dress will look like a winter sweater, not a bridal gown. However, if you are making a beach wedding dress and want something heavier and more textured, you might opt for a worsted weight cotton. But be warned: cotton has no stretch. If your gauge is even slightly off, the dress will be too tight or too loose.
I recommend sticking to the fiber Jenny suggests: bamboo rayon. It’s strong enough to hold its shape but soft enough to drape beautifully. It’s also hypoallergenic, which is a nice bonus if you have sensitive skin. But what if you can’t find it? What if your local store only stocks acrylic?
Here is my tip: Look for “bamboo-like” acrylics. Many brands now produce acrylic blends that mimic the drape of rayon. They won’t have the exact same breathability, but they will hang similarly. Avoid pure 100% acrylic if you can help it; it tends to be static-prone and can look shiny in a plastic-y way under lights.
When selecting yarn, always check the yardage. A wedding dress consumes a surprising amount of fiber. For a medium-sized dress, you might need anywhere from 3,000 to 5,000 yards, depending on the length and fullness. Buy 20% extra. I know it’s tempting to save money, but dye lots vary. If you run out of yarn halfway through the skirt and have to buy a new ball from a different batch, the color difference might be subtle, but under harsh sunlight? It’s obvious.
Also, think about care. Will you need to dry clean it? Or can you hand wash it? Bamboo rayon is generally easy to care for—it can be machine washed on gentle, but laying it flat to dry is best to prevent stretching. Cotton can be washed hotter but may shrink if not pre-shrunk. Silk requires dry cleaning or very gentle hand washing. Given that you’ll be eating, drinking, and possibly sweating on your wedding day, choose a fiber that can handle a little bit of mess.
Have you ever bought a skein of yarn only to find it pilled after one wash? It’s infuriating. Always read reviews. Look for comments about “pilling,” “splitting,” or “colorfastness.” A dress is a long-term investment, even if it’s just for one day. Make sure the yarn stands up to the occasion.
Adding Personal Touches: Beads and Belt
This is where the rubber meets the road. Or rather, where the needle meets the thread. Adding beads to a crochet dress is tricky. I know many of you, myself included, have stared at a pile of tiny glass beads and felt utterly defeated. The Everlasting pattern often includes a belt area or specific zones for embellishment, and getting this right separates a homemade look from a designer piece.
There are two main ways to add beads: pre-stringing and attaching later. Pre-stringing is time-consuming but allows for very intricate, dense patterns. You string the beads onto your yarn before you start crocheting. This is great for the bodice if you want a shimmering effect. However, if you make a mistake, you have to unravel the whole section. Attaching later is easier for beginners. You sew beads onto the finished fabric using a needle and thread. This gives you more control over placement.
For the belt, I have to confess a failure. My first attempt involved trying to attach a pre-made beaded belt directly to the dress. It was a disaster. The bulk was enormous, and it pulled the fabric unevenly, creating a weird dip in the waist. Years ago, I made the mistake of assuming I could just sew it on top. Don’t do that. Instead, crochet the belt as part of the dress or create a separate, flexible chain of beads that is sewn into the seam allowance. This hides the raw edges and distributes the weight better.
If you’re designing your own belt, plan the length carefully. Measure your natural waist and add two inches for ease. Then, decide on the bead density. Do you want a solid band of crystals or intermittent sparkles? Intermittent is often more elegant and less heavy. Use a beading needle—size 10 or 12—and a thread that matches your yarn color exactly. If you can’t find matching thread, use clear monofilament, but be careful, as it can kink.
A pro tip: Test your bead spacing on a scrap piece of fabric before committing to the dress. You want the beads to sit flush against the fabric, not bunch up. If you’re using larger beads, you might need to space them out more. Smaller seed beads can go closer together.
Also, consider the closure. A hidden zipper might be too stiff for a lace dress. Instead, try a series of decorative buttons or even a fabric tie. If you must use a zipper, ensure it’s invisible and sew it in gently to avoid distorting the lace. Remember, the belt should accentuate your waist, not squeeze it. Comfort is key.
Fit Adjustments and Customization
No pattern fits everyone perfectly. Even if you follow the measurements to the millimeter, your body might have curves that the pattern doesn’t account for. Bust darts, waist shaping, and hip flare are things you might need to adjust.
If you have a larger bust, you may need to add a dart to the bodice. This involves folding the fabric and sewing a triangular shape to take in excess material. Alternatively, you can crochet a separate panel and attach it. For waist shaping, you can decrease stitches gradually as you move down from the bust. This creates a more hourglass silhouette.
Length adjustments are common too. If you’re shorter, you can simply stop crocheting the skirt earlier. If you’re taller, add more rows. But be careful with adding rows to the skirt—it changes the proportion. You might want to add lace repeats rather than just random rows.
Blocking is where your dress truly takes shape. After you finish each piece (bodice, skirt, sleeves), you must block it. This involves wetting the fabric and pinning it to a foam board or towel in the correct shape and dimensions. For bamboo rayon, steam blocking is effective. Use a steam iron held slightly above the fabric to avoid crushing the texture. Pin the edges to stretch the lace open and define the motifs.
I cannot stress this enough: Blocking fixes minor fit issues. If your sleeve is too tight, blocking it can relax the stitches. If your bodice is gaping, blocking can tighten it. It’s like a second opinion from a tailor. Spend time here. Take photos of your pinned pieces for reference during assembly.
Final Tips and Resources
As we wrap up, remember that crocheting a wedding dress is a journey. Start early, test your yarn, keep detailed notes, and don’t rush the finishing. Join communities on Ravelry or Instagram for support. Share your progress, ask questions, and celebrate the small victories. You’ve got this.
Frequently Asked Questions
How long does it really take to crochet a wedding dress?
Based on my experience, a realistic timeline is three to six months of dedicated work. For a beginner to intermediate crocheter working full-time, aim for six months. If you can crochet daily, you might finish in eight to ten weeks. Always add a buffer for life emergencies and burnout.
What yarn is best for a crochet wedding dress?
Bamboo rayon is my top recommendation. It offers beautiful drape, a subtle sheen, and is soft against the skin. Avoid pure acrylic if possible—it looks cheap under flash photography. For alternatives, try a high-quality acrylic blend with rayon, a lightweight wool-silk blend for winter, or cotton-linen for a stiffer structure.
Can I add beads to my crochet wedding dress?
Yes, but plan carefully. Pre-string beads onto your yarn for dense patterns, or attach them later with a needle and thread for more control. For a belt, crochet it as part of the dress or sew a flexible bead chain into the seam allowance to avoid bulk and distortion. Always test bead spacing on a scrap piece first.
Related Posts
Crochet Cat Tapestries: 7 Tips for Perfect Pet Portraits
Learn to crochet cat tapestries with custom colors, shapes, and finishing techniques. Get tips for Lady Bagel, Sir Cheddar, and your own feline.
Tools15 Creative Uses for Tiny Crochet Projects: Mini Bag Ideas
Stuck with tiny crochet projects like a mini bag? Discover 15 creative uses, gift ideas, and scaling tips from a 20-year crocheter.
Try Our Free Crochet Tools
Turn Your Photo Into a Crochet Pattern
Upload any photo and our AI generates a pixel-perfect crochet pattern with real yarn color matching in seconds.
Try AeternaCraft Studio Free →Calculate Yarn for Any Resize
Free amigurumi yarn & resizing calculator. Change hook, switch yarn, or scale a whole pattern — instant results with PDF export.
Open the Calculator →