How to Crochet a Granny Square: 12-Step Beginner Guide
Learn how to crochet a granny square with my 12-step beginner guide. Includes tips for perfect corners, color changes, and joining squares.
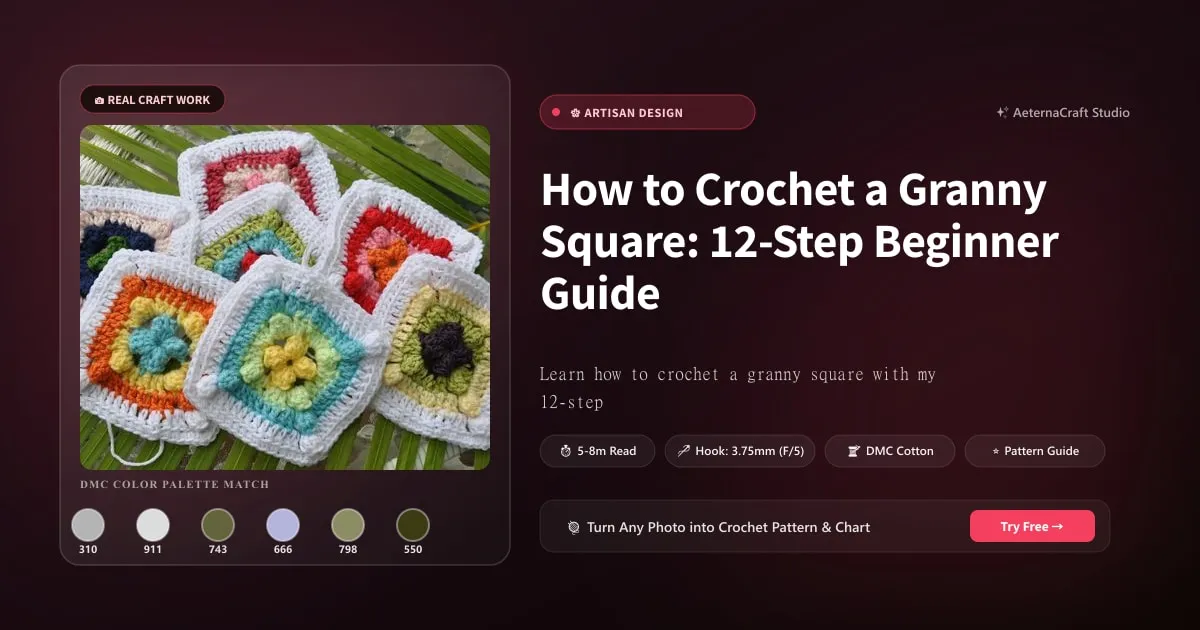
Grab a mug of tea and pull up a chair, because we are going to talk about supplies. I know, I know—supplies sound dreadfully practical and utterly unromantic compared to watching a pile of fluff transform into a crisp little square. But honestly, the difference between a happy crocheting session and a tear-stained, frustration-fueled tangle often comes down to what you put in your basket before you start.
Materials and Tools for Your First Granny Square
Choosing the Right Yarn and Hook
For your very first granny square, I strongly recommend a worsted weight or aran yarn. It sits right in that sweet spot where the fibers are thick enough to see clearly, but not so chunky that your hands ache after ten minutes. Look for a smooth, lightly twisted strand. Plush, haloed wool blends are gorgeous, but they hide stitch definition like a foggy window hides a mountain view. A smooth acrylic or a blended wool will let you see every double crochet pop into existence, which matters so much when you are still learning the rhythm.
Speaking of seeing your work, pick a light, solid color. I cannot stress this enough. A variegated yarn with streaks of navy, black, and forest green looks stunning when finished, but it is absolutely hostile to beginners. You will lose track of your chain-2 corners faster than I lost my first set of wedding rings (true story, they rolled under the sofa and survived three vacuum cycles). A pale heather grey, soft sky blue, or buttery yellow lets you spot mistakes before they become permanent architecture.
Now, the hook. Pair your worsted weight yarn with a 5mm hook. It will glide through the stitches without making the fabric stiff and board-like. That said, if you prefer a tighter fabric or find yourself tensioning a little hard, drop down to a 4.0mm hook. If you discover you are fighting your yarn, pulling harder than a cat on a string, grab a larger 5.5mm or even 6.0mm hook to relax your hands. For those of you itching to experiment later, keep this quick reference in mind: a 3.5mm hook pairs beautifully with DK or fingering weight yarn for lightweight projects like shawls and doilies; a 4.0mm hook works well with sport weight or tightly plied DK; and an H/8 hook is perfect for bulky yarn if you want to finish a blanket in a single afternoon.
Essential Notions and Setup
You do not need a fancy equipment shed. A decent pair of sharp scissors is non-negotiable—dull blades crush yarn fibers and leave you fraying ends that look like old pet fur. Grab a tapestry needle with a large eye, ideally one sized for worsted weight, so it glides through yarn tails without splitting the strands. I also keep a set of small plastic stitch markers nearby. They are tiny, inexpensive, and absolutely lifesaving when you are trying to remember which corner is which.
If your yarn comes as a skein rather than a hank, wind it into a center-pull ball before you begin. There is nothing more soul-crushing than chasing a rolling ball of yarn off the coffee table while trying to count your double crochets. You can purchase a swift and winder, but I usually just wrap the yarn around two books propped upright on my desk. Takes five minutes. Works perfectly.
Finally, keep a foam blocking mat and rust-proof pins within arm’s reach for the finishing step. You might think you can skip blocking, and technically yes, you can. But watching a lumpy, uneven square lay flat after a light steam tells you something about your technique that your eyes won’t catch while you are still working. It is deeply satisfying, truly.
One more thing about yarn fibers: if you eventually want to try cotton or mercerized cotton, go ahead, but switch to a smaller hook. Mercerized cotton has zero stretch and a slick surface, so it pulls through your fingers quickly and can feel slippery until you adjust your tension. Alpaca and silk blends are luxurious but bouncy, which means your squares may grow slightly after assembly. Keep that elasticity in mind when measuring your finished piece.
When I first started, I bought an expensive hand-dyed alpaca-silk combo and tried to follow a pattern using a standard 5mm hook. The fabric stretched into something resembling a lopsided beach towel. Thankfully, I learned fast that fiber behavior dictates everything. Match your hook to the yarn’s personality, and your first square will behave itself.
How to Crochet a Granny Square: The Foundation Round
Magic Ring vs. Chain-4 Method: Which Is Best?
Let us settle the oldest debate in beginner circles: how do you start the center? You have two main options, and neither is wrong. Pick whichever keeps your shoulders relaxed.
The magic ring starts with a loop you form around your hook, then you draw that loop tight after working your first stitches into it. Here is how I do it: wrap the yarn tail around your index finger, insert the hook under the first strand and over the second, grab the working yarn, and pull up a loop. You should have two loops on the hook. Chain 1 to secure, then work your double crochets directly into the center circle. When you are done with the required stitches, pull the tail and the hole closes like a tiny drawstring bag.
The chain-4 method is exactly as simple as it sounds. Chain 4, then slip stitch into the first chain to form a small ring. You now have a little buttonhole in the middle and nowhere to hide. You work your clusters into that ring just like you would with the magic ring.
So which should you choose? The magic ring gives you a tighter, more invisible center, which matters if you are making amigurumi or a project where the hole will show. The chain-4 method is far less fiddly if your hands are tired, your yarn is slippery, or you simply hate wrestling loops around your fingers. I used to swear by the magic ring exclusively. Then years ago, during a particularly chilly December evening, I tried it with icy-cold hands and fumbled the loop open three times. I switched to chain-4 permanently. Honestly, the chain method is simpler for beginners, and the finished square looks identical once you weave in the tail.
Whatever you pick, weave in your starting tail tightly. A loose tail creates a gap that looks like the square forgot to zip its pants. Thread the end onto your tapestry needle, run it through the backs of the surrounding double crochets, twist it once, and trim. Do not skim over this step. It is the difference between a tidy center and a hole you can fit a pencil through.
Working the First Cluster of Double Crochets
Now we build the base. Chain 3. This counts as your first double crochet, so treat it with respect. Do not forget it exists when you are counting later. Then work 2 more double crochets into the center ring. You now have a group of 3 double crochets.
Chain 2. This becomes your first corner space. Work 3 more double crochets into the center ring. That is your second cluster. Chain 2 again. Three double crochets. Chain 2. Three double crochets. Chain 2.
Stop. Look at your work. You should see four clusters of three double crochets, separated by four chain-2 spaces. That is 12 double crochets total, plus four corner chains. Now slip stitch into the top of your original chain-3 to join the round. Fasten off if you want, or continue directly into round 2.
Here is the trick that changed everything for me: think of each cluster as a tiny flower stem and the chain-2 space as the gap between petals. You are not chasing individual stitches. You are building four distinct corners connected by sides. When you count your double crochets at the end of round 1, say it out loud: twelve. If you count fourteen, you added too many. If you count ten, you skipped a stitch. Trust the number.
A question I hear constantly is whether the chain-3 really counts as a double crochet. Yes, it does. It functions as the first stitch of the cluster, so do not work another double crochet on top of it unless you accidentally created a bump. Smooth, even tops matter for the later rounds.
Once the foundation round sits neatly in your palm, you have earned your first proud moment. Take it. Photograph it if you must. I did. My couch still has a crumpled scrap of worsted acrylic with twelve double crochets that made me feel like I had built a house.
Increasing Rounds: Building the Square Shape
Round 2: Creating the First Corners
Round 2 is where your circle finally realizes it is supposed to be a square. Do not panic. The geometry is simple once you see it.
Join your new color (or continue the same yarn) with a slip stitch into the top of the chain-3 from round 1. That top stitch is now your anchor. Chain 3, which counts as your first double crochet. Then work 2 double crochets into the same chain-2 space. Chain 2. Work 3 double crochets into that same chain-2 space. Pause. That cluster of 3-2-3 is your corner. The chain-2 gap is what separates it from the next corner, and it is the secret weapon against curling.
Now move to the next chain-2 space along the side. Do not add a chain before moving. Just drop your hook in, chain 3, work 2 double crochets, chain 2, and work 3 double crochets in the same side space. Wait—that sounds like another corner. It is not. In a proper granny square, the side spaces receive only 3 double crochets total, while the corner spaces receive the fuller (3 dc, ch 2, 3 dc) treatment. So correct yourself: into the next corner space, work your (3 dc, ch 2, 3 dc). Into the following side space, simply work 3 double crochets. Chain 2. Work 3 double crochets into the next corner space. Repeat around until you reach the beginning.
Let me phrase that plainly, because the first time I read a pattern that said “work three double crochets in each chain-2 space,” my square turned into a wobbly octagon. Corner spaces get the (3 dc, ch 2, 3 dc). Side spaces get just 3 dc. The chain-2 space from the previous round is your guide. Mark the four corners with stitch markers. Seriously. Place a contrasting scrap of yarn or a plastic marker in each corner. It saves you from wondering whether the lump on your left is a side or a corner.
Subsequent Rounds: Keeping the Square Flat
Rounds 3 through whatever number you need follow the exact same logic. Every round: locate the chain-2 spaces. In each corner chain-2 space, work (3 dc, ch 2, 3 dc). In each side chain-2 space, work 3 dc. That is it. The formula does not get more complicated.
I know it sounds almost too simple, which is probably why people overthink it and start adding extra clusters for no reason. Do not add clusters to the sides. Do not work into the tops of the previous round’s double crochets unless a pattern specifically tells you to. Your hook belongs in the chain spaces. The chain spaces are roads; the tops of stitches are private property. Stay on the roads.
As you work round 4 and beyond, you will notice the square growing steadily. With worsted weight yarn and a 5mm hook, you are looking at roughly one inch of growth per round once you pass round 3. By round 7 or 8, you should be sitting near a standard 12-inch square. Measure occasionally. If your square starts leaning toward diamond instead of square, you have likely added a cluster in a side space by accident. Backtrack, rip out, and breathe. Rip outs are not failures; they are corrections.
One habit I picked up decades ago: after every round, I flatten the square between my palms and count the corners. Four corners. Four chain-2 gaps on the sides. If anything looks off, I fix it immediately while the yarn is still forgiving. Patience here saves hours later.
Troubleshooting Common Granny Square Problems
Why Is My Square Curving or Ruffling?
Nothing is more disheartening than working round after round with perfect attention, only to lay the square on the table and watch it curl upward like a potato chip. Before you toss it in the “mistakes” basket, let us diagnose the culprit.
The most common cause is too many increases. If you are adding extra clusters in the side spaces, you are effectively crocheting a circle, not a square. Circles expand outward; squares expand outward and inward simultaneously. Check your work under a bright lamp. Are you putting 3 double crochets in every side space, or are you accidentally stuffing a 5-stitch cluster into a side? Stick strictly to the formula: corners get the split cluster, sides get the plain trio.
The second cause is tension. If you pull every double crochet as tight as you would lacing a corset, the fabric will contract and warp. Yarn has memory. Tight stitches fight each other. Loosen your grip. Let the hook do the work. If you are using a 5mm hook but your hands keep cinching down, try a 5.5mm or 6.0mm hook temporarily. A larger hook forces your stitches to breathe.
The third cause is the corner chain. Some crocheters chain only 1 in their corners. That might work for a tiny motif, but for a standard granny square, chain 2. If your corners still want to puff, try chaining 3 instead of 2. It adds just enough room to keep the edge flat. I had a student who swore by ch-3 corners until she measured her squares. Once she matched the corner spacing, her throws stopped looking like scrambled eggs.
How to Fix Uneven Edges and Wavy Sides?
Wavy sides usually mean one thing: you are working into the wrong space. New crocheters often mistake the chain-3 from the previous round for a side space and pile stitches into it. Resist that urge. The chain-3 is the top of your corner cluster. Leave it alone. Your side work goes into the chain-2 gaps between corners.
Another sneaky culprit is inconsistent stitch height. If your chain-3 counts as a double crochet, your subsequent double crochets need to match that height. Work the first double crochet into the base of that chain-3, not on top of it, and keep your hook depth consistent. Uneven stitches create waves because some segments pull harder than others.
Stitch markers are your rescue rope here. Place a marker in every corner, and another marker at the midpoint of each side if you tend to lose count. Count aloud. One, two, three, four corners. Four side gaps. Four chain-2 corners. If the count drifts, stop, rip back, and rebuild.
I spent an entire rainy Saturday in my twenties making what I proudly called a “geometric square.” It was actually a hexagon with delusions of grandeur. I measured it, cried a little, frogged it, and started over with stitch markers. The second attempt was perfectly flat. You will learn to trust the count, and that confidence is worth more than any pattern book.
A question I get often: what if my square looks fine until I wash it? That is usually fiber behavior. Acrylic responds to heat and can flatten beautifully with a steam iron held slightly above the surface. Wool and alpaca may felt if you rub them aggressively, so press gently. Mercerized cotton and silk blend squares usually hold their shape extremely well, which is why I love them for heirloom quilts.
Advanced Tips: Color Changes and Joining Squares
Changing Colors Seamlessly
Color changes are where your granny square stops looking like a craft store sample and starts looking like something you designed. The trick is to plan the change before you finish the last stitch of the old color.
Work your final double crochet in the old color until two loops remain on the hook. Drop the old yarn, pull the new yarn through those last two loops, and tighten gently. Do not knot. Knots create bumps that show through the finished fabric like little mountains on a flat plain. Instead, leave a 6-inch tail on both the old and new colors, and weave them in as you work. Yes, actually as you go. Carry the unused color loosely along the back of your work if you need it in the next round, but do not pull it tight. Carried yarn acts like a hidden spring and warps the square.
For the cleanest transition, change colors at a corner chain-2 space. The ch-2 gap naturally conceals the join, and your eye will not catch the slight shift in texture. If you change in the middle of a side, you will see a tiny ridge. That is fine for some designs, but corners hide sins beautifully.
Weave in ends with a tapestry needle by running the tail through the backs of adjacent double crochets, twisting it once around a nearby stitch, and trimming. If you are using mercerized cotton, the ends are slippery and love to pull free, so twist twice and use a slightly longer tail. Alpaca and silk blends are smooth but heavy; secure them with a small knot hidden inside a cluster if you want extra insurance. Acrylic melts slightly with a lighter, which can lock ends in place, but I never recommend burning yarn near my face. Use the needle. Always.
Joining Granny Squares: Whip Stitch vs. Slip Stitch Join
Your square is finished. Now you need three hundred more — or whatever exact quantity your blanket dimensions call for! (If you haven’t planned your blanket layout yet, use our interactive Granny Square Blanket Calculator to get exact square counts for baby, throw, twin, and king sizes, along with skein yardage estimates). And then you need to join them. Joining methods fall into two main camps: whip stitch and slip stitch join.
Whip stitch sews through the back loops only of each square. You fold the squares side by side, insert your tapestry needle through the back loops of square A, then the corresponding back loops of square B, and pull through. The result is flat, sturdy, and nearly invisible from the right side. I use this for blankets, afghans, and anything that will get serious wear. It holds up through washing, pets, and midnight cuddling.
Slip stitch joining works through both squares with right sides together. You insert the hook through the front loops of both squares, yarn over, pull through, and repeat. This creates a raised, decorative ridge that looks like a braided seam. It is beautiful on pillow covers and wall hangings, but it can feel slightly thicker against the skin. If you are making a baby blanket that will touch cheeks, whip stitch wins.
Pros and cons honestly come down to preference. Whip stitch is quicker and flatter. Slip stitch join is more decorative and slightly stronger against lateral pull. For a standard granny square blanket, I recommend whip stitch. It lays flat, it hides nicely under a quilt top, and it does not fight with your blocking pins.
A common question I get: should I join as I go or seam later? Join as you go when you want a continuous fabric and do not care about repairing individual squares. Seam later gives you flexibility. You can replace a stained square, rearrange the pattern, or block each piece individually. I always seam later. Life happens, and replaceable squares save sanity.
Crocheting granny squares is one of those deceptively simple skills that rewards patience. You will make imperfect ones. I still have a drawer full of lopsided practice pieces that taught me more than any flawless square ever could. Keep going. The next one will be better. And when it finally lies perfectly flat on your lap, you will feel that quiet, stubborn pride that only comes from making something with your own hands.
Frequently Asked Questions
How many rounds should a granny square have for a blanket?
For a standard throw blanket, 7 or 8 rounds with worsted weight yarn and a 5mm hook will give you roughly a 12-inch square. Baby blankets look best at 4 or 5 rounds, which keeps the squares soft and proportional to a tiny torso. Coasters need only 3 rounds for a neat 4-inch piece.
Can I make a granny square without a magic ring?
Absolutely. The chain-4 method works beautifully and requires zero finger-wrapping gymnastics. Chain 4, slip stitch into the first chain to form a ring, then work your first cluster exactly as usual. The center hole will be slightly more visible than the magic ring version, but it is tidy once you weave in the starting tail.
What yarn fiber should I use for my first granny square?
Start with smooth acrylic or a wool-acrylic blend. They forgive tension mistakes, hold shape well, and are easy to wash. Cotton and mercerized cotton are lovely for summer blankets, but they lack stretch, which means your squares can skew if you tension unevenly. DK weight yarn with a 3.5mm or 4.0mm hook is a great middle ground.
Related Posts
Crochet for Beginners: Your 7-Step Start Guide
Learn crochet for beginners with essential tools, basic stitches, and easy patterns. Start your first project today with expert tips.
Beginner10 Crochet Baby Blanket Patterns: Easy & Adorable Designs
Find free crochet baby blanket patterns for beginners and pros. Easy, cute designs with step-by-step instructions for every skill level.
Try Our Free Crochet Tools
Turn Your Photo Into a Crochet Pattern
Upload any photo and our AI generates a pixel-perfect crochet pattern with real yarn color matching in seconds.
Try AeternaCraft Studio Free →Calculate Yarn for Any Resize
Free amigurumi yarn & resizing calculator. Change hook, switch yarn, or scale a whole pattern — instant results with PDF export.
Open the Calculator →