How to Crochet a Blanket: Step-by-Step Guide for Beginners
Learn how to crochet a blanket step by step. Complete beginner guide covering yarn choice, basic stitches, sizing chart, and edge finishing.
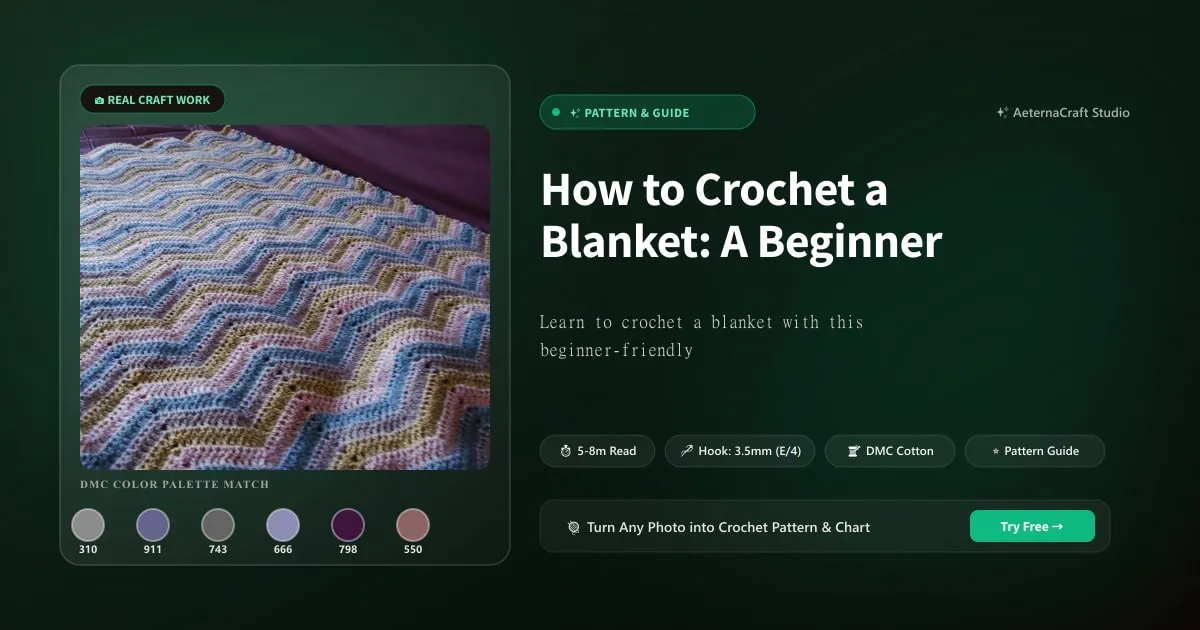
Grab a mug of tea, friend. Before we even touch a hook, let’s talk yarn. This is where most beginners panic, but I promise you, it’s easier than picking socks at a department store. The right choice will make your first blanket a joy; the wrong choice might leave you frustrated and staring at a pile of stiff fabric.
First up: fiber. Acrylic is the workhorse of the crochet world. It’s affordable, machine-washable, and comes in every color under the rainbow. It’s perfect for baby blankets because it survives spit-up and daycare washing machines without complaining. Cotton is beautiful, cool, and sturdy, but let’s be real: a cotton blanket gets heavy. If you’re making a beach cover-up, go for it; if you’re making a cozy lapghan, cotton might drag down on your lap like a wet towel. Wool is magical for warmth, but watch out for allergies and that wrist ache when you work with it for hours. I’ve seen fellow crafters rub their wrists raw using stiff merino, so keep that in mind. For your first blanket, I recommend a soft acrylic or an acrylic-wool blend in worsted weight (#4). You’ll thank me later.
You might also spot mercerized cotton on the shelf. It’s smoother and stronger than regular cotton, but it shares that same heaviness problem. Alpaca is super lofty and warm, though it can be slippery if you’re new. Silk blends add a gorgeous sheen and drape, but they’re pricey and can be fussy to work with. Stick to the basics for now.
Matching Hook Size to Yarn Weight
Here’s my golden rule: match the yarn label, but trust your swatch. (If you want to skip manual math and calculate exact width, length, and rows for your blanket swatch, use our free Crochet Gauge Swatch Calculator). Most worsted yarn labels suggest a 5.5mm or 6.0mm hook, though I often nudge up to a 6.5mm for blankets so the fabric breathes. A larger hook gives you drape; a smaller hook makes a dense, sturdy afghan. Look at this quick cheat sheet I keep pinned above my craft station:
- Fingering: 3.0mm–3.5mm
- DK: 3.5mm–4.0mm
- Worsted: 5.0mm–6.5mm (H/8 to J/10)
- Bulky: 6.5mm–8.0mm
When I first tried making a blanket with a tiny hook and bulky yarn, I ended up with something rigid enough to stand up on its own. It looked like a corrugated cardboard coast. Don’t be that person. Be wise. Use a 5.5mm or 6.5mm hook for worsted, and your hands will thank you. Also, here’s a pro-tip that cost me hours of eye strain early on: avoid dark colors for your first project. Black, navy, and deep burgundy are notorious stitch absorbers. You won’t see where to insert your hook until you’ve got a headache and a pile of frogging. Pick a medium heather grey, a soft blue, or a cream color. Seeing your stitches makes learning twice as fast.
How Much Yarn Do You Need?
People ask me, “Do I really have to do math for a blanket?” Yes, unfortunately. But it’s not calculus, and I’ll walk you through it. The formula is: blanket width (inches) x length (inches) x stitches per inch x rows per inch / yards per skein.
Now, hold your horses. That formula gets you a stitch count number, so in practice, you’ll divide that by your average stitches per yard, or just trust the blanket calculators online and add twenty percent for errors. (And if you are nearing the end of your blanket and wondering whether your final skein will reach the border, weigh your cake on our Yarn Chicken Calculator to see your row cushion). Let’s try a 36x48 inch baby blanket. If your gauge is about 3.5 stitches per inch and 4 rows per inch, you’re looking at roughly 1,728 square inches. For worsted weight at that gauge, you’ll likely need around 10 to 12 skeins of 200 yards each. A 50x60 inch throw? Bump that up to 16 to 18 skeins. And yes, bulky yarn uses significantly less yardage than worsted, so if you’re craving quick gratification, go for a #5 bulky. You’ll finish a lapghan in a weekend instead of a month.
Reader question: “Do I really need DK yarn for a child’s blanket?” You can use DK, but it works up slower. Worsted is easier for beginners because the stitches are bigger and more visible. Unless you want something very fine, I’d stick with worsted or bulky.
Reader question: “What if I buy too much yarn?” No worries! You can return unopened skeins if you stick to the original store’s policy, or save the extras for matching scarves. Shop smart, crocheters.
Essential Stitches for Crocheting a Blanket
Alright, hook in hand, yarn ready. Let’s talk stitches. You don’t need a PhD in crochet to make a blanket, but knowing your basics will save you from crying into your yarn basket. I’m going to introduce you to the friends you’ll be spending the next few weekends with.
The Chain Stitch Foundation
Everything starts with a slip knot and a chain. Take a deep breath and make that slip knot. Not too tight, not too loose—think of it as hugging a kitten, gentle but secure. To make a chain, yarn over and pull through the loop. Repeat. Keep your chains relaxed. If you tug them tight like you’re strangling a snake, your row one is going to fight back.
Step-by-step:
- Make a slip knot and place it on your hook.
- Yarn over, pull through the loop on your hook. That’s one chain.
- Repeat until you have your desired number plus a few extra.
I always make my foundation chain slightly longer than needed. Why? Because tension has a habit of tightening up once you start working back across. If you run short, you’ll have to frog the whole thing, and we don’t do that on day one. Count every tenth chain. Seriously. I’ve lost count more times than I can admit, only to realize at the end of row four that I had eight extra chains because I counted “one hundred” while thinking about dinner. Save your sanity: count.
Reader question: “My chain keeps twisting in the back loop!” Make sure all your loops face the same direction. If they look like little horseshoes twisting backward, you’ve got a twisted chain. Just flip it before you start working into it.
Single Crochet vs. Double Crochet for Blankets
Here’s the showdown. Single crochet (sc) creates a dense, warm fabric. It’s like a brick wall of coziness. But oh, does it take forever. If you choose sc for a throw, you’ll be counting seasons. Double crochet (dc), on the other hand, works up quickly. It has a beautiful drape, it’s lighter, and it’s much gentler on your wrists. For beginners, I recommend double crochet. It’s faster, so you see progress, and it’s easier to keep straight edges because you’re not fighting a dense block of fabric.
You can also throw half double crochet (hdc) into the mix. It sits right between sc and dc—nice texture, moderate speed. Treble (tr) stitches are super fast but can be tricky for newbies because the yarn overs multiply and your hook can get tangled. Stick to dc for now. Save trebles for when you’re feeling brave.
Simple Stitch Patterns to Avoid Curling
Have you ever made a dishcloth in single crochet and watched the corners curl up like potato chips? Yeah, don’t do that with a blanket. Some stitches love to curl. All dc tends to ripple at the edges, and all sc curls aggressively. The secret is alternating stitches to keep the fabric balanced.
Try the moss stitch. It goes like this: chain 1, single crochet in the next stitch. Repeat across. On the next row, chain 1, skip the first stitch, single crochet in the top of the ch-1 from the row below, then chain 1 in the next space. This creates a gorgeous pebbled texture that lies perfectly flat.
Another gem is the lemon peel stitch (also called seed stitch in some circles): alternate single crochet and double crochet. Sc in first stitch, dc in next. Sc in the top of the dc, dc in the next sc. This alternation balances the height differences, so your blanket lies smooth as a pancake.
Personal story: When I first tried a blanket in all double crochet, I didn’t realize the edges would wave like seaweed. I added about six rows of single crochet border just to stop the dancing. Lesson learned! Switch to moss or lemon peel early, and your edges will stay straighter with less finagling.
Reader question: “Can I just use slip stitch?” You could, but slip stitch makes a very stiff, heavy fabric. It’s great for edging or baskets, but not ideal for a cozy blanket unless you want something that drapes like a wet napkin.
Step-by-Step: How to Crochet a Blanket
This is the moment. You’ve got your yarn, your hook, and your stitches. Let’s actually make that blanket. I’ll walk you through a double crochet pattern, since it’s beginner-friendly and works up like a dream.
Making Your Foundation Chain and First Row
For a standard throw, let’s aim for about 100 to 110 chains. This should give you a width around 30 to 35 inches depending on your gauge. Work up your chain, and remember: make it a tad longer than you think.
Now, the first row. Here’s where mistakes happen. For double crochet, chain 3 at the start of the row. This counts as your first double crochet. Skip the first three chains from your foundation. That’s right, three chains. Many beginners get nervous and drop a dc right into the third chain, which creates a gap or a bump. Instead, yarn over, insert hook into the fourth chain from the hook, yarn over pull up a loop, yarn over pull through two loops, yarn over pull through remaining two loops. You’ve just made your first dc. Then, work one dc in each chain across the row.
When you finish the last stitch, you should have a nice straight edge with no extra chains hanging off the side. If you count your stitches, you’ll find you have one more dc than the number of skipped chains, plus the turning chain. Don’t stress if your first row looks a little wonky. It happens. Even seasoned crocheters have days where the first row grumbles. Just keep going.
Reader question: “How do I keep the first stitch from looking sloppy?” Pull your tail snug but not tight. Weave that tail into the back of your first few stitches as you go to anchor it.
Continuing Rows with Consistent Tension
Time to turn your work. Flip the blanket like a pancake—gently, please—and chain 3 to start the next row. Skip the first stitch at the base of the turning chain. This prevents that unsightly hole at the corner. Work one dc in each stitch across until you reach the end.
Here’s a big one: tension control. I see so many beginners gripping the yarn like they’re wrestling an eel. Relax your hands! Hold the yarn loosely. If you pull too tight, your blanket will shrink, your edges will wave, and your fingers will ache. Practice a relaxed grip. Let the yarn flow through your hand.
Every 20 stitches, pop a stitch marker into the top of your stitches to check your width. If you notice your row tapering or bulging, pause and count. Missing a stitch at the end of the row is the #1 cause of wavy edges. I once finished a baby blanket only to discover one corner was an inch shorter than the other because I dropped a dc in the last stitch of every third row. Frogging that was… memorable. Count your stitches. It feels tedious, but it saves heartache.
Personal story: Years ago I made a mistake of using tight tension throughout a large project and ended up with a blanket that looked like a crinkled potato chip bag. I had to stretch it for weeks. Learn from my pain: keep it loose and even.
Adding Borders and Changing Colors
Borders aren’t just decoration; they stabilize the edges. Once your main blanket body is done, work a round of single crochet evenly around the perimeter. Place a dc or sc in the turning chain at the top. For corners, work two stitches in the same corner stitch to keep it flat. This makes the blanket look finished and hides any minor mistakes along the edges.
Want stripes? Change colors at the end of a row. To join a new color, when your last yarn over is almost complete, yarn over with the new color and pull through both loops on the hook. Cut the old yarn, leaving a tail, and continue working. Weave in ends as you go by crocheting over the tails for a few stitches. It takes a minute longer upfront, but it saves you time later when you’re faced with forty loose ends staring at you.
Reader question: “When do I add the border?” Always after the main body is complete. Blocking changes the shape slightly, so wait until after blocking if you want perfect dimensions. For now, just finish the body and add your border when it feels right.
Finishing Your Crochet Blanket
You made it! Your blanket is finally shaped, bordered, and ready to grace a couch. But hold your horses, my friend. The finishing touches are what separate a “newbie project” from something you’d hang on Pinterest. Let’s polish this beauty.
Weaving in Ends Neatly
I know, I know. Weaving in ends sounds boring. But trust me on this: loose ends are the enemy of longevity. If you leave them dangling, your cat will attack them, your dog will drag the blanket around, and eventually, your stitches will unravel like a bad yarn ball.
Here’s how I do it. Take your tapestry needle and thread an end. Weave it through the backs of the stitches in the opposite direction of how you crocheted it. Cross over itself once, then weave back another way. Think of it like a zipper locking the end in place. Avoid running the tail in a straight line along one row; it’ll look like a bump and might show through.
Once you’ve woven an inch or two, give the tail a gentle tug. Not a yank! Just enough to snug it. Then trim close to the fabric. I usually leave about half an inch past the weave path before cutting. If you cut too short, the end might pop free. If you leave long tails, they’ll show through the front. Be precise. I once had a blanket with ends left so long they poked through the stitches like yarn spikes. It looked like a hedgehog. Don’t be the hedgehog blanket person.
Reader question: “Do I have to weave in every single end immediately?” Ideally, yes, especially if you’re changing colors often. But I get it—life happens. You can weave them in later, just don’t leave them until they become a tangled nest behind your sofa.
Blocking Your Blanket for a Professional Look
Blocking is the magic step. It evens out your stitches, straightens wavy edges, and gives your blanket that store-bought finish. How you block depends on your fiber.
For wool, alpaca, or cotton, wet blocking works wonders. Soak your blanket in lukewarm water with a little wool wash for 15 minutes. Gently squeeze out excess water—never wring it! Wrung wool is a nightmare. Lay it flat on a clean towel, roll the towel to absorb moisture, then unroll and pin the blanket to your desired dimensions on a blocking mat or carpet. Let it dry completely.
For acrylic, be careful with heat. Steam blocking is safer than ironing. Hover a steam iron over the fabric without touching it, or use a garment steamer. The heat relaxes the fibers and opens up your stitches. I once ironed an acrylic blanket directly and nearly melted the fibers. Thankfully, it was only a small corner. Learn from my scare: always test a scrap first!
Personal story: When I first blocked a blanket, I thought I was overkill. I pinned it out, dried it, and… wow. The stitches looked uniform, the edges went straight, and I was incredibly proud of the result. Blocking is worth every minute.
Reader question: “What if I don’t have pins?” You can use thick sewing needles or even sturdy tacks. Just make sure the blanket is anchored securely so it doesn’t shift while drying.
Adding a Simple Fringe or Tassels
Fringe adds a playful finish. Cut yarn strands about twice your desired fringe length. If you want 5-inch fringe, cut 10-inch strands. Fold a strand in half, insert your hook through an edge stitch, pull the loop through, then pass the cut ends through the loop and tighten. Space the fringe every 2 to 3 stitches. For a throw, you’ll need quite a few strands—probably 60 to 80 depending on width.
Trim the fringe evenly once attached. Use a comb or your fingers to fluff it slightly. Tassels work the same way but in clusters. Keep your fringe length consistent, or it’ll look scruffy. Aim for 4 to 6 inches for a cozy, classic look. This is optional, of course. If you prefer a clean edge, skip it. But honestly? Fringe makes a blanket look finished and inviting. I love the way it catches the light.
Troubleshooting Common Blanket Problems
Even the best crocheters hit snags. I’ve frogged more blankets than I’d care to admit. The good news is, most problems are fixable, and some are just part of the learning curve. Let’s tackle the big ones.
Why Are My Edges Curling?
Curling is the bane of many a blanket. If your corners are lifting like a taco shell, here’s what’s happening. Curling usually comes down to two things: tight tension or stitch choice. Single crochet loves to curl because the stitches bunch up tightly. If you’re using all sc, expect trouble.
Solutions:
- Use a larger hook. If you’re struggling with tight tension, moving up half a size can loosen the fabric and help it lie flat.
- Add a border of single crochet. A round of sc can weigh down edges and stop the curl.
- Switch to a non-curling pattern. Moss stitch and lemon peel stitch are your best friends here. They balance the fabric structure.
I once made a blanket in hdc that curled so badly I thought I’d ruined it. I added a wide border of sc and dc shells, and poof—the edges flattened. Sometimes the border saves the day.
Reader question: “Is my blanket supposed to stretch out?” Yes, especially with acrylic and cotton. After washing and blocking, the stitches relax and the shape evens out. Don’t panic if it looks tight right after you finish.
How to Fix Uneven Edges (Wavy or Tapering)
Wavy edges happen when you accidentally add or miss stitches. The most common culprit? Forgetting the turning chain or skipping the first stitch after turning. Another sneaky issue: dropping a stitch near the end of the row because you’re tired.
Fixes:
- Count your stitches every few rows. Make this a habit. If your first row has 80 stitches, your second row should also have 80. If you have 79, find the missing one. If you have 81, find the extra.
- Mark your first and last stitches. Place markers in the first and last stitch of each row to keep track visually.
- Border can hide minor unevenness. If your edges are slightly wavy, a straight border helps disguise it. Work carefully around corners.
- Frog back to the mistake. If you spot a missing stitch early, unravel back to that row and fix it. It’s easier now than discovering the whole blanket tapers to a point.
Personal story: Years ago I made the mistake of not counting and ended up with a blanket that tapered to a sharp point. It looked like a giant leaf. I frogged three rows back, fixed the count, and learned my lesson. Never underestimate the power of counting!
Reader question: “What if I already finished the blanket and the edges are wavy?” Block it! Stretch and pin the edges straight while damp. A border can also help mask slight waviness. If it’s severe, you might need to add a triangular border to widen the narrow sides, but that’s advanced stuff for another day.
What If I Run Out of Yarn?
This is every crocheter’s nightmare. You’re two rows from finishing, and snip—yarn is gone. Breathe.
- Same dye lot. If you bought extra, check the dye lot number. Different lots can shade slightly. Order more of the same lot if possible.
- Complementary color. If you can’t match it exactly, embrace a stripe. Add a few rows of a slightly different shade. Call it a design choice.
- Contrasting border. Finish the body with mismatched yarn, then use the last bit of your main color for a bold border.
To join seamlessly, leave a tail on the old yarn, start with the new yarn, and crochet over both tails for a few stitches. Weave them in later. I like to split the new yarn tail and weave it in the opposite direction of the old tail for security.
Reader question: “Can I change hooks during the project?” Generally, no. Changing hook sizes mid-blanket will alter your gauge and create visible bumps. Stick with one hook unless you’re intentionally creating a textured effect.
Blanket Size Chart and Project Ideas
Now let’s talk dimensions. Knowing what you’re making helps you buy the right amount of yarn and set realistic goals. I’ve seen beginners plan a king-size blanket for their first project and then spend six months wondering what went wrong. Let’s be smarter than that.
Standard Blanket Dimensions
Here’s a handy size chart to keep nearby:
- Baby: 36 x 48 inches. Great for beginners. Fast to finish.
- Lapghan: 36 x 36 inches. Tiny, cozy, perfect for practice.
- Throw: 50 x 60 inches. The standard couch blanket. Moderate project.
- Twin: 66 x 90 inches. Good for kids’ rooms.
- Full/Queen: 80 x 90 inches. Big commitment.
- King: 108 x 90 inches. Massive. Only attempt if you’re experienced or extremely dedicated.
For your first blanket, I highly recommend starting with a baby or lapghan. You’ll get that satisfying “I made this!” feeling in a few days or weeks. I still remember the first blanket I ever finished. It was a ragged lapghan, probably an inch shorter on one side, but I carried it around like a trophy. That pride? You can have that too.
Reader question: “Should I make a gift or just practice?” Make a practice project first. Get your tension down, learn to weave ends, and finish a border. (When adding a border or picking up stitches along the rough edges, use our Even Increase & Decrease Calculator to space your stitches symmetrically and prevent ruffled or cupping borders). Then use those skills for the gift. Your recipient will appreciate the neat edges.
Personalizing Your Blanket with Stripes or Granny Squares
Once you’re comfortable with basic rows, you can get creative. Horizontal stripes are easy. Just change colors every four rows. Make sure to cut the yarn and weave in ends, or carry the unused color up the side if it’s not too thick. Diagonal stripes require increasing or decreasing stitches, which is a bit more advanced. Start with horizontal if you’re new.
Granny squares are another classic. (Use our Granny Square Blanket Calculator to determine how many squares to make for any bed size). Here’s the basic formula:
- Chain 4, join with slip stitch to form a ring.
- Chain 3, work 2 double crochet in the ring. That’s your first cluster.
- Chain 2, work another 3-double-cluster in the ring. Chain 2 again.
- Work one more 3-dc cluster, chain 2, and join with slip stitch to the top of the chain-3.
- For subsequent rounds, work clusters into the chain-2 spaces along the sides and the chain-2 corner spaces.
To join squares, place two squares right sides together and use slip stitch through the back loops of corresponding stitches. Or crochet them together as you go for a seamless look.
Personal story: When I first tried joining granny squares, I made them too tight and the blanket wouldn’t lie flat. Loose joins are key! Pinch the fabric as you join, not pull.
Reader question: “How do I keep my granny square blanket straight?” Block each square before joining, and check that your squares are all the same size. A rippled blanket is hard to fix once joined.
You’ve got the tools, the knowledge, and now the courage to start. Crochet a blanket, sip some tea, and enjoy the process. You’re doing great.
Frequently Asked Questions
How much more yarn do I need if I double the size of my crochet blanket?
You'll need roughly four times the yarn, not double. Blanket area scales by width times length, so doubling both dimensions quadruples the square inches. For a 36x48 inch baby blanket needing 10 skeins, a 72x96 inch version would need about 40 skeins of the same yarn.
What's the best stitch for a beginner crochet blanket that won't curl?
The moss stitch or lemon peel stitch are your best bets. Both alternate stitch heights to balance the fabric, so edges stay flat without curling. I recommend double crochet for speed, but add a single crochet border to tame any waves.
Can I use acrylic yarn instead of cotton for a baby blanket?
Yes, acrylic is actually better for baby blankets. It's machine-washable, affordable, and survives spit-up and daycare washing machines without shrinking. Cotton gets heavy and can be stiff, while soft acrylic stays cozy and easy to care for.
Related Posts
How to Change Colors in Crochet: 3 Seamless Techniques
Master seamless color changes in crochet with 3 easy techniques. Avoid gaps, tangles, and tension issues for perfect stripes every time.
Beginner7 Easy Crochet Stitches for Beginners: Step-by-Step Guide
Master 7 easy crochet stitches for beginners with step-by-step tutorials. Chain, single, half double, and double crochet with personal tips from a maker.
Try Our Free Crochet Tools
Turn Your Photo Into a Crochet Pattern
Upload any photo and our AI generates a pixel-perfect crochet pattern with real yarn color matching in seconds.
Try AeternaCraft Studio Free →Calculate Yarn for Any Resize
Free amigurumi yarn & resizing calculator. Change hook, switch yarn, or scale a whole pattern — instant results with PDF export.
Open the Calculator →