Crochet a 1m+ Weighted Dragon with Faux Fur Yarn
Learn to crochet a giant weighted dragon using faux fur yarn, with tips on stitch visibility, filling, and achieving a soft floppy finish.
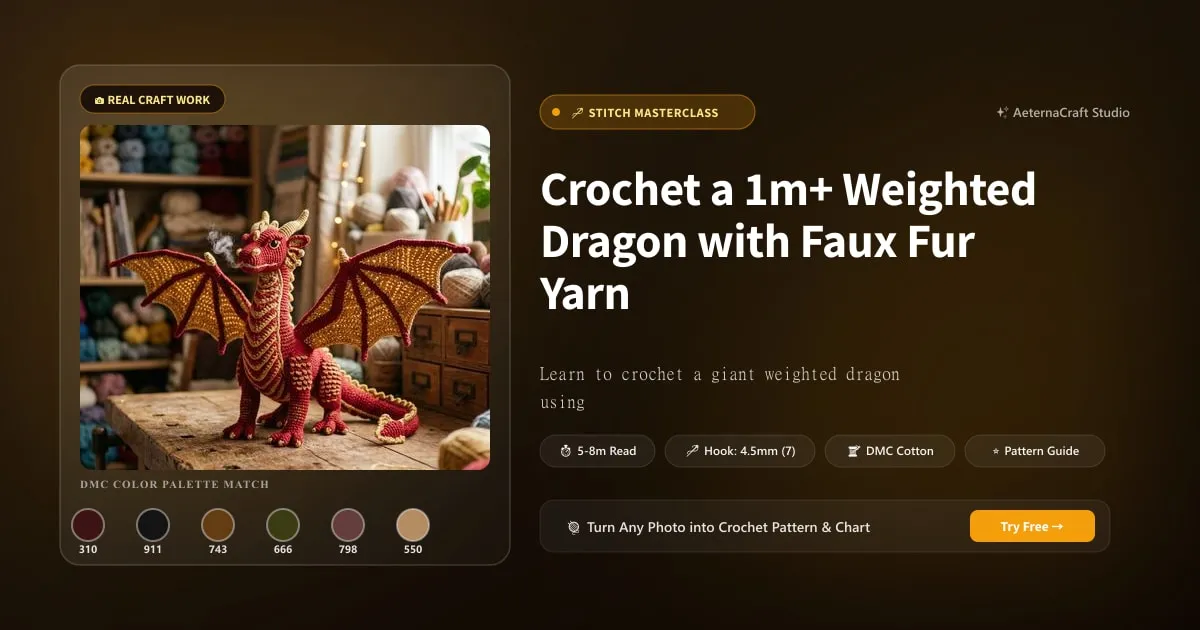
Let’s be honest for a second. There’s something absolutely magnetic about faux fur yarn. It’s not just yarn; it’s a vibe. When I first picked up a skein of thick, plush faux fur, I thought I’d stumbled onto something special. And honestly? In some ways, I did. The appeal isn’t just aesthetic—it’s tactile. Regular cotton or acrylic yarns have a crisp definition, a certain geometry to them that I’ve come to love over twenty years of crafting. But faux fur? It’s chaotic, luxurious, and impossibly huggable. When you’re making a dragon, you don’t want something that looks like a math problem; you want something that looks like a creature you could actually sleep next to. The texture is soft, the drape is dreamy, and it completely transforms a simple plushie into a statement piece. It’s the difference between a toy and a treasured companion.
But—and this is a big but—working with faux fur is not for the faint of heart. It is arguably the most frustrating material I have ever encountered. Have you ever tried to count stitches through a forest of long fibers? It’s maddening. Years ago, I tried to make a simple scarf using a variegated faux fur blend, and I spent three hours trying to figure out if I’d dropped a stitch or if the yarn was just playing tricks on my eyes. With these long strands, visibility drops to near zero. You lose the clean “V” of a single crochet or the distinct loop of a double crochet. Instead, you have a fuzzy blob that swallows your progress whole.
And let’s talk about time. If you think crocheting a small amigurumi takes forever, wait until you try a giant weighted dragon. A project of this magnitude—something over a meter in length—can easily consume a week of your life. I remember sitting there, late one Tuesday night, battling a knot in the fur that had worked itself so tight I thought I’d need dental floss to undo it. It was 2:00 AM, my tea was cold, and I wanted to throw the whole thing in the fire. But then I brushed it out, fluffed it up, and held it against my cheek. That instant gratification of pure softness? It makes the headache worth it.
You might also wonder why we bother adding weight to something so fluffy. It’s a fair question. People often ask, “Why not just leave it light?” The answer lies in sensory experience. A weighted plushie provides grounding. It has presence. When you hold a lightweight dragon, it feels like a toy. When you hold a weighted one, it feels like a living thing resting in your lap. The heft calms the nervous system, providing a deep-pressure touch that many find incredibly soothing. It’s not just about looking good; it’s about feeling good. Combining that calming weight with the luxurious texture of faux fur creates an object that is both beautiful and functional. It’s a hug you can hold. Yes, the struggle with visibility is real, and yes, it will take all weekend, but the result? A dragon so soft, so substantial, and so uniquely yours, that every frustrating minute disappears the moment you pick it up.
Essential Tools and Materials for a Giant Dragon
If you are ready to tackle this beast, you need to arm yourself correctly. First things first: the yarn. You can’t just grab any fluffy skein from the clearance bin. For a dragon of this scale, you need consistency and length. Brands like Bernat Blanket Extra Thick or Loops & Threads Impeccable Fur are staples for a reason. They have a dense underlay that helps hold stitches together, which is crucial when you’re trying to see anything at all. Now, let’s do some math, because you will need more than you think. For a dragon over one meter long, you are looking at approximately 8 to 10 skeins. Don’t buy seven and hope for the best. You won’t have enough to do matching repairs later, and buying a different batch number means your color gradient will look patchy and uneven. Aim for at least 10 skeins of worsted or super bulky weight.
Next, the hook. This is where most beginners go wrong. They read the label, see “Use 9mm hook,” and grab the nearest 9mm hook. Stop. Do not do that. Faux fur needs room to breathe. If your stitches are tight, the fur gets matted down, and your fabric becomes stiff as cardboard. We want floppy, we want soft. I always recommend going one or two sizes larger than the label suggests. While a 6–8mm hook is standard for many bulky yarns, for this specific faux fur project, I often reach for an H/8 (5.0mm) or even a 6.0mm hook depending on how dense the fur is. Test your gauge! Make a swatch, wash it, dry it, and brush it. If it’s stiff, go bigger. Loose stitches allow the fur to stand up, creating that plush, voluminous look.
Now, let’s talk about the weight. You have two main choices here: glass beads or poly pellets. Glass beads are smooth, dense, and silent. Poly pellets are cheaper and lighter per volume. For a dragon, I prefer a mix or a strategic placement. If you use too many pellets, the dragon might feel like a beanbag chair rather than a creature. I aim for a total weight of around 2.2kg (about 5 lbs) for a full-size dragon. This gives it substantial heft without being unwieldy.
Here is a pro tip I learned the hard way: never pour beads directly into your stuffing. Ever. I once did this with a small bear, and the beads clumped in one corner, making the poor thing lopsided and noisy whenever it moved. It looked like a bag of marbles inside a sock. Instead, create a weighted insert. Take an old tube sock or a small pillowcase and fill it with your beads or pellets. Sew it shut tightly. This pouch goes inside the body, distributed evenly along the spine and belly. It keeps the weight contained and prevents the beads from shifting around while you crochet. It’s much safer for the integrity of your stitches, too. When you’re working with slippery faux fur, you don’t want hard beads poking through weak spots in your fabric. By containing the weight, you ensure your dragon stays soft, squishy, and structurally sound.
Mastering Stitch Visibility in Faux Fur
Okay, let’s get technical. How do you actually count stitches when you can’t see them? This is the number one question I get from students after they’ve spent an hour crying over a tangled mess. The secret isn’t better eyesight; it’s better technique. First, use stitch markers. But not just any markers. Use bright, contrasting colors. If your yarn is white, use red or neon green markers. Place them every few stitches, especially at the beginning and end of rounds. If you’re working in continuous rounds (which you should be, to avoid seams), mark every 10 stitches. This acts as a reset button for your brain. If you lose count, you know exactly where you are because you can feel the marker through the fur.
Lighting is non-negotiable. You cannot do this in a dimly lit room. I bought a headlamp specifically for this purpose. Having light directed straight onto your hands makes a massive difference. Sometimes, I’ll also use a light-colored base yarn for the first few rows to establish the foundation, then switch to the darker faux fur. Wait, no, that doesn’t work well with faux fur because the pile hides everything. Better advice: start with a lighter color faux fur if possible. White or cream hides less visually than black. Black yarn is a void; you literally cannot see the loops against it.
When you can’t see, you must feel. Develop the “touch method.” Run your thumb over the top of your work. You should feel the distinct dip of a single crochet or the ridge of a double crochet. Trust your fingertips more than your eyes. If your finger says there’s a stitch there, but your eye doesn’t see it, believe your finger. This is how I crochet blindfolded in my dreams, almost.
For decreases, which are tricky because they hide the hole, use the invisible decrease method (sc2tog). In standard yarn, you insert the hook into the front loop only of two adjacent stitches. With faux fur, this can still be hard to see. Here is my trick: use a smaller hook, like a 3.5mm or 4.0mm, just for the decrease row. Work two single crochets together using the smaller hook to pull the stitches tight and minimize the gap. Then switch back to your larger hook for the rest of the round. It’s a small adjustment, but it helps keep the stitch definition tighter and prevents those annoying holes where beads might escape later.
Increases are easier but require care. When you work two stitches into the same space, make sure you aren’t twisting the fur. Twist it, and your fabric will pucker. Keep the fur lying flat, parallel to the ground, as you crochet around it. It’s a dance, really. You’re fighting the material, coaxing it into shape, one fuzzy loop at a time.
Step-by-Step: Crocheting the Dragon Body
Let’s get into the actual construction. We start with the head. Use a magic ring (or adjustable loop) to begin. Crochet six single crochets (sc) into the ring. For round two, increase in every stitch (12 sc). Round three, increase, sc (18 sc). Continue increasing until you reach the desired width for the snout, usually around 24-30 stitches. To shape the snout, work a few rounds of sc without increasing. Then, start shaping the back of the head. Here, you’ll need to be precise with your markers. If you miss an increase or decrease, your head will end up looking lopsided, like a drunk potato.
Once the head is formed, you transition into the body. Do not join rounds with a slip stitch; it creates a visible ridge and hard spot. Instead, work in continuous spiral rounds. This keeps the fabric smooth and flexible, essential for that floppy look. The body should be long and cylindrical. For a 1-meter dragon, the body tube alone might be 60-70cm long. Just keep crocheting rounds of single crochet (sc) or half-double crochet (hdc). I prefer hdc for the body because it’s faster and creates a slightly denser fabric that holds the weight better, but sc gives you more flexibility. Your choice.
The tail is where you need to taper. Start decreasing gradually. Every few rounds, do an invisible decrease across a wider area. This creates a gentle cone shape. If you decrease too quickly, the tail will bunch up. Think of it as a slow slide down, not a cliff edge.
Limbs and wings are worked separately. For legs, chain a few stitches and work back and forth in rows, or crochet in a circle and flatten it. Wings are fun—crochet a triangle shape and add scalloped edges using shell stitches (five dc in one stitch, skip a few, five dc in the next). Attach them using a tapestry needle and a yarn whip stitch. Be generous with the stitching on the wings. They take a lot of abuse. I learned this when a friend’s dragon lost a wing after one enthusiastic play session. Reinforce the joints with extra passes of the needle.
Throughout this process, step back and assess the shape. Does the neck look too thin? Add a round of increases. Is the body sagging? Tighten your tension slightly, though not too much. It’s a balancing act. You’re building a sculpture out of clouds and beads.
Weighting and Assembly for a Floppy Finish
Now for the satisfying part: assembly. Before you sew the final pieces together, insert your weighted pouch. Remember that sock filled with beads? Slide it into the body cavity. Position it along the spine, distributing the weight evenly from the shoulders to the hips. If you put all the weight in the tail, the dragon will tip over constantly. Center of gravity is key.
Stuffing comes next. Use high-quality polyester fiberfill. Fluff it up before you use it. Compressed stuffing makes a stiff dragon; airy stuffing makes a soft one. Push the stuffing into the limbs and head firmly but not tightly. The head needs a bit more support to hold its shape, but the body should remain squishy. I use a chopstick to push stuffing into tight corners like the webbing between toes or the base of the wings. It’s a handy tool that saves my fingers from exhaustion.
Seam invisibility is your goal. Use the mattress stitch or whip stitch with a matching yarn. Thread your tapestry needle with a long tail of the faux fur yarn (cut from the same skein if possible, to match the dye lot). Weave the needle in and out of the stitches, pulling gently until the seam closes. The fur will hide most of the thread, so perfection isn’t strictly necessary, but neatness helps.
Final touches: brushing. Once assembled, take a pet slicker brush or a wide-tooth comb and gently brush the fur. This does two things: it fluffs the pile, hiding any flattened stitches, and it blends the seams so they disappear. Your dragon should look like it grew the fur, not had it stitched on. Care instructions? Hand wash cold, lay flat to dry. Do not tumble dry, or your dragon will shrink and become a hard, tiny lump.
Troubleshooting Common Issues
Even with the best plans, things go wrong. Let’s address the elephant in the room—or rather, the stiff dragon in the corner. If your dragon feels like a board, what happened? Usually, it’s tight tension or a hook that was too small. Next time, use a larger hook. If you’ve already finished it, you can try to loosen it up by manipulating the stuffing. Pull and stretch the fabric gently. Sometimes, adding a bit more loose fiberfill can help push the stitches apart, making the fabric softer. For weighted sections, ensure you didn’t overfill the pouch. Too many beads equal stiffness.
What if your stitches are completely invisible, even with markers? This happens with very long-pile fur. The solution? Patience. Slow down. Use the “feel and count” method religiously. If you’re really stuck, switch to a yarn with a shorter pile for the next project. Not all faux fur is created equal. Some are dense and short; others are wild and shaggy. Shorter fur is easier to manage for beginners.
Finally, why won’t your dragon sit up? Because it’s supposed to be a lap dragon, not a display statue. It’s floppy by design. If you want it to sit, you’ll need to add a wire skeleton inside the stuffing, which compromises the softness. Or, stuff the legs very firmly. But honestly? There’s something charming about a dragon that slumps gracefully. Embrace the flop. It’s part of the character. Now, go make some fuzz.
Frequently Asked Questions
How do I see my stitches when crocheting with faux fur yarn?
Use bright stitch markers every 5-10 stitches, work in good lighting (a headlamp helps), and develop the 'touch method'—run your thumb over the top of your work to feel the dips of each stitch. Trust your fingers over your eyes.
How much yarn do I need for a 1m+ dragon?
You'll need 8 to 10 skeins of worsted or super bulky weight faux fur yarn. Don't buy fewer—matching dye lots later is nearly impossible, and you want enough for repairs or adjustments.
How do I add weight to a crochet dragon without it feeling lumpy?
Create a weighted insert using an old tube sock or small pillowcase filled with glass beads or poly pellets. Sew it shut and place it inside the body cavity along the spine. This keeps the weight contained and prevents beads from shifting or poking through your stitches.
Related Posts
Excel to Sweater: Plot Knitting Patterns Like a Pro
Design custom sweaters using Excel—from plotting patterns to flawless execution. Tips for creating unique, personalized knits with grid-based planning.
AdvancedSelf-Drafted Knit Sweater: Intarsia & Sleeve Adjustments
Learn from a knitter's journey: self-drafting, intarsia, choosing yarn, and adjusting sleeves after completion. Tips for custom-fit sweaters.
Try Our Free Crochet Tools
Turn Your Photo Into a Crochet Pattern
Upload any photo and our AI generates a pixel-perfect crochet pattern with real yarn color matching in seconds.
Try AeternaCraft Studio Free →Calculate Yarn for Any Resize
Free amigurumi yarn & resizing calculator. Change hook, switch yarn, or scale a whole pattern — instant results with PDF export.
Open the Calculator →