Crochet Baby Blanket Pattern: Easy Step-by-Step Guide
Find the perfect crochet baby blanket pattern for beginners. Learn yarn choices, stitch tips, and size guides to create a beautiful, soft blanket.
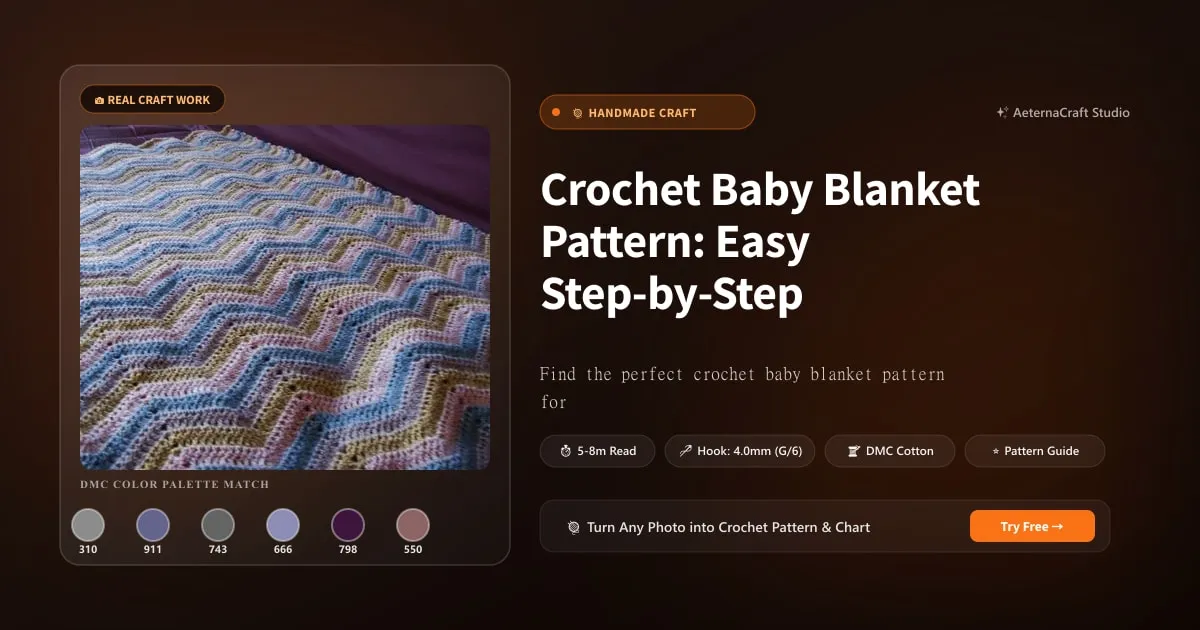
Crochet Baby Blanket Pattern: Easy Step-by-Step Guide
Choosing the Perfect Yarn for Your Crochet Baby Blanket Pattern
Best Yarn Fibers for Baby Blankets
Let’s pour some tea and talk about what actually touches your little one’s skin. Yarn choice isn’t just about looks; it’s about survival. Babies are notoriously messy, hot, and prone to spitting up on anything within a three-foot radius.
Years ago I made the mistake of gifting a blanket knitted from pure merino wool to a friend’s newborn. The mother loved it, but two months later she texted me crying because every wash cycle felt like it was turning the throw into a stiff, itchy coaster. Lesson learned!
For baby blankets, I always lean toward fibers that balance plush comfort with ruthless washability. Acrylic is my go-to for durability and affordability. It doesn’t shrink, it wipes clean like a champ, and modern blends feel incredibly soft against delicate cheeks. If you want something more breathable, cotton or mercerized cotton offers a crisp, cool drape perfect for summer nurseries. Just beware that unmercerized cotton can sometimes feel a bit scratchy at first, though it softens beautifully after a few warm washes.
Wool, alpaca, and silk are stunning, but they demand respect. Alpaca is warmer than sheep’s wool and practically hypoallergenic since it lacks lanolin, yet it stretches under its own weight if you don’t support it properly. Silk blended with wool or cotton adds a gorgeous luster and temperature regulation, but you’ll need to hand-wash it and lay it flat to dry.
For most beginners, I recommend sticking to a tightly spun acrylic or a cotton-acrylic blend. They’re forgiving, budget-friendly, and they’ll outlast the toddler phase without asking for a delicate cycle forever.
Yarn Weight and Hook Size Recommendations
The thickness of your yarn dictates how fast you work, how warm the final piece feels, and whether you’ll be staring at a tiny swatch for three weeks or flying through it over a weekend.
Weight systems aren’t always intuitive, so let’s clear the fog. Fingering yarn is incredibly thin, best reserved for lightweight afghans or accessories where you want maximum detail. DK sits just above it, offering a nice balance of drape and speed. Worsted weight (category 4) is the sweet spot for most beginner blankets—it crochets up quickly, creates a cozy density, and comes in every color imaginable. Bulky (category 5) moves even faster and makes a chunky, huggable throw, though it can feel a bit heavy for a newborn’s delicate frame.
Your hook size must match the yarn weight. For worsted weight, I typically reach for a 5.5mm or 6.0mm hook to get that slightly open stitch definition that babies love. If you’re working with bulky, a 6.5mm hook keeps the fabric from turning into a brick.
Sometimes crafters ask me, “How do I know if this yarn will actually survive a toddler’s spit-up phase?” The answer lies in the label: look for machine-washable classifications and avoid loose, halo-heavy fibers that trap moisture. For those who prefer finer gauges, a 4.0mm hook pairs beautifully with DK, while a 3.5mm hook works well for fingering or lightweight cotton. Even smaller hooks like an H/8 (5.0mm) can work wonders with thicker worsted if you want a tighter, less stretchy fabric. Always check the band recommendations, but trust your hands more. You’ll quickly learn whether your tension runs tight or loose, and adjust accordingly.
Color Selection Tips for Baby Gifts
Picking colors feels incredibly personal, but I’ve found that stepping outside the traditional pink-and-blue binary often leads to the most cherished pieces. Mint, butter yellow, lavender, soft sage, and heather gray never go out of style. They photograph beautifully, match modern nursery themes, and don’t age into teenage rebellion.
Before committing to a whole stash, always run a quick colorfastness test. Dip a scrap piece in warm water with a drop of mild detergent. If the water turns cloudy, you’ve got bleeding dye on your hands. Rinse that scrap until it runs clear, then let it dry flat. I’ve saved more than one gift by catching a bleeding shade early.
Variegated yarns are a wonderful shortcut for visual interest without juggling multiple skeins. Just be mindful of how the color transitions align with your stitch pattern. A busy gradient can hide the beautiful texture you spent hours building, while a subtle tonal shift adds depth without overwhelming the eye. Honestly, watching those colors pool together as you work is one of my favorite parts of the process. It’s meditative, predictable enough to plan around, and just lovely enough to make any parent smile when they unwrap it.
Essential Stitches for a Crochet Baby Blanket Pattern
Mastering the Single Crochet and Half Double Crochet
Let’s get our hands dirty with the stitches that actually build the fabric. Single crochet, or sc, is the backbone of most baby blankets. It creates a dense, wind-resistant fabric that blocks drafts and holds up beautifully to constant washing.
To form a single crochet, insert your hook into the designated stitch, yarn over and pull up a loop (you now have two loops on your hook), yarn over again, and pull through both loops. Simple, right? The trick is keeping your tension consistent. New crocheters often tighten up their grip when they’re nervous, which turns the fabric into stiff canvas. Relax your shoulders, hold the yarn loosely, and let the hook do the work.
Half double crochet, or hdc, lifts the fabric slightly higher and opens the stitches just enough for better airflow. It’s fantastic for those warmer months or for parents who worry about overheating. For an hdc, yarn over, insert your hook, pull up a loop, yarn over and pull through all three loops on your hook in one smooth motion.
When I first tried teaching my niece how to keep her corners from puckering, I spent three hours trying to pick out a snail trail of stitches before finally just embracing the ruffle… and honestly, it looked kind of vintage-chic. Stick to either sc or hdc for the main body of your blanket, and you’ll develop muscle memory faster than you think. Both stitches forgive minor inconsistencies and create a uniform surface that’s easy to read row by row.
Adding Texture with the Shell Stitch
Once you’re comfortable with the basics, you might want to play with texture. The shell stitch is a classic for a reason. It’s essentially five double crochet stitches, or dc, worked into the same space, creating a fan-like ridge that catches light and feels wonderfully soothing to touch.
To execute a shell, skip the next stitch, work 5 dc into the following stitch, skip two stitches, and anchor the shell with a slip stitch, or sl st, in the next space. When repeating across a row, maintain that spacing rhythm. Shells look stunning as an all-over pattern for a boho-inspired throw, but they shine brightest as a border. The added volume gives the blanket a finished, professional edge that begs to be hugged. Just remember that dc stitches grow taller, so your blanket will gain a few extra inches in height as you incorporate them.
Creating a Clean Edge with Border Stitches
A blanket with frayed or curled edges never feels quite right in the arms of a new parent. A simple single crochet border tames chaos instantly. Work evenly along each side, making sure to distribute your stitches rather than cramming them in.
The secret weapon lives in the corners: always work 3 sc into the corner stitch itself. This prevents the dreaded pointy spike and keeps the square genuinely square. After finishing the four sides, you can add a round of slip stitches worked backwards (crab stitch) for a subtle rope-like trim, or leave it clean and crisp.
I’ve found that a tidy border takes less time than fixing a wavy edge later. Take your time, count occasionally, and celebrate that satisfying moment when the last corner falls perfectly into place.
Step-by-Step Crochet Baby Blanket Pattern for Beginners
Materials and Gauge Swatch
Gather your supplies before you start: two skeins of worsted weight yarn, a 5.5mm hook, a pair of sharp scissors, and a tapestry needle for weaving. You’ll also want a measuring tape and stitch markers.
Before diving into the main project, make a gauge swatch. I know, I know—swatching feels like homework when you just want to make something pretty. But measuring a 4x4 inch swatch saves you from ending up with a throw that’s the size of a placemat or a giant tent.
Chain 20, work 10 rows of single crochet, fasten off, and lay it flat without stretching. Count your stitches and rows. If you have more stitches per inch than the pattern expects, your tension is too tight; grab a larger hook. Fewer stitches? You’re working loose, so downsize slightly. Adjusting early means fewer frogging sessions later.
Starting Chain and Foundation Row
For a standard 30-inch wide blanket, chain 96 stitches. Keep that foundation chain loose; imagine you’re making a rope you’d actually want to pull yourself up with. Tight chains cause the first row to pucker and the whole fabric to cave inward.
Once chained, work a single crochet into the second chain from your hook and continue across (that leaves one chain unworked at the end, which accounts for your turning chain). You should finish Row 1 with 95 sc. Chain 1, turn, and proceed to the next row.
I often hear crafters wonder, “Do I really need to measure my swatch, or can I just jump straight into the main blanket?” You could, but why gamble with yarn and time? A quick gauge check takes twenty minutes and guarantees your dimensions will hit the mark.
Repeating the Pattern to Desired Length
Continue working rows of single crochet or half double crochet until your piece measures 36 inches from the foundation to the last completed row. Each full row should contain 95 stitches, matching your foundation count.
Place a stitch marker every 20 stitches to help you track your progress and catch dropped loops early. Working this way builds a consistent, uniform fabric that drapes beautifully over a crib rail or wraps snugly around a bundle.
Don’t rush the counting. Trust your markers, feel the rhythm of the hook, and notice how the fabric starts to soften with every passing row. There’s a quiet pride in watching plain yarn transform into something structured and useful.
Finishing and Weaving in Ends
When your blanket reaches 36 inches, cut the yarn leaving a 6-inch tail, pull it through the loop to fasten off, and trim neatly. Thread that tail onto your tapestry needle and weave it through the backs of nearby stitches in alternating directions before clipping the excess. Do this for every loose end.
If you’re working with acrylic, wet blocking will relax the fibers and even out minor tension quirks. Lay the blanket on a clean towel, gently mist it with water, press out excess moisture, and reshape it to exact dimensions. For wool or alpaca blends, light steam blocking achieves the same smoothing effect without soaking the fabric completely. Allow it to dry flat away from direct sunlight. The result is a professional finish that looks like it came straight from a boutique.
Customizing Your Crochet Baby Blanket Pattern
Adjusting Size for Lovey, Stroller, or Crib
Blankets aren’t one-size-fits-all, especially when you’re catering to different stages of infancy. For a pocket-sized lovey, chain 88 stitches to hit roughly 24x24 inches. A stroller throw needs a longer rectangle; chain 128 for a 30x36 inch piece that hangs comfortably over a bassinet bar. If you’re tackling a full crib blanket, aim for 36x45 inches by chaining 160 stitches.
The math is straightforward: multiply your desired width by your gauge stitches per inch, subtract one for the turning chain, and you’ve got your starting number. Keep in mind that larger blankets require more yarn, so always check the yardage on your skein labels before committing.
I once ordered three sets of worsted yarn for a charity project, only to realize I’d misread the yards-per-skein and had to raid my stash mid-crochet. Learn from my panic!
Adding Personalized Details
Nothing says “made with love” like a monogram or a simple appliqué. Crochet a few letters using the same single crochet technique, or shape hearts and stars by working in rounds and fastening off cleanly. Sew them onto the corner using matching thread and a whip stitch for durability.
If you want to take it further, search for basic appliqué tutorials online; many free patterns exist for clouds, elephants, and nesting bears. Attach them after washing the blanket first, as fibers can shift during cleaning.
A personalized touch transforms an ordinary throw into an heirloom. I still keep a tiny star I crocheted for my daughter’s first blanket tucked in my memory box. It’s ridiculous how much meaning a two-inch square of yarn can carry.
Color Blocking and Stripes
Stripes are incredibly satisfying to watch, especially when you master the color change without tying knots. Simply complete your last pull-through of the row with the new color instead of the old one, cutting the unused strand close to the fabric. Continue across with the fresh hue.
For a simple striped sequence, work four rows in mint, two rows in white, then repeat. You can carry the unused yarn up the side by crocheting over it as you work the next color, but be careful not to twist it or you’ll create bumps. Carrying works best on light-to-dark transitions where visibility won’t cause stray strands to show through. If you’re swapping from dark to light, cut the yarn to prevent shadowing.
Experiment with narrow bands or wide blocks depending on the mood you want to set. Watching those color shifts accumulate row by row is genuinely therapeutic.
Caring for Your Crochet Baby Blanket
Washing and Drying Instructions
Even the softest blanket will face diaper rash creams, nursing spills, and midnight wipe-downs. Fortunately, machine washing isn’t the enemy if you treat it right.
For acrylic and synthetic blends, toss the blanket in a mesh laundry bag, set the washer to cold water with a gentle cycle, and use a mild detergent free of optical brighteners. Tumble dry on low heat or, better yet, air dry flat to preserve stitch definition.
Natural fibers like wool, alpaca, and silk require gentler handling. Hand wash them in lukewarm water with a dedicated wool wash, press out moisture without wringing, and lay them flat on a drying rack away from radiators. Direct heat felts wool permanently, shrinking it into an unusable coaster.
I’ve ruined more precious garments than I care to admit by tossing them in a dryer “just for ten minutes.” Respect the fiber, and it will respect you back.
Storing and Gifting Tips
When the blanket isn’t in rotation, fold it neatly with acid-free tissue paper between layers to prevent creasing and yellowing. Store it in a breathable cotton bag or a cedar-lined chest to deter moths without relying on chemical sachets that babies might inhale.
If you’re gifting it, attach a handwritten care card listing the recommended wash settings and noting any special handling instructions. Parents appreciate clear guidance, especially when sleep deprivation makes reading laundry symbols impossible.
Keep the storage area cool, dry, and out of direct sunlight. UV rays fade beautiful variegated dyes over time. A well-cared-for blanket easily travels through multiple children, siblings, or even future baby showers. Knowing your creation will outlast a season gives the whole process a deeper sense of purpose.
Troubleshooting Common Crochet Baby Blanket Issues
Why Are My Edges Curling?
Curling is incredibly common, and it usually points to two culprits: a foundation chain pulled too tight or exclusively working single crochet across every row. Sc has a natural tendency to roll inward because the vertical post stitches are shorter than the horizontal chain spaces.
If your edges are curling like chips, try switching to half double crochet or alternating rows of sc and dc to balance the fabric’s behavior. You can also add a stabilizing border. Crochet a round of reverse single crochet, also known as crab stitch, around the entire perimeter. This tightens the edge and lays the blanket flat without altering the main body.
Another trick is loosening that initial chain. I’ve seen beginners obsess over stitch height and forget that a relaxed foundation eliminates ninety percent of edge problems before they start.
How to Fix Uneven Tension
Tension fluctuations happen to everyone, even after decades of practice. Tight spots pull the fabric inward, while loose patches create unwanted gaps. Identify the trouble zones by laying your work flat and running your fingers along the rows.
If you catch a few uneven stitches early, use a stitch marker to flag the area, then frog (rip out) back to that marker and redo it. Don’t fight it; pulling the yarn gently while releasing loops works better than yanking.
If your hands constantly tighten up, consider wearing a tension ring on your non-dominant hand. It guides the yarn smoothly and removes guesswork. Consistency improves with repetition, and practicing with a simple gauge swatch daily builds muscle memory faster than random project hopping. Frustration is normal, but patience always pays off in the final drape.
Blanket Is Too Small or Too Large
Measuring against a standard crib mattress (28x52 inches) helps you stay on track. If your piece runs short, simply add extra rows until it reaches your target length. Watch the stitch count closely to avoid accidental increases or decreases.
If it’s too narrow, work a wider border around all four sides. A two-inch single crochet border adds substantial width without requiring you to rip out half your hard work. Always check your gauge early, and don’t hesitate to adjust your hook size midway through if you notice the fabric drifting off scale.
I once finished a throw only to realize it barely covered a doll bed because I hadn’t measured my swatch properly. I rescued it by adding a generous treble crochet border that gave it a vintage ruffle vibe. Mistakes rarely ruin projects; they just redirect them. Stay flexible, keep measuring, and trust that every finished blanket deserves to be used.
Frequently Asked Questions
How much more yarn do I need if I double the size of my crochet baby blanket?
Doubling the dimensions of your blanket roughly quadruples the yarn required. For example, a 30x36 inch blanket using worsted weight yarn needs about 800 yards, while a 36x45 inch crib blanket needs closer to 1,600 yards. Always multiply your original yardage by four when scaling up both length and width.
Can I use acrylic yarn instead of cotton for a baby blanket?
Yes, acrylic yarn is an excellent choice for baby blankets. It's machine-washable, durable, and soft against delicate skin. Modern acrylic blends feel much softer than older versions. Cotton works better for warmer climates, but acrylic holds up better to frequent washing and doesn't shrink.
What is the best stitch for a beginner crochet baby blanket?
Single crochet (sc) is the best stitch for beginners. It creates a dense, warm fabric that's easy to keep consistent. Half double crochet (hdc) is another great option that works up faster and offers better airflow. Both stitches forgive minor tension issues and build muscle memory quickly.
Related Posts
Crochet for Beginners: Your 7-Step Start Guide
Learn crochet for beginners with essential tools, basic stitches, and easy patterns. Start your first project today with expert tips.
BeginnerHow to Change Colors in Crochet: 3 Seamless Techniques
Master seamless color changes in crochet with 3 easy techniques. Avoid gaps, tangles, and tension issues for perfect stripes every time.
Try Our Free Crochet Tools
Turn Your Photo Into a Crochet Pattern
Upload any photo and our AI generates a pixel-perfect crochet pattern with real yarn color matching in seconds.
Try AeternaCraft Studio Free →Calculate Yarn for Any Resize
Free amigurumi yarn & resizing calculator. Change hook, switch yarn, or scale a whole pattern — instant results with PDF export.
Open the Calculator →